
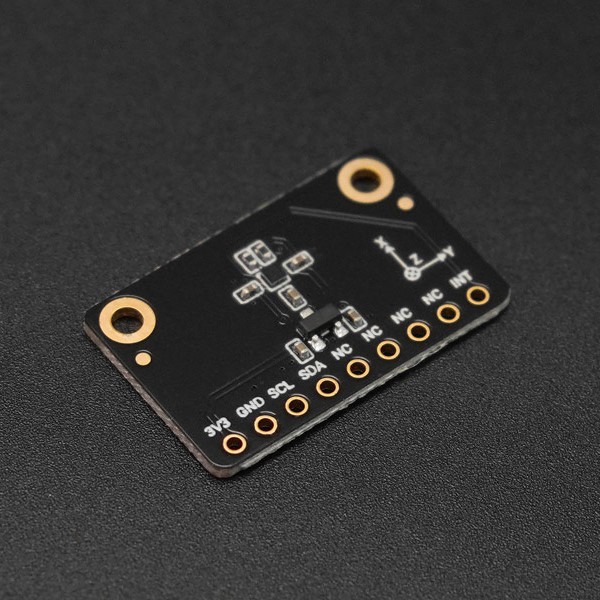
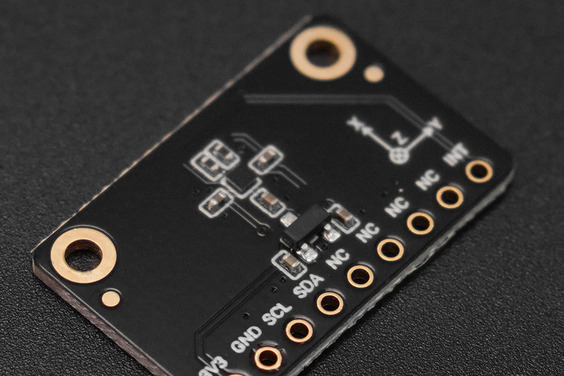
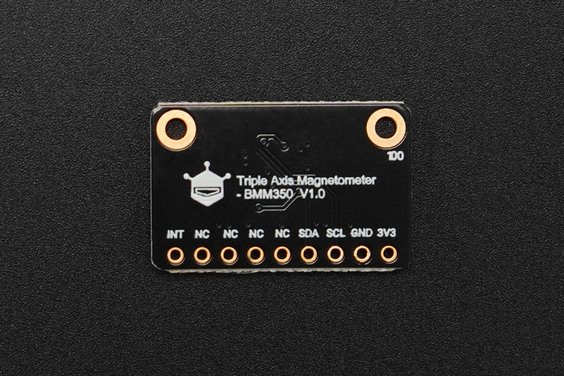
Fermion: BMM350 Triple-Axis Magnetometer Sensor for AR / VR (Breakout) - แท้ DFRobot


| รหัสสินค้า | AS50115 |
| หมวดหมู่ | วัดความเร่ง/ไจโร/IMU |
| ราคา | 385.00 บาท |
| สถานะสินค้า | พร้อมส่ง |
| จำนวน | ชิ้น |

รายละเอียดสินค้า

Comparison Table of BMM150 and BMM350

Applications
- AR / VR
- E-compass
- AGV Geomagnetic Navigation
- Drones

Specification
- Working voltage: 3.3~5V DC
- Working current: 200μA (Normal mode@100Hz Sample Rate)
- Zero-fild offset: ±25μT
- Protocol: I2C
- Working Temperature: -40~+85℃
- Start-up time: 2.5ms
Shipping List
- Fermion: BMM350 Triple Axis Magnetometer Sensor x1
- XH2.54-10pin Header x1
7.Tutorial
7.1 Hardware
- FireBeetle ESP32-E
- Fermion: BMM350 Triple Axis Magnetometer Sensor
- Dupond wire
7.2 Software
- Arduino IDE: Click to download Arduino IDE
- Install the ESP32 SDK:FireBeetle 2 ESP32-E WIKI
- Arduino library:DFRobot_BMM350 Github repo,
7.3 Wire diagram
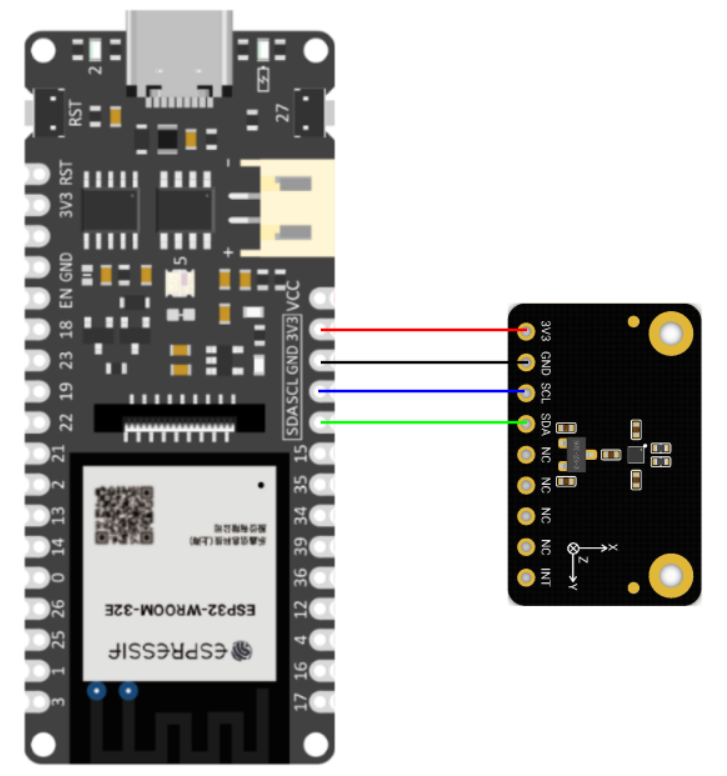
Fermion I2C BMM350 Sensor:VCC---(to)---ESP32-E dev board:3V3;
Fermion I2C BMM350 Sensor:GND---(to)---ESP32-E dev board:GND;
Fermion I2C BMM350 Sensor:SCL---(to)---ESP32-E dev board:SCL;
Fermion I2C BMM350 Sensor:SDA---(to)---ESP32-E dev board:SDA;
7.4 Sample code
- Sample code1-(getAllState.ino)
- Sample code2-(getGeomagneticData.ino)
- Sample code3-(thresholdInterrupt.ino)
Sample code1-(getAllState.ino)
-
Upload the code
Result
Upload the sample program and the serial monitor prints out the current configuration status of the sensor

Sample code 2(getGeomagneticData.ino)
-
Upload the code
Result
Upload the sample code, the serial port prints out the geomagnetic data and compass angle data acquired by the sensor

Sample Code 3 (thresholdInterrupt.ino)
-
Upload the code
Result
Upload sample code, bring magnet close to sensor, serial port prints change data

8. API list
วิธีการชำระเงิน
ชำระเงินค่าสินค้าโดยการโอนเงินเข้าบัญชีธนาคาร KBANK, SCB, BBL,TMB
กรุณาเก็บหลักฐานการโอนเงินของท่านไว้เพื่อแจ้งการชำระเงินด้วยค่ะ
ท่านสามารถแจ้งการชำระเงินผ่านระบบอัตโนมัติได้โดย Click Link ข้างล่างค่ะ
https://www.arduitronics.com/informpayment
ชำระเงินผ่านธนาคาร


@rfm0967y
ติดต่อสอบถาม
Join เป็นสมาชิกร้านค้า
MEMBER
