
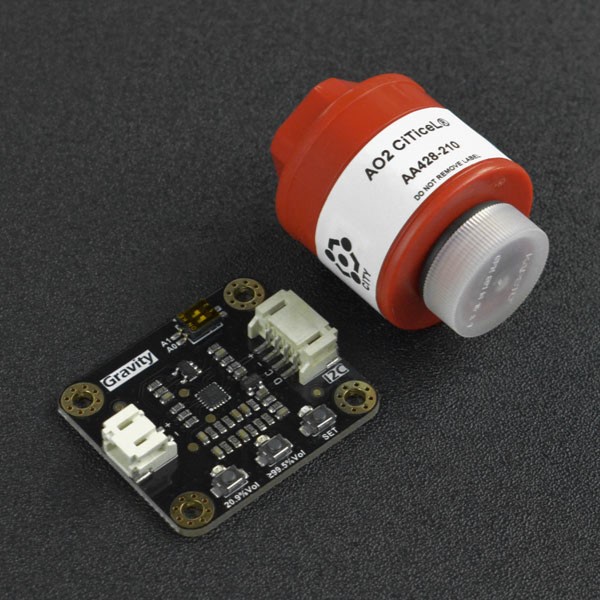
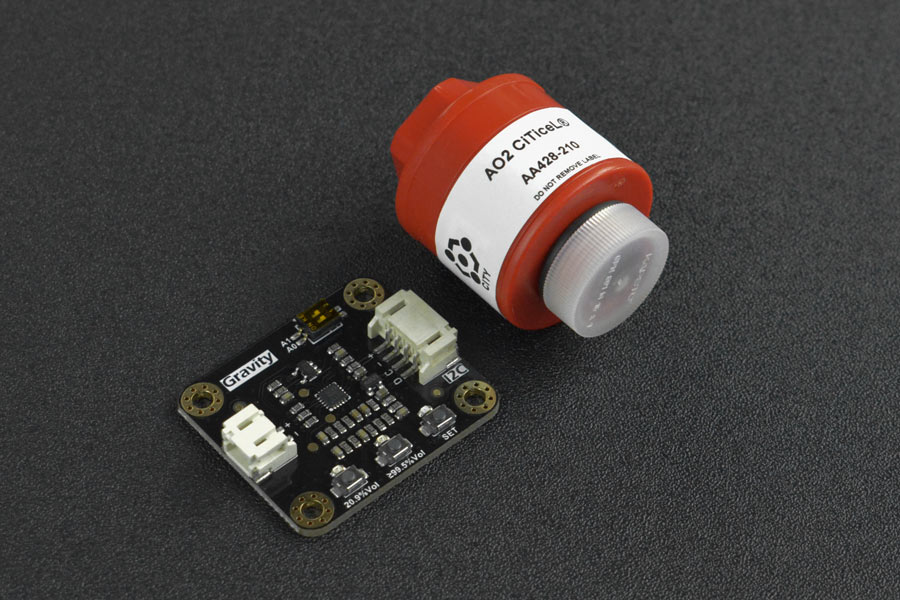
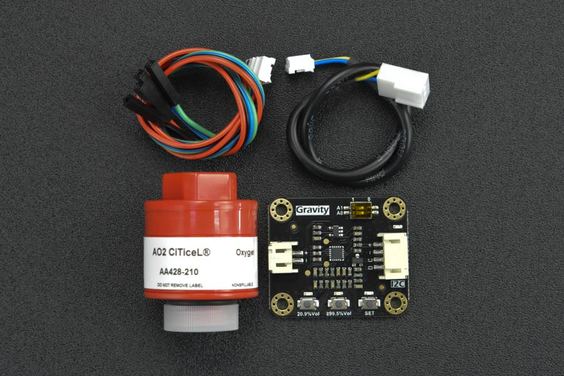
Gravity: Electrochemical Oxygen / O2 Sensor (0-100%Vol, I2C) (ของแท้จาก DFRobot)

| รหัสสินค้า | AS10367 |
| หมวดหมู่ | Gas Sensors แก๊สเซ็นเซอร์ |
| ราคา | 4,650.00 บาท |
| สถานะสินค้า | พร้อมส่ง |
| จำนวน | ชิ้น |

รายละเอียดสินค้า
 - I2C")
I2C Oxygen / O2 Sensor Selection Guide
| Product | Gravity:Electrochemical Oxygen / O2 Sensor (0-25%Vol) - I2C |
Gravity:Electrochemical Oxygen / O2 Sensor (Calibrated) - I2C & UART |
Gravity: Electrochemical Oxygen / O2 Sensor (0-100%Vol) - I2C |
|
Detection Range |
0~25%Vol | 0~25%Vol | 0~100%Vol |
|
Calibration Method |
Manual calibration | Factory calibration | Manual calibration |
| Output Signal | I2C | I2C、UART、Analog | I2C |
|
Working Principle |
Electrochemical | Electrochemical | Electrochemical |
| Stability | <2%/Month | <2%/Month | <10%/Year |
| Response Time | ≤15S | ≤15S | 0.1%~20.9%<40S 20.9%~100%<5S |
|
Operating Pressure Range |
101kPa±10% | 101kPa±10% | 0.5 - 2.0 Bar |
|
Temperature Compensation |
× | √ | × |
Applications
- Oxygen / O2 generators
- Automobile exhaust
- Air-fuel ratio detection
- Strong anti-interference ability
- High stability and sensitivity
Specifications
- Physical Quantity Detected: Oxygen / O2 concentration
- Measuring Range: 0~100%
- Working Voltage: 3.3~5.5V DC
- Output Signal: I2C
- Working Pressure Range: 0.5~2.0Bar
- Operating Temperature Range: -20°C ~ +50°C
- Operating Humidity Range: 0-99% RH (non-condensing)
- Response Time: < 5S
- Lifespan: < 2 years (in air)
- Size: 32mm*27mm/1.26*1.06 inch
- Mounting Hole Size: inner diameter 3.1mm(0.12 inch)/outer diameter 6mm(0.24 inch)
- Compatible with Arduino, ESP32, Raspberry Pi
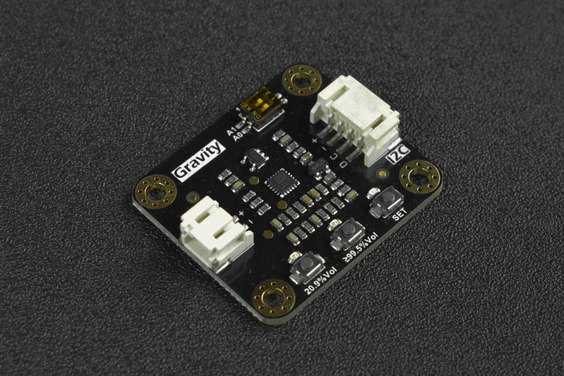
Board Overview

| Label | Name | Function Description |
|---|---|---|
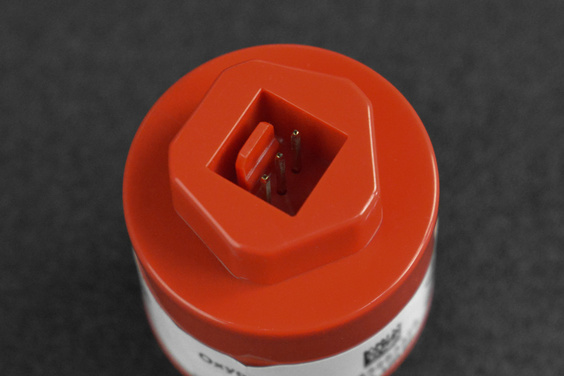
| 1 | Left signal input terminal | Connect with oxygen / O2 sensor probe |
| 2 | Right signal output terminal | I2C signal output terminal, connected to the controller |
| 3 | DIP switch | I2C address switching |
Tutorial for Arduino
- Caution: Exposure to high concentrations of solvent vapors is avoided, both during storage, fitting into instruments, and operation.
Preparation
- Hardware
- Aruino UNO R3 x1
- SEN0495 Gravity: Oxygen / O2 Sensor x1
- Several Dupont lines
- Software
- Arduino IDE Click to download Arduino IDE
- Download and install DFRobot_EOxygenSensor library. How to install the library?
Connection

Data Calibration
Data calibration can be performed with a single-point calibration with an oxygen / O2 concentration of 20.9%Vol, or a two-point calibration with 20.9%Vol and greater than 99.5%Vol.
The oxygen / O2 content in the air-circulating environment is about 20.9%, so the single-point calibration can be quickly completed in the air after the sealing cap of the sensor probe is unscrewed. If you want to make the data more accurate, you need to perform two-point calibration.
| Button | 20.9%Vol | ≥99.5%Vol | SET |
|---|---|---|---|
| LED Color | Green | Green | Red |
| Button function | After long press for 2s, calibrate the voltage value in air (20.9% oxygen content) | After long press for 2s, calibrate the voltage value in pure oxygen (oxygen content ≥99.5%) | 1. Short press to check calibration status 2. Long press for 2s to clear calibration data |
| LED blinking logic | 1. Blink for 2s after successful calibration, 4 times per second 2. After entering the state of checking calibration data, if this point has calibration data, LED will be on for 4s; otherwise, the LED will be off. 3. After the data is cleared successfully, it will flash synchronously with the red LED for 4s, 2 times per second |
1. Blink for 2s after successful calibration, 4 times per second 2. After entering the state of checking calibration data, if this point has calibration data, LED will be on for 4s; otherwise, the LED will be off 3. After the data is cleared successfully, it will flash synchronously with the red LED for 4s, 2 times per second |
1. After a short press, enter the state of checking calibration data, the red LED flashes for 4s, 4 times per second 2. After long pressing for 2s, the calibration data will be cleared. After the data is cleared successfully, the red LED will flash for 4s, 2 times per second |
Button calibration process:
-
- Clear the current calibration data: press and hold the SET button until three indicators flash, release the button after the indicator flashes
- Preheating: Unscrew the sealing cap on the probe. After a long time of sealing storage, it needs to stand in the air for at least 3 minutes after unscrewing the sealing cap to preheat the sensor.
- Single-point calibration: Put the probe in the air, press and hold the 20.9%Vol button until the green indicator flashes, and the single-point calibration is completed (the voltage at the signal input terminal in the 20.9%Vol environment is about 9~13mv)
- Two-point calibration: Place the probe in a pure oxygen environment with an oxygen concentration ≥99.5%Vol, press and hold the ≥99.5%Vol button until the green indicator flashes, and the two-point calibration is completed.(The voltage of the signal input terminal in the environment of ≥99.5%Vol is about 50mv)
For software calibration method, please refer to the usage example below
Read sensor data
Sample code
- Unscrew the sealing cap on the probe. After a long time of sealing storage, it needs to stand in the air for at least 3 minutes after unscrewing the sealing cap to preheat the sensor.
- Connect the module to the Arduino according to the wiring diagram above. Of course, you can also use it with the Gravity I/O Expansion Board, which can be more convenient and faster to complete the project prototype construction.
- The default I2C address is 0x70, which corresponds to ADDRESS_0 in the code. If you need to modify the I2C address, you can first configure the hardware I2C address through the DIP switch on the module, and modify the I2C address definition ADDRESS_X in the sample code. The corresponding relationship between the DIP switch and the I2C address parameters is as follows:
- ADDRESS_0:0x70, A0=0, A1=0
- ADDRESS_1:0x71, A0=1, A1=0
- ADDRESS_2:0x72, A0=0, A1=1
- ADDRESS_3:0x73, A0=1, A1=1
- Download and install DFRobot_EOxygenSensor library. How to install the library?
- Open Arduino IDE and upload the code below to Arduino UNO.
- Open the serial monitor of Arduino IDE, adjust the baud rate to 115200, and observe the serial port print result.
/*!
* @file getOxygenConcentration.ino
* @brief Enable the power, and the information is printed on the serial port.
* @n When using IIC device, select I2C address, set the dialing switch A0, A1 (Address_0 is [0 0]), (Address_1 is [1 0]), (Address_2 is [0 1]), (Address_3 is [1 1]).
* @copyright Copyright (c) 2010 DFRobot Co.Ltd (http://www.dfrobot.com)
*/
#include "DFRobot_EOxygenSensor.h"

/**
* iic slave Address, The default is E_OXYGEN_ADDRESS_0
* E_OXYGEN_ADDRESS_0 0x70
* E_OXYGEN_ADDRESS_1 0x71
* E_OXYGEN_ADDRESS_2 0x72
* E_OXYGEN_ADDRESS_3 0x73
*/
#define OXYGEN_I2C_ADDRESS E_OXYGEN_ADDRESS_0
DFRobot_EOxygenSensor_I2C oxygen(&Wire, OXYGEN_I2C_ADDRESS);

void setup()
{
Serial.begin(115200);
while(!Serial);
while(!oxygen.begin()){
Serial.println("NO Deivces !");
delay(1000);
} Serial.println("Device connected successfully !");
}

void loop()
{
Serial.print("oxygen concetnration is ");
Serial.print(oxygen.readOxygenConcentration());
Serial.println("% VOL");
delay(1000);
}
Result
Open the serial monitor to get the final data.

Software Calibration
Sample code
- Unscrew the sealing cap on the probe. After a long time of sealing storage, it needs to stand in the air for at least 3 minutes after unscrewing the sealing cap to preheat the sensor.
- Connect the module to the Arduino according to the wiring diagram above. Of course, you can also use it with the Gravity I/O Expansion Board, which can be more convenient and faster to complete the project prototype construction.
- The default I2C address is 0x70, which corresponds to ADDRESS_0 in the code. If you need to modify the I2C address, you can first configure the hardware I2C address through the DIP switch on the module, and modify the I2C address definition ADDRESS_X in the sample code. The corresponding relationship between the DIP switch and the I2C address parameters is as follows:
- ADDRESS_0:0x70, A0=0, A1=0
- ADDRESS_1:0x71, A0=1, A1=0
- ADDRESS_2:0x72, A0=0, A1=1
- ADDRESS_3:0x73, A0=1, A1=1
- Download and install DFRobot_EOxygenSensor library. How to install the library?
- Open Arduino IDE and upload the code below to Arduino UNO.
- Open the serial monitor of Arduino IDE, adjust the baud rate to 115200, and observe the serial port print result.
/*!
* @file calibrationSensor.ino
* @brief Calibrate sensor
* @n The calibration status is printed on the serial port terminal
*/
#include "DFRobot_EOxygenSensor.h"

/**
* iic slave Address, The default is E_OXYGEN_ADDRESS_0
* E_OXYGEN_ADDRESS_0 0x70 // i2c device address
* E_OXYGEN_ADDRESS_1 0x71
* E_OXYGEN_ADDRESS_2 0x72
* E_OXYGEN_ADDRESS_3 0x73
*/
#define OXYGEN_I2C_ADDRESS E_OXYGEN_ADDRESS_0
DFRobot_EOxygenSensor_I2C oxygen(&Wire, OXYGEN_I2C_ADDRESS);
uint8_t calibrationState = 0;

void setup()
{
Serial.begin(115200);
while(!Serial);
while(!oxygen.begin()){
Serial.println("NO Deivces !");
delay(1000);
} Serial.println("Device connected successfully !");

if(oxygen.clearCalibration()) Serial.println("clear calibration success!");
if(oxygen.calibration_20_9()) Serial.println("20.9 calbration success!");
//if(oxygen.calibration_99_5()) Serial.println("99.5 calbration success!");
}

void loop()
{
calibrationState = oxygen.readCalibrationState();
if(calibrationState == 0) Serial.println("no calibration!");
if(calibrationState&0x01) Serial.println("20.9 calibration!");
if(calibrationState&0x02) Serial.println("99.5 calibration!");
Serial.print("oxygen concetnration is ");
Serial.print(oxygen.readOxygenConcentration());
Serial.println("% VOL");
delay(1000);
}- 20.9% of the single-point calibration is completed after the code is programmed successfully.

- If you need to continue to complete the 99.5% calibration, please place the probe in a pure oxygen environment, and then program the sample code below. After the code is successfully programmed, the two-point calibration will be completed.
/*!
* @file calibrationSensor.ino
* @brief Calibrate sensor
* @n The calibration status is printed on the serial port terminal
*/
#include "DFRobot_EOxygenSensor.h"

/**
* iic slave Address, The default is E_OXYGEN_ADDRESS_0
* E_OXYGEN_ADDRESS_0 0x70 // i2c device address
* E_OXYGEN_ADDRESS_1 0x71
* E_OXYGEN_ADDRESS_2 0x72
* E_OXYGEN_ADDRESS_3 0x73
*/
#define OXYGEN_I2C_ADDRESS E_OXYGEN_ADDRESS_0
DFRobot_EOxygenSensor_I2C oxygen(&Wire, OXYGEN_I2C_ADDRESS);
uint8_t calibrationState = 0;

void setup()
{
Serial.begin(115200);
while(!Serial);
while(!oxygen.begin()){
Serial.println("NO Deivces !");
delay(1000);
} Serial.println("Device connected successfully !");

//if(oxygen.clearCalibration()) Serial.println("clear calibration success!");
//if(oxygen.calibration_20_9()) Serial.println("20.9 calbration success!");
if(oxygen.calibration_99_5()) Serial.println("99.5 calbration success!");
}

void loop()
{
calibrationState = oxygen.readCalibrationState();
if(calibrationState == 0) Serial.println("no calibration!");
if(calibrationState&0x01) Serial.println("20.9 calibration!");
if(calibrationState&0x02) Serial.println("99.5 calibration!");
Serial.print("oxygen concetnration is ");
Serial.print(oxygen.readOxygenConcentration());
Serial.println("% VOL");
delay(1000);
}
วิธีการชำระเงิน
ชำระเงินค่าสินค้าโดยการโอนเงินเข้าบัญชีธนาคาร KBANK, SCB, BBL,TMB
กรุณาเก็บหลักฐานการโอนเงินของท่านไว้เพื่อแจ้งการชำระเงินด้วยค่ะ
ท่านสามารถแจ้งการชำระเงินผ่านระบบอัตโนมัติได้โดย Click Link ข้างล่างค่ะ
https://www.arduitronics.com/informpayment
ชำระเงินผ่านธนาคาร


@rfm0967y
ติดต่อสอบถาม
Join เป็นสมาชิกร้านค้า
MEMBER
