
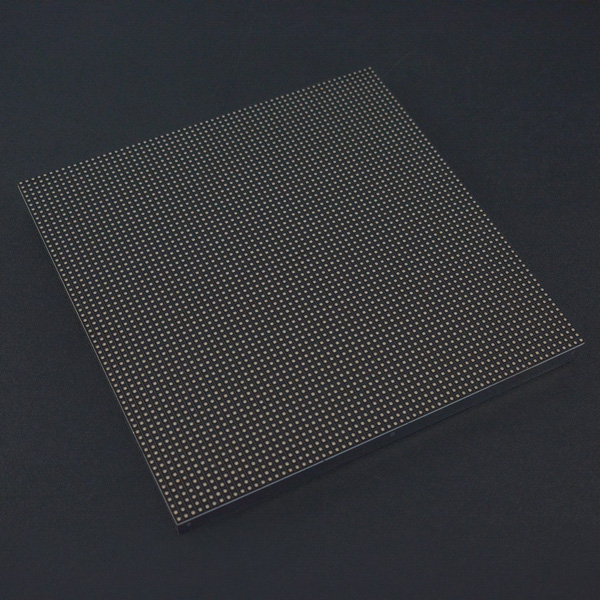
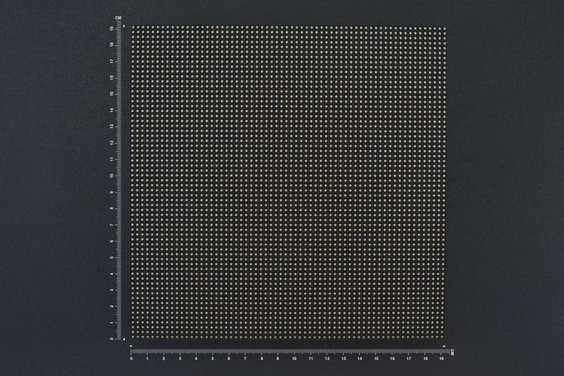
64x64 RGB LED Matrix Panel (3mm pitch) (แท้จาก DFRobot)


รายละเอียดสินค้า
INTRODUCTION
City night is always beautiful. She is just like a charming girl, showing her beauty every time. The colorful light is jewelry, dotted on her dress.SPECIFICATION
- Operating voltage: DC 5V
- Average power consumption: <500W/㎡
- Maxim Power Consumption: <1000w/㎡
- Pixel: 64x64=4096
- Level of viewing Angle: ≧160°
- Control mode: Synchronous control
- Drive mode: 1/16 scan rate
- Repetition frequency: ≧60Hz
- White Balance Brightness: ≧1200cd/㎡
- Refresh frequency : ≧300Hz
- MTTF: ≧5000 hours
- Service Life: 75000~100000 hours
- Pixel pitch: 3mm
- Dimension: 190 x 190 x 14.5 mm / 7.48 x 7.48 x 0.57 inches
- Thickness: 11mm
DOCUMENTS
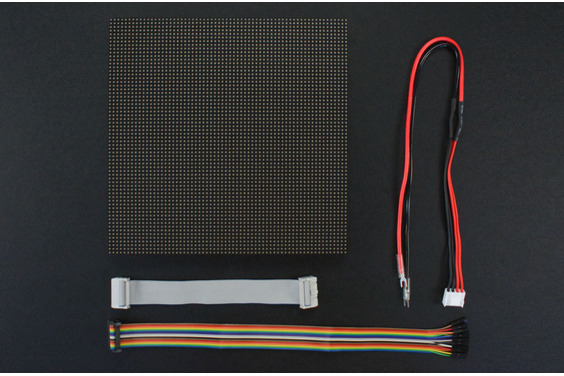
SHIPPING LIST
- 64x64 RGB LED Matrix Panel (3mm pitch) x1
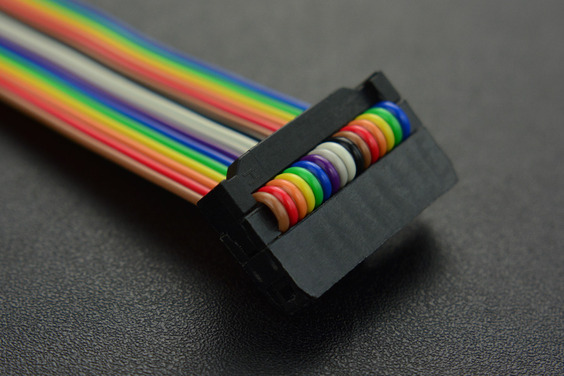
- IDC to XH2.54 cable x1
- IDC to IDC cable x1
- Power supply cable x1
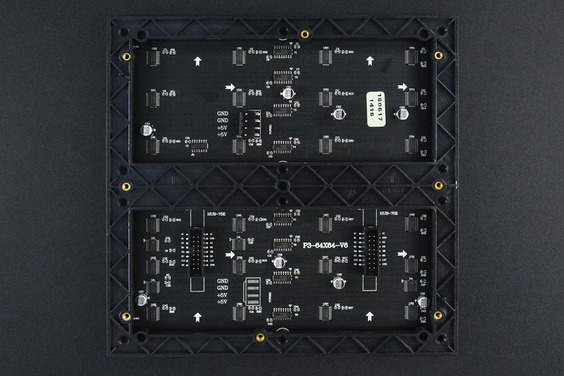
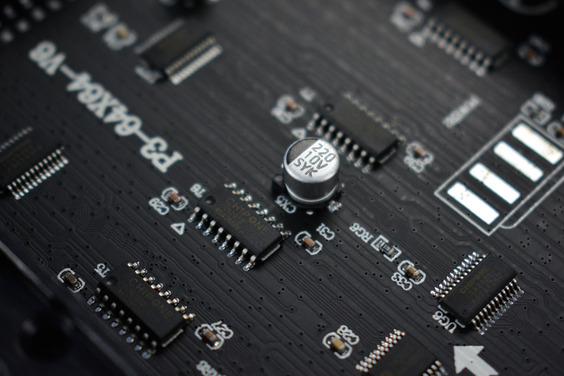
Board Overview
Note: The pin order of DATA-IN and DATA-OUT is same,POWER SUPPLY 5V.

| Label | Name | Function |
|---|---|---|
| 1 | DR1 | High R data |
| 2 | DG1 | High G data |
| 3 | DB1 | High B data |
| 4 | GND | GND |
| 5 | DR2 | Low R data |
| 6 | DG2 | Low G data |
| 7 | DB2 | Low B data |
| 8 | GND | GND |
| 9 | A | A line selection |
| 10 | B | B line selection |
| 11 | C | C line selection |
| 12 | D | D line selection |
| 13 | CLK | CLOCK |
| 14 | LAT | LATCH |
| 15 | OE | Output Enable |
| 16 | GND | GND |
DATA-IN and DATA-OUT
| Label | Name | Function |
|---|---|---|
| 1 | VCC | 5V |
| 2 | VCC | 5V |
| 3 | GND | GND |
| 4 | GND | GND |
POWER
Tutorial
According to the pinout to connect, then upload the code to Mega2560, you will be able to see a beautiful display effect.
Requirements
-
Hardware
- Arduino Mega R3 x1
- DFR0471 x1
- DuPont cables
-
Software
- Arduino IDE Click to Download Arduino IDE from Arduino®.
Connection Diagram

 Note: It needs an external power supply, the USB is only 5V@500mA, not enough power to drive the screen.
Control signal pin connected to MEGA2560:
R1-> 24 G1-> 25 B1-> 26
R2-> 27 G2-> 28 B2-> 29
HA-> A0 HB-> A1 HC-> A2 HD-> A3 HE-> A4
OE-> 9 LAT-> 10 CLK-> 11
GND-> GND
Power Interface:
-5V -> +5V DC power supply positive
-5V -> +5V DC power supply positive
GND-> DC power supply negative
GND-> DC power supply negative
16P Interface Diagram

Sample Code 1
Please download DFRobot_RGBMatrix library first
Sample Code 2
Click to download the library Adafruit-GFX-Library. RGB-matrix-Panel. How to install the library?
Smaple Code 3
Expected Results
- Sample Code 1: Character Display
- Sample Code 2: A color filled circle
- Sample Code 3: The LED module will take turns display: a white point, full screen green, full screen yellow, a yellow rectangle, a yellow rectangle, a red X and a blue circle
วิธีการชำระเงิน
ชำระเงินค่าสินค้าโดยการโอนเงินเข้าบัญชีธนาคาร KBANK, SCB, BBL,TMB
กรุณาเก็บหลักฐานการโอนเงินของท่านไว้เพื่อแจ้งการชำระเงินด้วยค่ะ
ท่านสามารถแจ้งการชำระเงินผ่านระบบอัตโนมัติได้โดย Click Link ข้างล่างค่ะ
https://www.arduitronics.com/informpayment
ชำระเงินผ่านธนาคาร


@rfm0967y
ติดต่อสอบถาม
Join เป็นสมาชิกร้านค้า
MEMBER
