
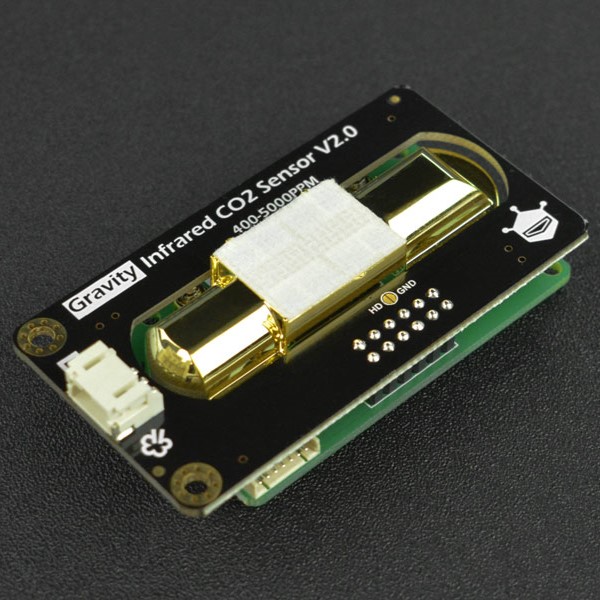
Gravity: PWM Infrared Carbon Dioxide Sensor (400-5000 ppm) - แท้ DFRobot


| รหัสสินค้า | SG50379 |
| หมวดหมู่ | วัดสภาพแวดล้อมและแก๊ส Environmental / Gas |
| ราคา | 2,495.00 บาท |
| สถานะสินค้า | พร้อมส่ง |
| จำนวน | ชิ้น |

รายละเอียดสินค้า
This Gravity: Infrared CO2 Sensor is able to directly compatible with the DFRobot Arduino IO expansion board thanks to its external DFRobot Gravityinterface. This character simplify the use of the sensor as it is plug and play and no need additional wiring.
This CO2 Sensor could be widely used in HVAC, indoor air quality monitoring, industrial process, and security protection monitoring, agriculture, and animal husbandry production process monitoring.
| Gravity CO2 Sensor Selection Guide | |||
 |
 |
 |
|
| Product Name | Gravity: Analog Electrochemistry CO2 Sensor | Gravity: Analog IR CO2 Sensor | Gravity: UART IR CO2 Sensor |
| SKU | SG40379 | SG20379 | SG30379 |
| Operation Voltage | 3.7~5V | 4.5~5.5V | 4.5~5.5V |
| Output |
Gravity: Analog
(Analog2.7~4.1V)
+
3P Header Digital Output(Alarm):0~VCC Level
|
Gravity: Analog
(Analog Output 0.4~2V)
|
Gravity: UART
(0~3.3V Level)
|
| Measurement Principle |
Electrochemistry
(Solid electrolyte battery principle)
|
NDIR(non-dispersive infrared) | NDIR(non-dispersive infrared) |
| Measurement Range | 0~10000 ppm | 0~5000 ppm | 0~50000 ppm |
| Accuracy | ±100ppm@400ppm | ±(100ppm + 6% readings) | ±(100ppm + 6% readings) |
| Response Time | <20s | <90s | <30s |
| Average Power | <1W | <430mW@5V | <430mW@5V |
| Operation Temperature | -20℃~50℃ | 0℃~50℃ | 0℃~50℃ |
| Operation Humidity | 0~95% RH (No condensation) | 0~95% RH (No condensation) | 0~95% RH (No condensation) |
| Lifespan | >1 years | >5 years | >5 years |
|
Dimension
(PCB)
|
32*42 mm | 37*69 mm | 21*27.1 mm |
| Features |
1.Large Range
2.Adjustable Alarm Threshold
3.Fast Response
4.Analog Output
|
1.High Accuracy
2.Long Lifespan
3.Auto Temperature Compensation
4.Water Vapor Interference Resistance
5.Analog Output
|
1.High Accuracy
2.Large Range
3.Long Lifespan
4.Auto Temperature Compensation
5.Water Vapor Interference Resistance
6.3.3V UART Output
|
FEATURES:
- Waterproof and anti-corrosion
- High sensitivity
- Low power consumption
- Excellent stability
- Temperature compensation
- Excellent linear output
- High cycle life
- Anti-water vapor interference
- No poisoning
SPECIFICATION
- Detection Gas: Carbon Dioxide (CO2)
- Power Supply: 5.0±0.1V DC
- Average Current: 40mA@5V
- Peak Current: <125@5V
- Output Signal: PWM
- Preheat: 1min
- Response Time: T90 < 120s
- Working Temperature: -10℃~50℃
- Working Humidity: 0~95%RH (non-condensing)
- Detection Range: 400~5000 ppm
- Resolution: 1ppm
- Accuracy: ±(50ppm+5% rdg)
- Dimension: 69×37mm/2.72×1.46"
DOCUMENTS
SHIPPING LIST
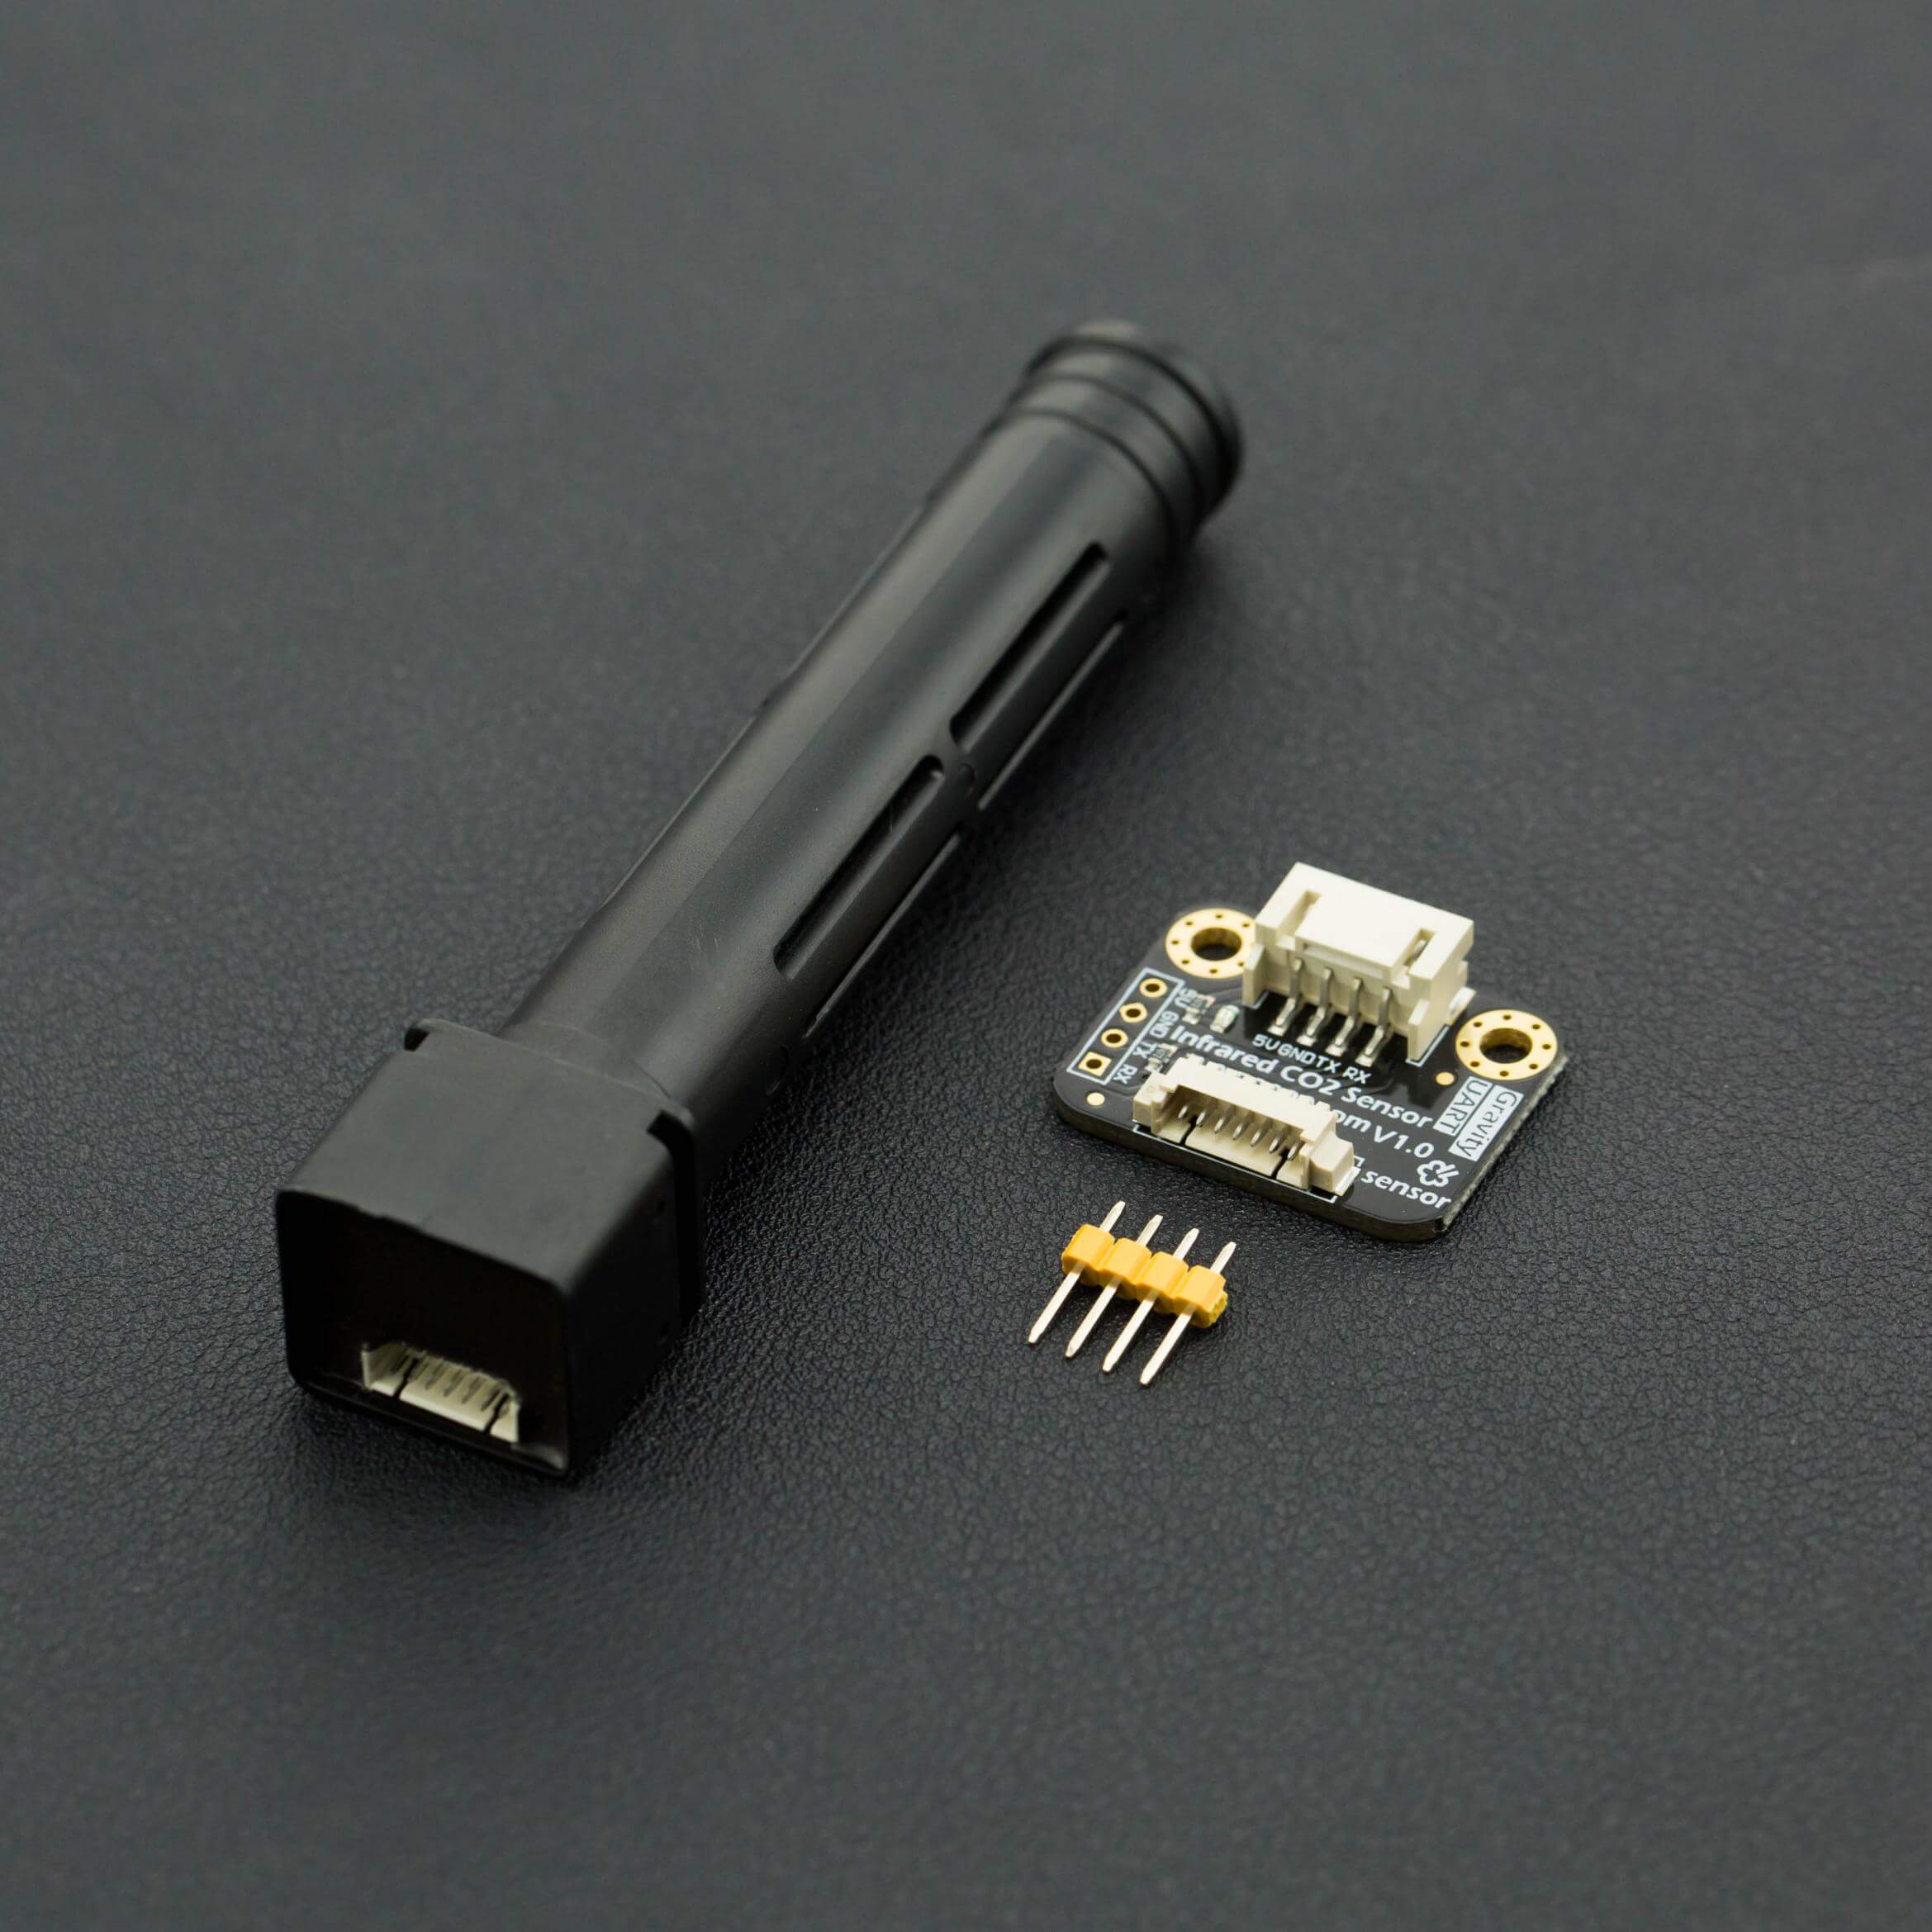
- Gravity: PWM Infrared Carbon Dioxide Sensor (400-5000 ppm) x1
- Digital Sensor Cable for Arduino x1
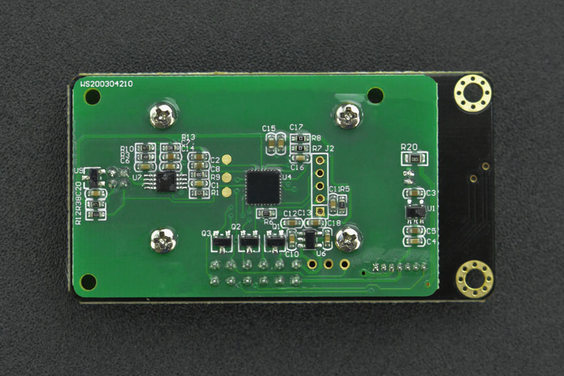
Board Overview

| Num | Label | Description |
|---|---|---|
| 1 | Signal | Signal Output (0.4-2V) |
| 2 | VCC | + |
| 3 | GND | - |
Zero Calibration
-
Method 1: Manual zero calibration
Short circuit the HD and GND of the sensor to calibrate it. It always needs to last for over 7 seconds at a low level. Make sure that the sensor runs stably for over 20 minutes at a concentration of 400ppm before the calibration.
-
Method 2: Automatic zero calibration
The automatic calibration function means that the sensor will intelligently determine the zero point according to the ambient CO2 concentration and automatically calibrate it after a period of continuous operation. The calibration starts from power-on and is performed once every 24 hours. The zero point for automatic calibration is 400 ppm. This calibration is suitable for office and home enviornment.
Tutorial
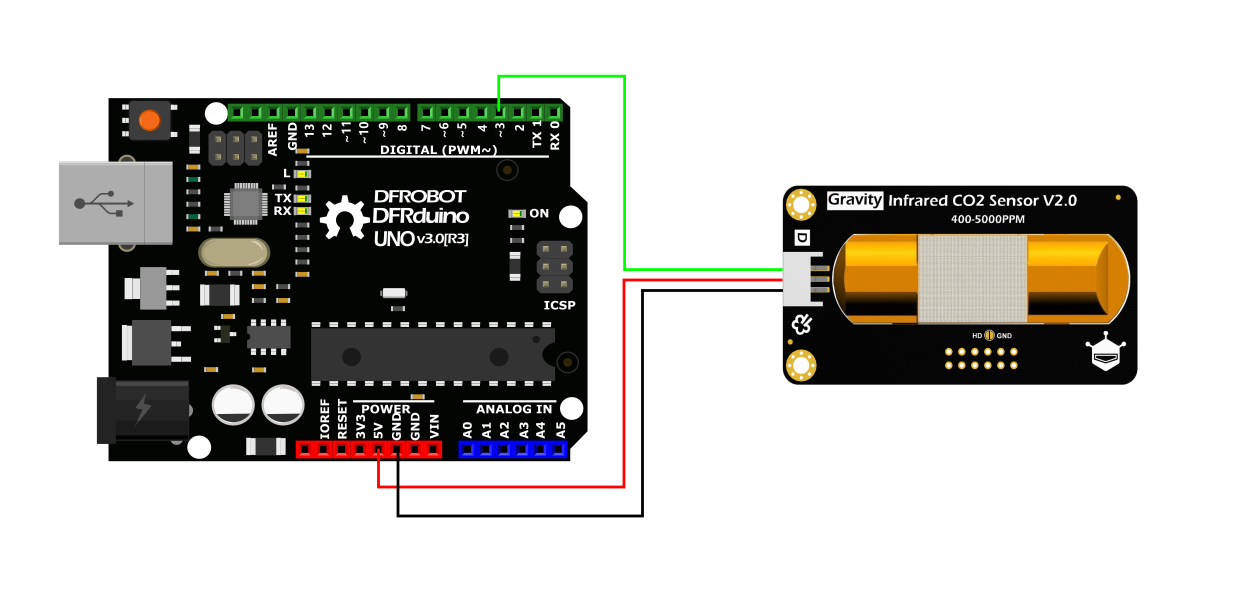
This tutorial is designed for you to learn how to use the infrared CO2 sensor to measure the current CO2 concentration in the air in 5 minutes.
Requirements
-
Hardware
- DFRduino UNO x 1
- DFRobot Gravity: Infrared CO2 Sensor x 1
- Gravity: IO Expansion Shield for Arduino V7.1 x 1
- Cable x 1
-
Software
- Arduino IDE Click to Download Arduino IDE from Arduino®
Connection Diagram
Sample Code
Download the Arduino code, and open the window monitor in the upper right corner to view the data.
/***************************************************
Infrared CO2 Sensor range : 400-4980ppm
* ****************************************************
This example The sensors detect CO2

@author qsjhyy(qsj.huang@dfrobot.com)
@version V2.0
@date 2021-8-17

GNU Lesser General Public License.
See <http://www.gnu.org/licenses/> for details.
All above must be included in any redistribution
* ****************************************************/
/*
* The Correspondence Table of AVR Series Arduino Interrupt Pins And Terminal Numbers
* ---------------------------------------------------------------------------------------
* | | DigitalPin | 2 | 3 | |
* | Uno, Nano, Mini, other 328-based |--------------------------------------------|
* | | Interrupt No | 0 | 1 | |
* |-------------------------------------------------------------------------------------|
* | | Pin | 2 | 3 | 21 | 20 | 19 | 18 |
* | Mega2560 |--------------------------------------------|
* | | Interrupt No | 0 | 1 | 2 | 3 | 4 | 5 |
* |-------------------------------------------------------------------------------------|
* | | Pin | 3 | 2 | 0 | 1 | 7 | |
* | Leonardo, other 32u4-based |--------------------------------------------|
* | | Interrupt No | 0 | 1 | 2 | 3 | 4 | |
* |--------------------------------------------------------------------------------------
*
* This example uses UNO to demonstrate.
* If you want to use other master controls, please configure the following two lines
*/
#define sensorIn 2 // Sensor PWM interface
#define interruptNumber 0 // interrupt number

unsigned long pwm_high_start_ticks=0, pwm_high_end_ticks=0;
float pwm_high_val=0, pwm_low_val=0;
volatile uint8_t flag=0;


void interrupt_rising()
{
pwm_high_start_ticks = micros(); // store the current micros() value
if(2 == flag){
flag = 4;
pwm_low_val = pwm_high_start_ticks - pwm_high_end_ticks;
}else{
flag = 1;
}

attachInterrupt(interruptNumber, interrupt_falling, FALLING);
}

void interrupt_falling()
{
pwm_high_end_ticks = micros(); // store the current micros() value
if(1 == flag){
flag = 2;
pwm_high_val = pwm_high_end_ticks - pwm_high_start_ticks;
}

attachInterrupt(interruptNumber, interrupt_rising, RISING);
}


void setup() {
// put your setup code here, to run once:
Serial.begin(115200);
pinMode(sensorIn, INPUT);
attachInterrupt(interruptNumber, interrupt_rising, RISING);
}

void loop() {
if(flag == 4){
flag = 1;
float pwm_high_val_ms = (pwm_high_val * 1000) / (pwm_low_val + pwm_high_val);

if (pwm_high_val_ms < 0.01){
Serial.println("Fault");
}
else if (pwm_high_val_ms < 80.00){
Serial.println("preheating");
}
else if (pwm_high_val_ms < 998.00){
float concentration = (pwm_high_val_ms - 2) * 5;
// Print pwm_high_val_ms
Serial.print("pwm_high_val_ms:");
Serial.print(pwm_high_val_ms);
Serial.println("ms");
//Print CO2 concentration
Serial.print(concentration);
Serial.println("ppm");
}else{
Serial.println("Beyond the maximum range :398~4980ppm");
}
Serial.println();
}
}
Result
Please wait at least 3 minutes (preheat process) until the data is stable. At this time, the sensor can display the CO2 concentration.

วิธีการชำระเงิน
ชำระเงินค่าสินค้าโดยการโอนเงินเข้าบัญชีธนาคาร KBANK, SCB, BBL,TMB
กรุณาเก็บหลักฐานการโอนเงินของท่านไว้เพื่อแจ้งการชำระเงินด้วยค่ะ
ท่านสามารถแจ้งการชำระเงินผ่านระบบอัตโนมัติได้โดย Click Link ข้างล่างค่ะ
https://www.arduitronics.com/informpayment
ชำระเงินผ่านธนาคาร


@rfm0967y
ติดต่อสอบถาม
Join เป็นสมาชิกร้านค้า
MEMBER
