
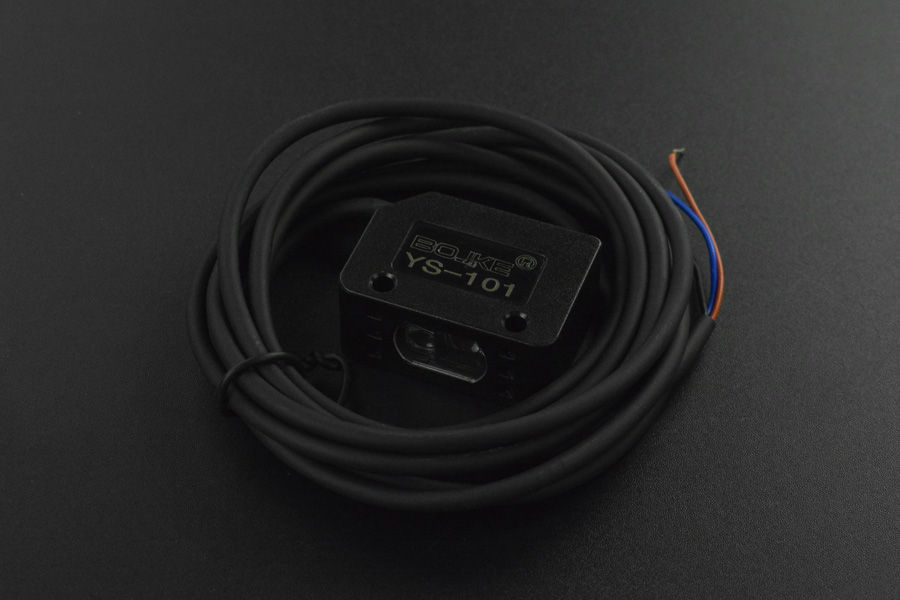
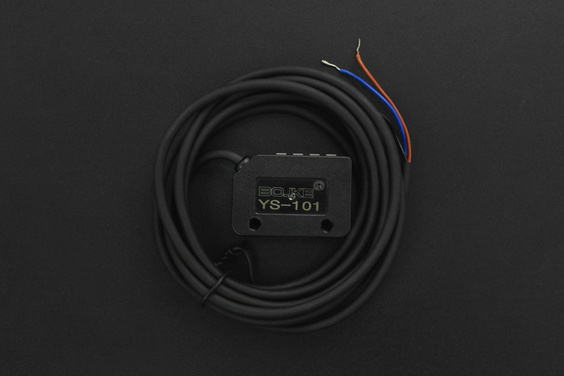
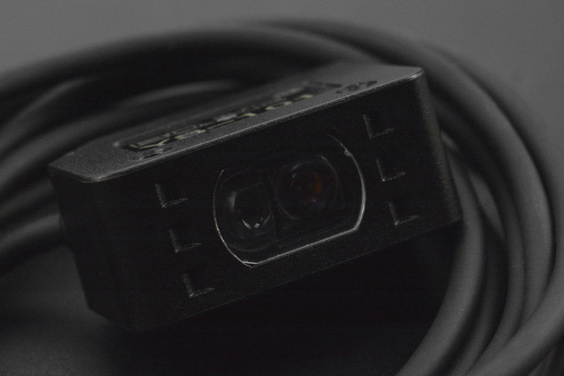
Smart Color Mark Photoelectric Sensor (แท้จาก DFRobot)

| รหัสสินค้า | AS00469 |
| หมวดหมู่ | ตรวจวัดสเปกตรัมจากแสงสะท้อน Spectrum / Spectroscopy |
| ราคา | 2,385.00 บาท |
| สถานะสินค้า | พร้อมส่ง |
| จำนวน | ชิ้น |

รายละเอียดสินค้า
ดู Guide สำหรับเริ่มการใช้งานหร้อมตัวอย่าง arduino code และ python Click
INTRODUCTION
Operating at 12~24V, the color mark sensor offers 3 detection modes, and 4 output modes. It saves color data with one click, which is pretty easy to use.


FEATURES
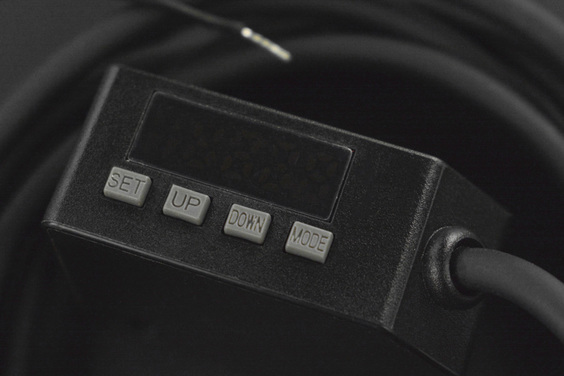
- Onboard buttons for function settings, easy to use
- Strong light resistance, stable performance
- 12-24V wide voltage range, multiple protection mechanisms
SPECIFICATION
- Light Source: Four-element LED
- Detection Distance: 8~16mm
- Power Supply: DC 12-24V
- Response Time:
Mode of MARK: 50um;
Mode of C/C1: 130um - Output Selection: LIGHT-ON/DARK-ON [switching select]
- Detection Method:
Detection of light intensity MARK
Detection of automatic color matching C
Detection of color and brightness C1 - Delay Function:
Turn off delay timer/turn on delay timer/one-shot timer/turn on delay one-shot timer, optionally.
Selectable timer time: 1ms to 9999ms - Operating Ambient Luminance:
Incandescent Lamp: Max 20000Lux
Sunlight: Max 30000Lux - Power Consumption:
Standard mode: Max 300mW@24V
- Operating Temperature: -10~55°C
- Output Type: NPN
DOCUMENTS
SHIPPING LIST
- Smart Color Mark Photoelectric Sensor x1
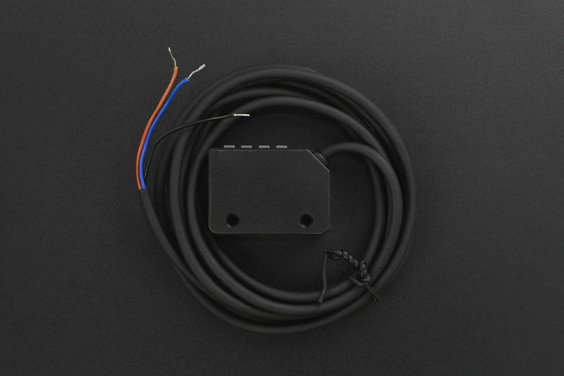
Pinout


| Name | Function |
|---|---|
| Brown wire | Sensor+ |
| Blue wire | Sensor- |
| Black wire | Sensor signal output wire |
Size Diagram

Tutorial
Requirements
- Hardware
- UNO R3
- Software
How to use this color mark sensor?

- Direct the sensor light source at the color to be detected at a distance of 8~16mm and press the SET button once, then the settings is done.
- Press the MODE button lightly to adjust the trigger threshold. If the detection value is higher than the set value, it will trigger; and if it is lower, it will not trigger. After setting, press the MODE button once and you can select normally open Lon and normally closed Don.
 NOTE: This setting method needs to be done when 1P is selected in the C or C1 mode. The specific setting method can be adjusted by referring to the following menu.
- Press the SET and MODE button for three seconds at the same time to restore the factory settings.
Light Intensity Selection

Press the MODE button for 3 seconds to enter the menu until light intensity selection appears: R-H(strong light)/R-L(low light). Options can be switched with the UP/DOWN button.
Detection Mode Selection

- After selecting the light intensity, press the MODE button to enter the detection mode selection.
- There are three modes: C mode, MARK contrast mode and C1 mode
- Options can be switched with the UP/DOWN button.
- The default is in C mode. You can select mode according to your testing needs.
Teaching Selection

After selecting detection mode, press MODE button to make teaching selections 1P/ 2P appear.
- 1P: point at color that needs to be output and teach it once
- 2P: point at objects with two different colors to teach
Delay Mode

After selecting the required teaching, press the MODE button to enter the delay menu. The default is TOFF, which means turning off delay.
- onod: pull up/down delay at the same time
- ond: pull up the delay, and when an object color is sensed, wait a while, then output.
- oFFd: pull down the delay, keeping output after leaving the detected color area for a while. press the MODE button to select the time. (unit: ms)
After selecting, press the M button to end the setting and then return to the detection interface.
วิธีการชำระเงิน
ชำระเงินค่าสินค้าโดยการโอนเงินเข้าบัญชีธนาคาร KBANK, SCB, BBL,TMB
กรุณาเก็บหลักฐานการโอนเงินของท่านไว้เพื่อแจ้งการชำระเงินด้วยค่ะ
ท่านสามารถแจ้งการชำระเงินผ่านระบบอัตโนมัติได้โดย Click Link ข้างล่างค่ะ
https://www.arduitronics.com/informpayment
ชำระเงินผ่านธนาคาร


@rfm0967y
ติดต่อสอบถาม
Join เป็นสมาชิกร้านค้า
MEMBER
