ดูรายละเอียดการใช้งานและ download software ได้ที่ Clickดูตัวอย่าง code สำหรับ arduino, Nano Jetson, Raspberry pi, microbit ได้ที่ Click
Raspberry Pi : ClickNvidia Jetson Nano: ClickArduino : ClickMicro:bit : ClickK210 : Click
หมายเหตุ: สินค้าไม่รวมบอร์ด motor drive
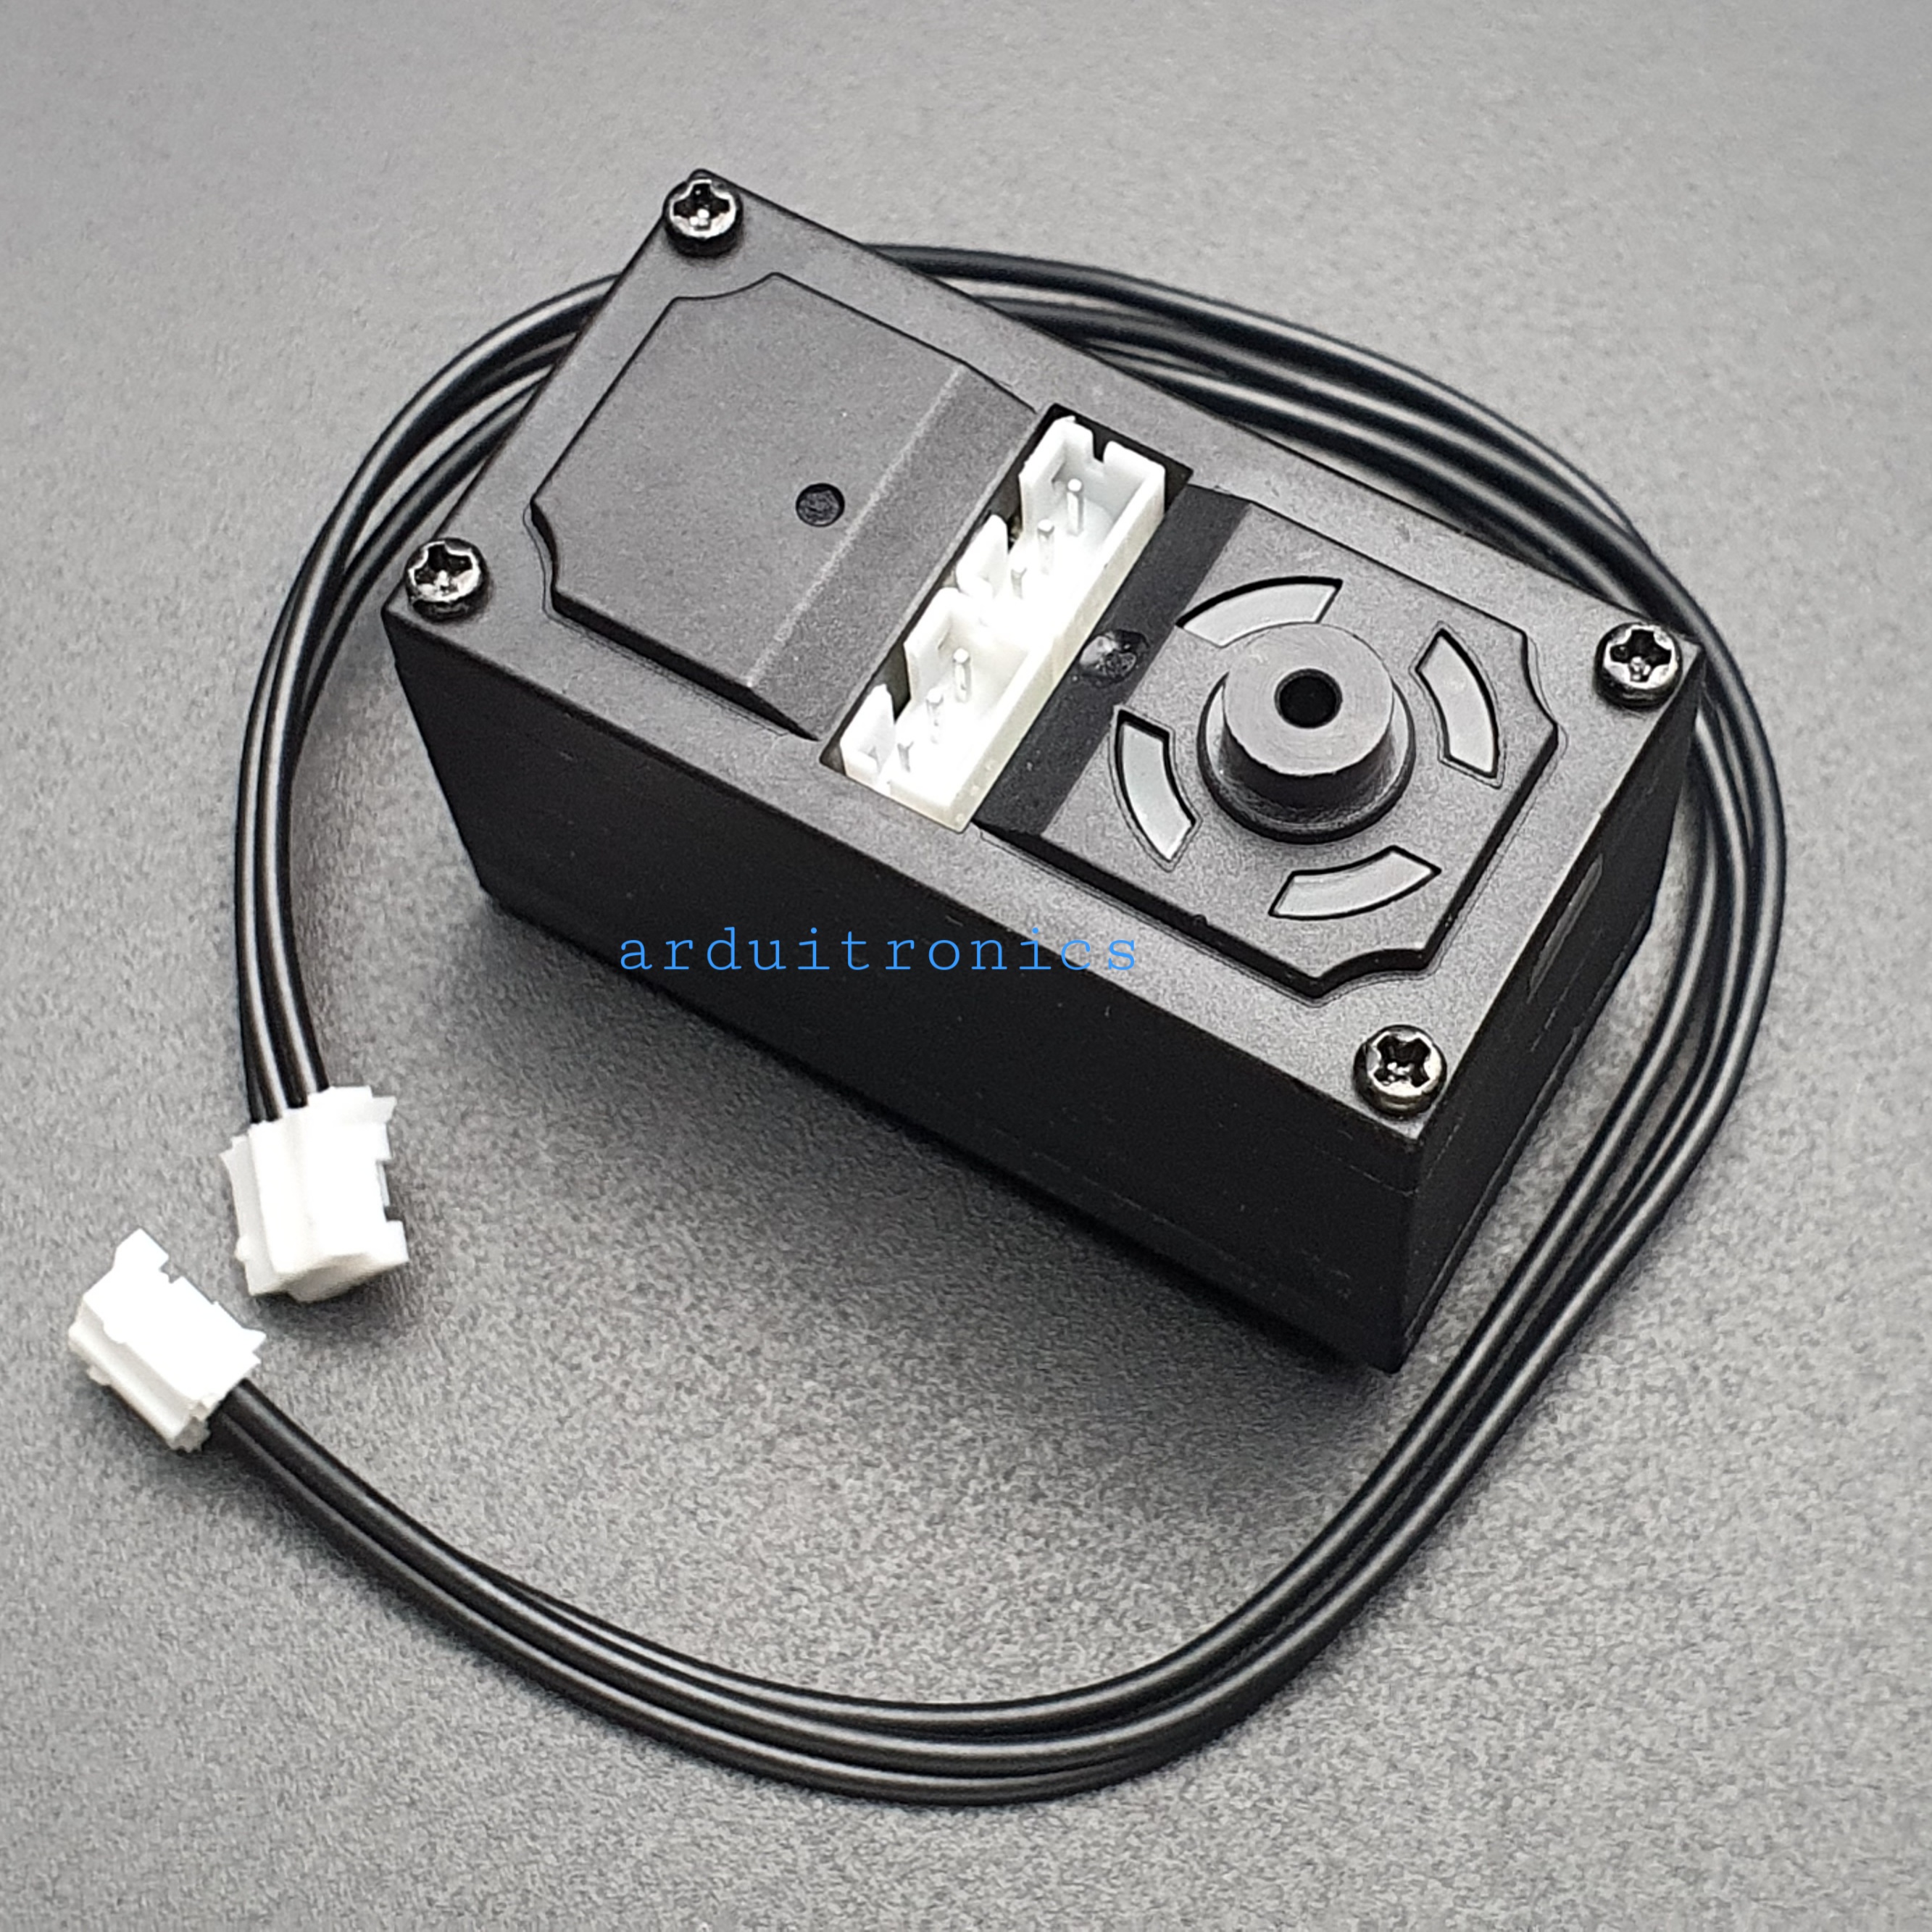
1. Bus servo installation and interface

servo (front side)
servo (back side)
 Steering wheel and bearing
Installation diagram:

Bus servo interface:

1. Component and function distribution on drive board

Note:
1) At the same time, only one of the micro USB interface and TTL interface can be used.
2) Blue power supply interface and DC socket only need to choose one of them for power supply. In normally, the power indicator will keep on.
3) The RX indicator flashes when the micro USB interface sends data to the driver board.
4) Two bus servo interfaces are connected in parallel, and pin is also the same.
5) 5V of the TTL interface is the input voltage, not is output voltage.
2. Install CH340 Drive
2.1 Enter to the Uart drive (CH340) folder we provided, you will see CH341SER.EXE. Double clicking on this application will bring up the interface as shown below, we need to click [INSTALL].


2.2 We need to wait patiently until the screen of the driver installation is successful, indicating that the installation is complete, we need to click [OK].
2.3 Connect the drive board to the computer with the USB cable and power up the robot car. Then open the computer device manager and you will recognize the corresponding CH340 port, as shown below.


!!Note: The port number of each computer will be different, as long as it recognizes that CH340 is the port we needed.
Control bus servo
1. The principle of bus servo control
Ordinary servos are controlled by receiving PWM pulse signals, while bus servos are controlled by writing data through the serial port. But the bus servo interface has only three lines. The ordinary serial port needs four line, so we need to use the servo drive board. The servo drive board can not only power supply to the bus servo, but also convert the serial data into a half-duplex serial port data, so that the bus servo can receive commands normally.
The inside of the bus servo is composed of a small DC motor, a control circuit board, a position feedback potentiometer, and a variable speed metal gear set. The control circuit board integrates a MCU for receiving serial commands and outputting PWM signals.
Bus servo can be used as a slave machine and can work according to the commands received by the serial port. When the host machine needs to return data from the slave machine, it can also read the current servo angle and return it to the host machine.
2. Connect the bus servo and the drive board
The interfaces of the bus servo and the drive board comes with anti-reverse connection. As shown below.

3. Connect to the bus servo to PC software
3.1 Connect servo drive board to your computer.
3.2 Double-click to open the servo debugging software. Click [Settings]-- [Serial Port Settings] to select the corresponding port number, the baud rate is 115200, and finally click [Open Port].

3.3 If the serial port is successfully opened, the serial port number and baud rate will be displayed in the lower left corner.
If it can’t be opened, please confirm whether the serial port is occupied by other devices.

3.4 After the serial port is successfully opened, as shown below, the entire area can be used to control the servo, choose the send display and receive display, which can be used to display the received and sent serial data.

4. PC software control bus servo
4.1 [Position control-Drag control]: Drag the slider directly to change the position of the servo.
In generally, 2048 means the middle position, and the receiving signal range of the servo is 96~4000. You can also customize the maximum and minimum values.
The commands sent are all broadcast commands, which means that all the servos connected to this bus can receive this command and take related actions.

4.2 [Position control -- Customize servo position]: Click “Send [A/B/C/D/E/F]” to control the servo to the specify position. If you choose [Broadcast ID send (254)], all servos on this bus will receive this command and rotate to the specified position; if the [Broadcast ID Send (254)] is not choose, only the bus servo corresponding to the [tar ID] on the left will receive the command and rotate to the specified position.
In the effective range, the smaller the [time], the bus servo will run with faster speed.
If the time is equal to 0, the bus servo will move to the specified position with fastest speed.
[Torque Switch] is effective for all connected servos, [ON] is torque on, that is, the bus servo can be controlled by commands, and the bus servo cannot be moved manually;
[OFF] is torque off, that is, the bus servo can not receive control commands, the bus servo can be moved manually.

4.3 [Position control -- Automatic loop]: After setting the start position and end position and other parameters, click [Run], the bus servo will circulate back and forth between these two positions, and click [Stop] to end this loop.

Set bus servo and read position
1. Connect the bus servo and drive board
As shown below.

2. Connect to the bus servo to PC software
2.1 Connect servo drive board to your computer.
2.2 Double-click to open the servo debugging software. Click [Settings]-- [Serial Port Settings] to select the corresponding port number, the baud rate is 115200, and finally click [Open Port].

2.3 If the serial port is successfully opened, the serial port number and baud rate will be displayed in the lower left corner.
If it can’t be opened, please confirm whether the serial port is occupied by other devices.

2.4 After the serial port is successfully opened, as shown below, the entire area can be used to set servo ID and read position.

3. PC software setting and query
3.1 Set ID. For example(ID = 1). When you click [Write], all bus servos connected to this drive board will be set to ID=1.

Click [Ping] to see the data returned by the bus servo in [Receive Display].
3.2 Pos offset. The offset of the servo can be modified. At present, only a positive integer can be written, the maximum value is 1000, and the servo will shift clockwise.

3.3 We can set the angle limit, torque limit and stall protection time according to actually conditions.

3.4 Restore factory settings, click [Restore factory Settings] and a prompt box will pop up. Click [OK] to restore all the contents of the servo to default, and the ID of the servo will become to 1.

Bus servo cascade control
1. Set each servo ID
Before cascade control bus servo, we need to set a unique ID for each bus servo.
1.1 Connect a servo to the servo drive board separately, as shown below.

1.2 open our software, input ID 1, click [Write].

1.3 Unplug the bus servo, and then connect another bus servo to the drive board separately, input the ID 2, and click [Write].

....
If there are multiple bus servos, set the ID for each bus servo according to this method.
! Note: The ID number cannot be repeated and is between 1 and 250.
When there are multiple bus servos, paste the corresponding ID numbers with stickers.
2. Bus servo cascade connection
The other interface of the bus servo can be used as the input terminal of other bus servos. Due to the limited drive capability of the drive board, we can’t connect too many servo.
As shown below.

3. Controlling bus servo by PC software
3.1 Cancel [Broadcast ID sending (254)],
3.2 Input ID to be controlled in [tarID] (1)
3.3 Click [A/B/C/D/E/F] to control to the position of [B],
3.4 Input [tarID] into ID (2), and then click [E],
After the above steps, we can make the two bus servos run to different angles.


![[ยี่ห้อ YAHBOOM] 15KG Serial Bus Metal Steering Gear / Servo Motor YB-SD15M (High Torque and Precision)](https://o.lnwfile.com/_/o/_raw/pf/oy/jb.jpg)
![[ยี่ห้อ YAHBOOM] 15KG Serial Bus Metal Steering Gear / Servo Motor YB-SD15M (High Torque and Precision)](https://o.lnwfile.com/_/o/_raw/k8/g8/ov.jpg)
![[ยี่ห้อ YAHBOOM] 15KG Serial Bus Metal Steering Gear / Servo Motor YB-SD15M (High Torque and Precision)](https://o.lnwfile.com/_/o/_raw/z5/ar/o1.jpg)
![[ยี่ห้อ YAHBOOM] 15KG Serial Bus Metal Steering Gear / Servo Motor YB-SD15M (High Torque and Precision)](https://o.lnwfile.com/_/o/_raw/oh/op/sp.jpg)


