
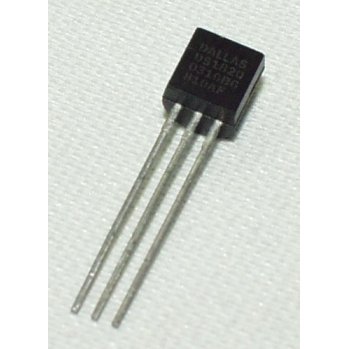
DS18B20 (Temperature Sensor)
| รหัสสินค้า | SG00085 |
| หมวดหมู่ | วัดสภาพแวดล้อมและแก๊ส Environmental / Gas |
| ราคา | 25.00 บาท |
| สถานะสินค้า | พร้อมส่ง |
| จำนวน | ชิ้น |
หยิบลงตะกร้า

รายละเอียดสินค้า
DS18B20 เป็นเซ็นเซอร์สำหรับทำเป็น Temperature Sensor
Circuit Diagram:

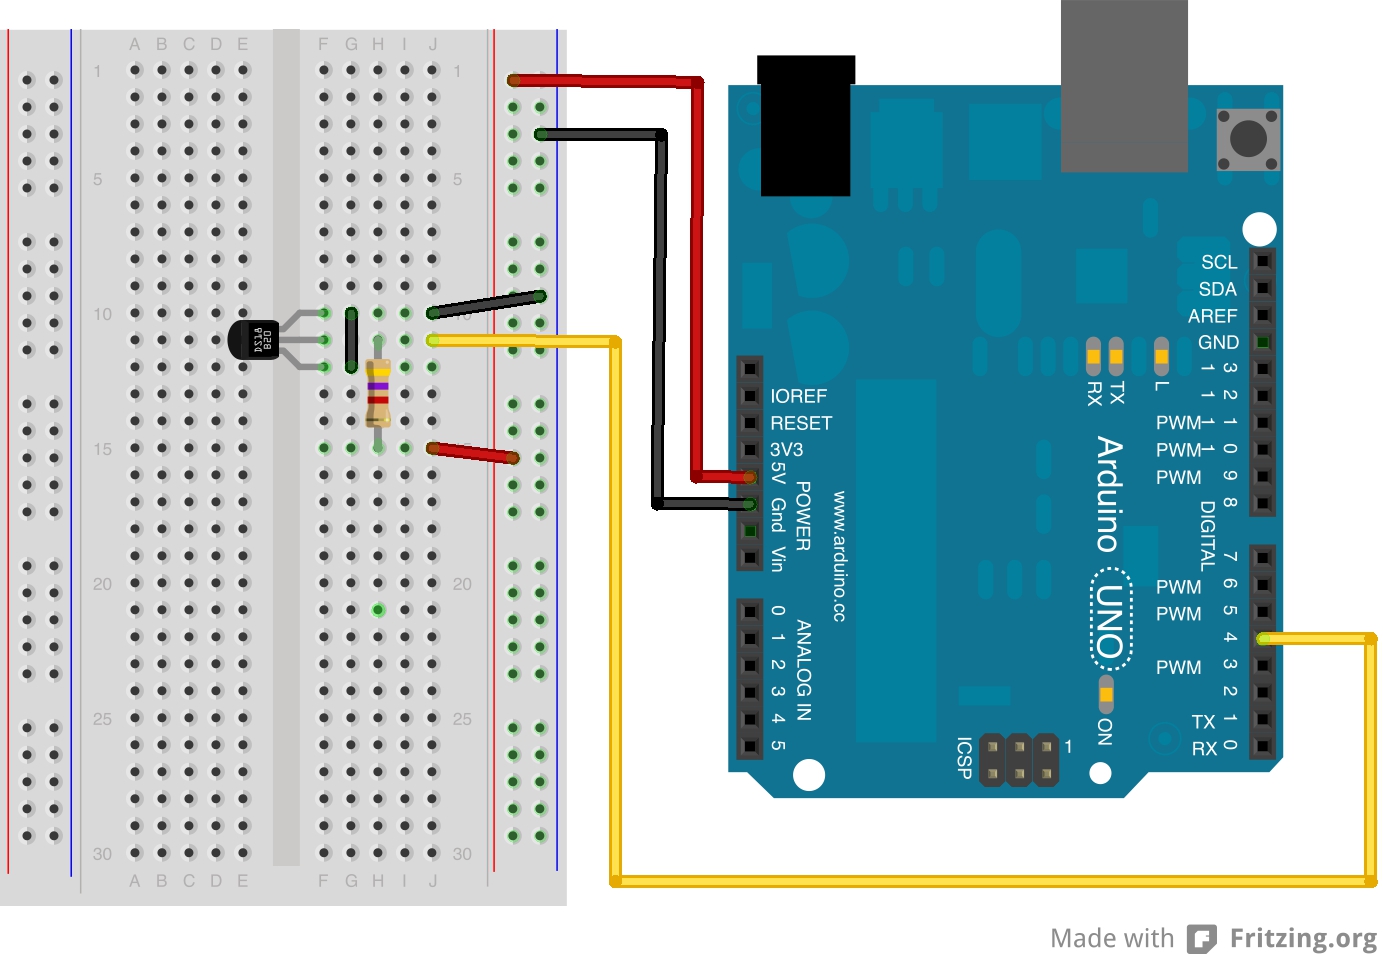
Wiring Diagram:
ตัวอย่าง Sketch 1:
|
1
2
3
4
5
6
7
8
9
10
11
12
13
14
15
16
17
18
19
20
21
22
23
24
25
26
27
28
29
30
31
32
33
34
35
36
37
38
39
40
41
42
43
44
45
46
47
48
49
50
51
52
53
54
55
56
57
58
59
60
61
62
63
64
65
66
67
68
69
70
71
72
73
74
75
76
77
78
79
80
81
82
83
84
85
|
/*Tested on Arduino 1.0.3UcontrolIt.TVBulding Block 2 - Sketch 1 Single Sensor to Serial with High Low and C/FAdd two more libraries: OneWire and DallasTemperatureMark JohnsonuControlIt.tvDecember 2012License: GNU General Public License*/// Load Libraries for DS1820 and OneWire#include#include// Variables for temperature readingsfloat myTemp;float myHighTemp;float myLowTemp = 50;// DS1820 Data wire is plugged into pin 4 on the Arduino#define ONE_WIRE_BUS 4// Setup oneWire instance to communicate with devicesOneWire oneWire(ONE_WIRE_BUS);// Pass oneWire reference to Dallas Temperature.DallasTemperature sensors(&oneWire);void setup(){ // Start the OneWire library sensors.begin();}void loop(){ // Read the temperature readtemp(); // Write the Results to the serial Monitor serialPrint();}void readtemp(){ // call sensors.requestTemperatures() to issue a global temperature // request to all devices on the bus sensors.requestTemperatures(); // Send the command to get temperatures myTemp = (sensors.getTempCByIndex(0));// Set High or Low Temp if (myTemp < myLowTemp) { myLowTemp = myTemp; } if (myTemp > myHighTemp) { myHighTemp = myTemp; }}void serialPrint(){Serial.print("Current Temp: ");Serial.print(myTemp);Serial.print("C");Serial.print(" Lowest Temp: ");Serial.print(myLowTemp);Serial.print("C");Serial.print(" Highest Temp: ");Serial.print(myHighTemp);Serial.println("C");delay (500);Serial.print("Or if you prefer : ");Serial.print(DallasTemperature::toFahrenheit(myTemp));Serial.print("F / ");Serial.print(DallasTemperature::toFahrenheit(myLowTemp));Serial.print("F / ");Serial.print(DallasTemperature::toFahrenheit(myHighTemp));Serial.println("F ");Serial.println();delay (500);} |
ตัวอย่าง Sketch 2:
|
1
2
3
4
5
6
7
8
9
10
11
12
13
14
15
16
17
18
19
20
21
22
23
24
25
26
27
28
29
30
31
32
33
34
35
36
37
38
39
40
41
42
43
44
45
46
47
48
49
50
51
52
53
54
55
56
57
58
59
60
61
62
63
64
65
66
67
68
69
70
71
72
73
74
75
76
77
78
79
80
81
82
83
84
85
86
87
88
89
90
91
92
93
94
95
96
97
98
99
100
101
102
103
104
105
106
107
108
109
110
111
112
113
114
115
116
117
118
119
120
121
122
123
124
|
/*Tested on Arduino 1.0.3UcontrolIt.TVBulding Block 2 - Sketch 2 Single Sensor to LCD with High / LowSketch is based on UCI Ep 6 LCD SketchAdd two more libraries: OneWire and DallasTemperatureMark JohnsonuControlIt.tvDecember 2012License: GNU General Public License*/// Load Libraries for LCD#include#include#include // Define variables for LCD:#define I2C_ADDR 0x27 // Define I2C Address where the PCF8574A is#define BACKLIGHT_PIN 3#define En_pin 2#define Rw_pin 1#define Rs_pin 0#define D4_pin 4#define D5_pin 5#define D6_pin 6#define D7_pin 7//Initialise the LCDLiquidCrystal_I2C lcd(I2C_ADDR,En_pin,Rw_pin,Rs_pin,D4_pin,D5_pin,D6_pin,D7_pin);// Load Libraries for DS1820 and OneWire#include#include// Variables for temperature readingsfloat myTemp;float myHighTemp;float myLowTemp = 50;// DS1820 Data wire is plugged into pin 4 on the Arduino#define ONE_WIRE_BUS 4// Setup oneWire instance to communicate with devicesOneWire oneWire(ONE_WIRE_BUS);// Pass oneWire reference to Dallas Temperature.DallasTemperature sensors(&oneWire);void setup(){ // Initialise the LCD display initialiseLCD(); // Start the OneWire library sensors.begin();}void loop(){ // Read the temperature readtemp(); // Write results to the LCD LCDPrint();}void readtemp(){ // call sensors.requestTemperatures() to issue a global temperature // request to all devices on the bus sensors.requestTemperatures(); // Send the command to get temperatures myTemp = (sensors.getTempCByIndex(0));// Set High or Low Temp if (myTemp < myLowTemp) { myLowTemp = myTemp; } if (myTemp > myHighTemp) { myHighTemp = myTemp; }}void LCDPrint(){ lcd.setCursor (15, 0 ); lcd.print("*"); lcd.setCursor ( 8, 0 ); lcd.print(myTemp); lcd.setCursor ( 0, 1 ); lcd.print("L="); lcd.setCursor ( 2, 1 ); lcd.print(myLowTemp); lcd.setCursor ( 8, 1 ); lcd.print("H="); lcd.setCursor ( 10, 1 ); lcd.print(myHighTemp); delay (500); lcd.setCursor (15, 0 ); lcd.print(" "); delay (500);}void initialiseLCD(){ lcd.begin (16,2);// Switch on the backlight lcd.setBacklightPin(BACKLIGHT_PIN,POSITIVE); lcd.setBacklight(HIGH);// Goto first column (0 not 1!), first line (0 not 1!), lcd.setCursor ( 0, 0 );// Print at cursor location lcd.print("Temp: ");// Go to first column (0 not 1!), second line (which is 1 not 2!) lcd.setCursor ( 13, 0 );// Print at cursor location lcd.print("C");} |
วิธีการชำระเงิน
ชำระเงินค่าสินค้าโดยการโอนเงินเข้าบัญชีธนาคาร KBANK, SCB, BBL,TMB
กรุณาเก็บหลักฐานการโอนเงินของท่านไว้เพื่อแจ้งการชำระเงินด้วยค่ะ
ท่านสามารถแจ้งการชำระเงินผ่านระบบอัตโนมัติได้โดย Click Link ข้างล่างค่ะ
https://www.arduitronics.com/informpayment
ชำระเงินผ่านธนาคาร


@rfm0967y
ติดต่อสอบถาม
Join เป็นสมาชิกร้านค้า
ร้านArduitronics
/www.arduitronics.com/
สมัครสมาชิกร้านนี้ เพื่อรับสิทธิพิเศษ
MEMBER
สินค้าในตะกร้า ({{total_num}} รายการ)

ขออภัย ขณะนี้ยังไม่มีสินค้าในตะกร้า
ราคาสินค้าทั้งหมด
฿ {{price_format(total_price)}}
- ฿ {{price_format(discount.price)}}
ราคาสินค้าทั้งหมด
{{total_quantity}} ชิ้น
฿ {{price_format(after_product_price)}}
ราคาไม่รวมค่าจัดส่ง
➜ เลือกซื้อสินค้าเพิ่ม