
FireBeetle ESP8266 IOT Microcontroller (Supports Wi-Fi) - แท้จาก DFRobot
| รหัสสินค้า | BA00179 |
| หมวดหมู่ | WiFi ESP8266 |
| ราคา | 585.00 บาท |
| สถานะสินค้า | พร้อมส่ง |
| จำนวน | ชิ้น |

รายละเอียดสินค้า
ดู tutorial project
Introduction
FEATURES
- Compatible with FireBeetle series
- Compatible with Arduino programing
- Built-in 32-bit Tensilica L106 MCU and 10-bit ADC
- Support RTOS SDK in Linux, Arduino IDE and Micropython.
- Support IEEE802.11 b/g/n WiFi (2.4 GHz~2.5 GHz)
- Support TCP / IP
- Support Lithium Battery (The Maximum charge current: 500mA)
- Support Low Power Consumption
- Support OTA Updating
- Support STA/AP/STA+AP
SPECIFICATION
- Operating Temperature: -40℃~+85℃
- Operating Voltage: 3.3V
- Input Voltage (limits): 3.3~5V (Lithium Battery:3.7V & USB:5V)
- Microcontroller: Tensilica L106 (32-bit MCU)
- Clock Speed: 80MHz (Maximum: 160MHz)
- SRAM: 50KB
- External Flash Memory: 16MB
- DC Current in the Low-Power-Consumption: 46uA
- Average Operating Current: 80mA
- Maximum Discharging Current: 600mA (LDO-3.3 Output)
- Maximum Charging Current: 500mA
- Digital Pin x10
- Analog Pin x1
- SPI interface x1
- I2C interface x1
- IR interface x1
- I2S interface x1
- Interface: XH2.54mm Pin (No soldering default)
- In Combination of Wi-Fi MAC/ BB/RF/PA/LNA
- WiFi: IEEE802.11 b/g/n (2.4 GHz~2.5 GHz), not support 5GHz WiFi
- Dimension: 58 × 29(mm)
- Operating Temperature: -10℃~+55℃
- Mounting Hole Dimension: 53 x 24(mm)
- Weight: 24g
DOCUMENTS
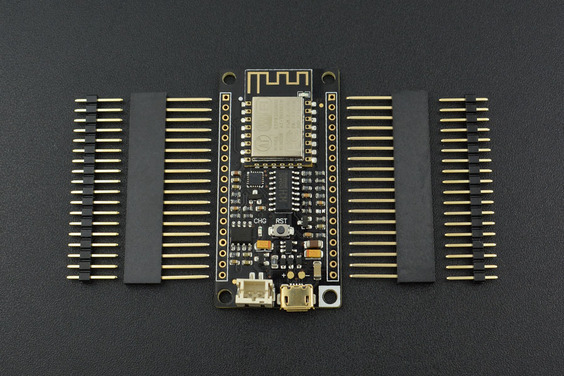
SHIPPING LIST
- FireBeetle Board-ESP8266 ×1
- 18pin-2.54mm ×2
- 18pin-2.54mm Female Holder ×2
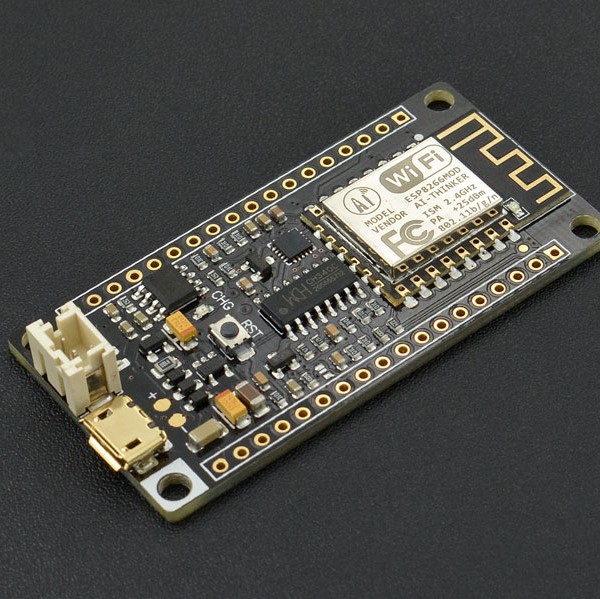
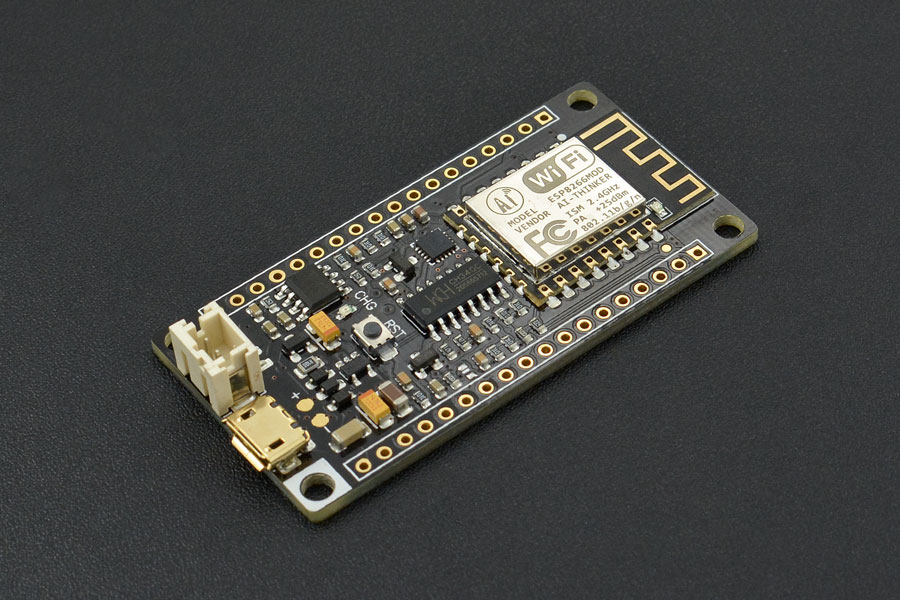
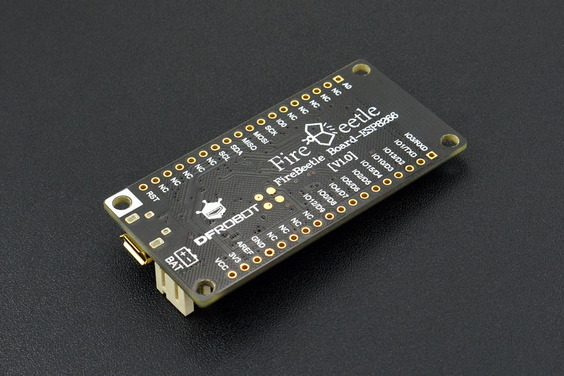
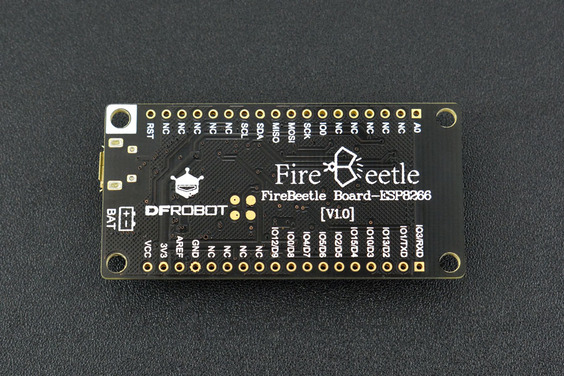
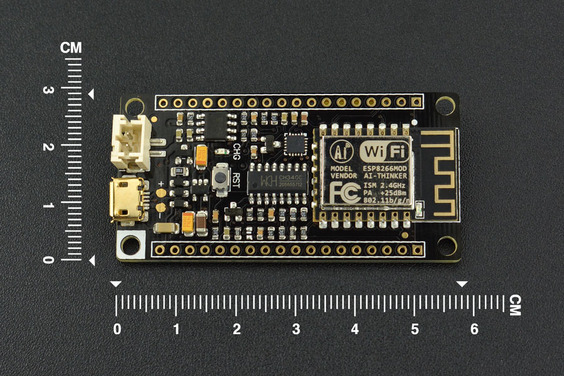
Board Overview
FireBeetle Board - ESP8266 is not only compatible with ESP8266 PinMap, but also make a special compatible with Arduino IDE PinMap. Dx (x=0,1,2,3...9)
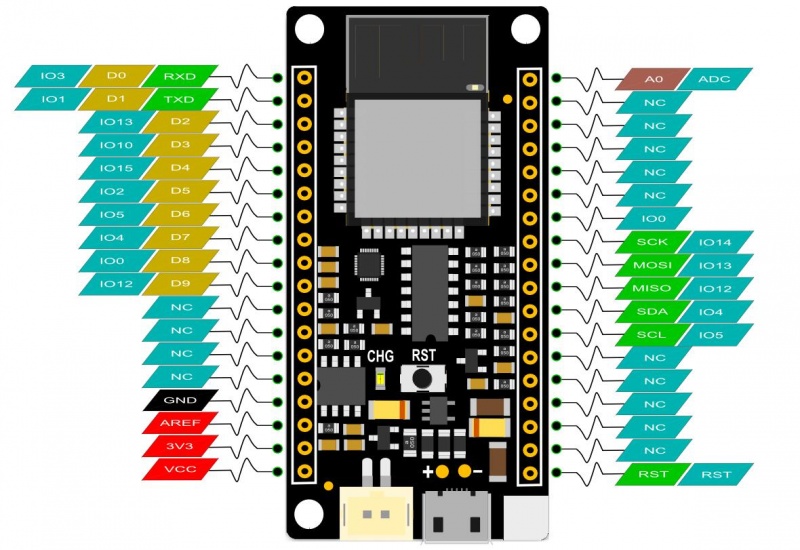
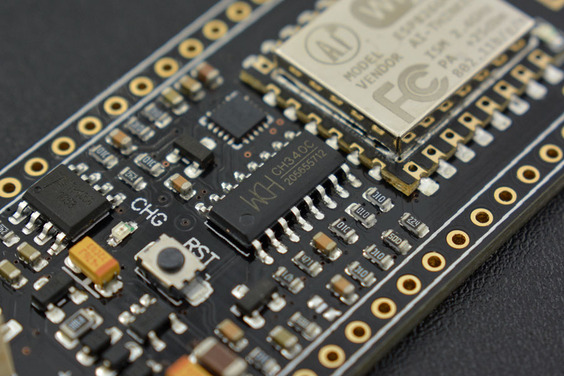
- CHG Blink = not connect battery; Light on = Charging; Light off = Charge complete
NOTE: NC = Empty; VCC = VCC (5V under USB power supply, Around 3.7V under 3.7V lipo battery.power supply)
Tutorial
In this tutorial, we'll show you some basic operation with FireBeetle-ESP8266 Microcontroller.
Requirements
- Hardware
- FireBeetle ESP8266 IOT Microcontroller x 1
- Micro USB Cable x1
-
Software
-
Arduino IDE (newest), Click to Download Arduino IDE from Arduino®
-
Setup Arduino IDE Development Environment
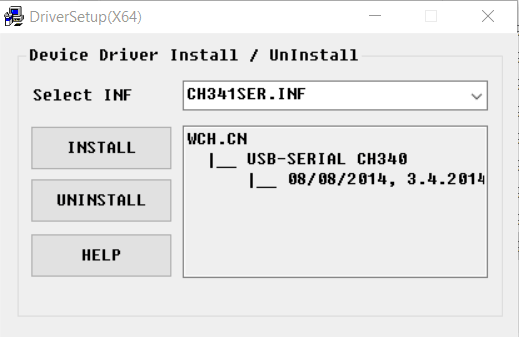
- Plug FireBeetle to your computer, install the driver manually.
- Add FireBeetle Board URL to Arduino IDE
- Open Arduino IDE, File->Preferences, find Additional Boards Manager URLs, copy the below link, and paste in the blank.
For domestic users: http://download.dfrobot.top/FireBeetle/package_firebeetle8266_index.json
For overseas users: https://raw.githubusercontent.com/DFRobot/FireBeetle-ESP8266/master/package_firebeetle8266_index.json
.png)
File->Preferences
.png)
paste url here
- Click OK
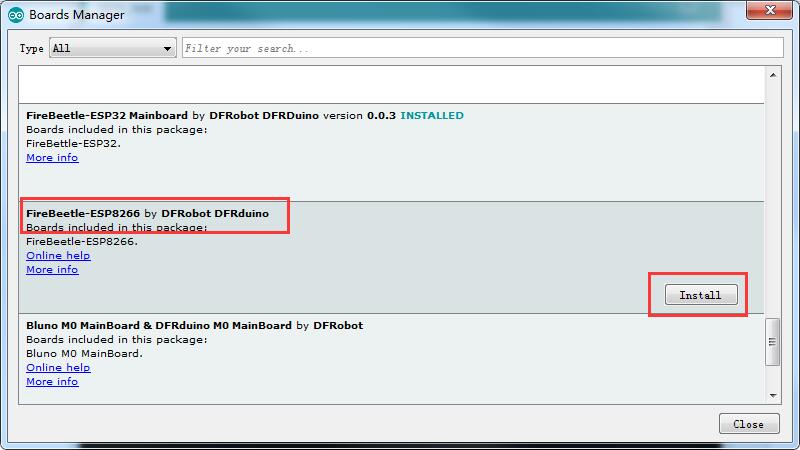
- Open Tools->Board->Boards Manager, waiting automatic update. You'll find FireBeetle-ESP8266
Now, the development environment has been installed, you can use it like a normal Arduino board.

Sample Code - Blink
The default LED for FireBeetle Board-ESP8266 is D5 (IO2), input following code:
Sample Code - Scan WiFi
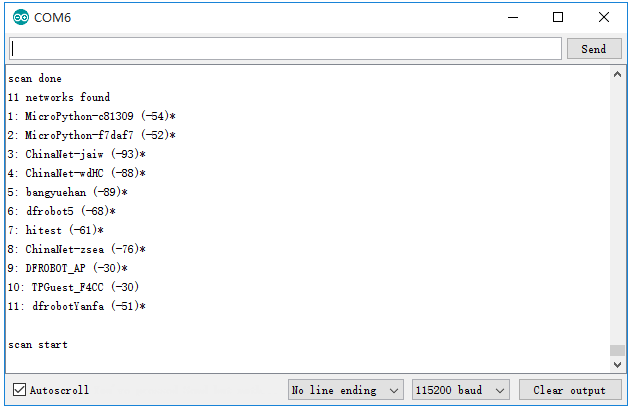
After you have installed the FireBeetle ESP8266 development environment, it will comes with a lot of sample code in Arduino IDE, you can find them in File > Examples. The follow sample code scans the around WiFi:
Open your Arduino IDE serial monitor:
วิธีการชำระเงิน
ชำระเงินค่าสินค้าโดยการโอนเงินเข้าบัญชีธนาคาร KBANK, SCB, BBL,TMB
กรุณาเก็บหลักฐานการโอนเงินของท่านไว้เพื่อแจ้งการชำระเงินด้วยค่ะ
ท่านสามารถแจ้งการชำระเงินผ่านระบบอัตโนมัติได้โดย Click Link ข้างล่างค่ะ
https://www.arduitronics.com/informpayment
ชำระเงินผ่านธนาคาร


@rfm0967y
ติดต่อสอบถาม
Join เป็นสมาชิกร้านค้า
MEMBER
