
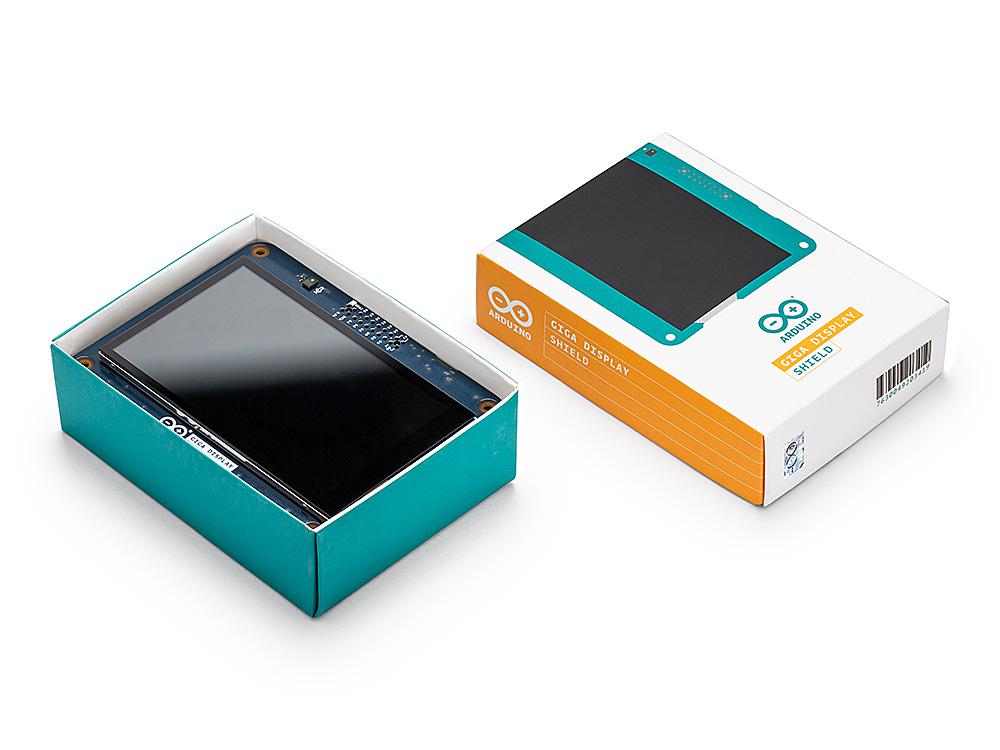
Arduino® GIGA Display Shield (แท้ 100% Italy)


| รหัสสินค้า | CC10036 |
| หมวดหมู่ | Core Boards |
| ราคา | 2,985.00 บาท |
| สถานะสินค้า | พร้อมส่ง |
| จำนวน | ชิ้น |

รายละเอียดสินค้า
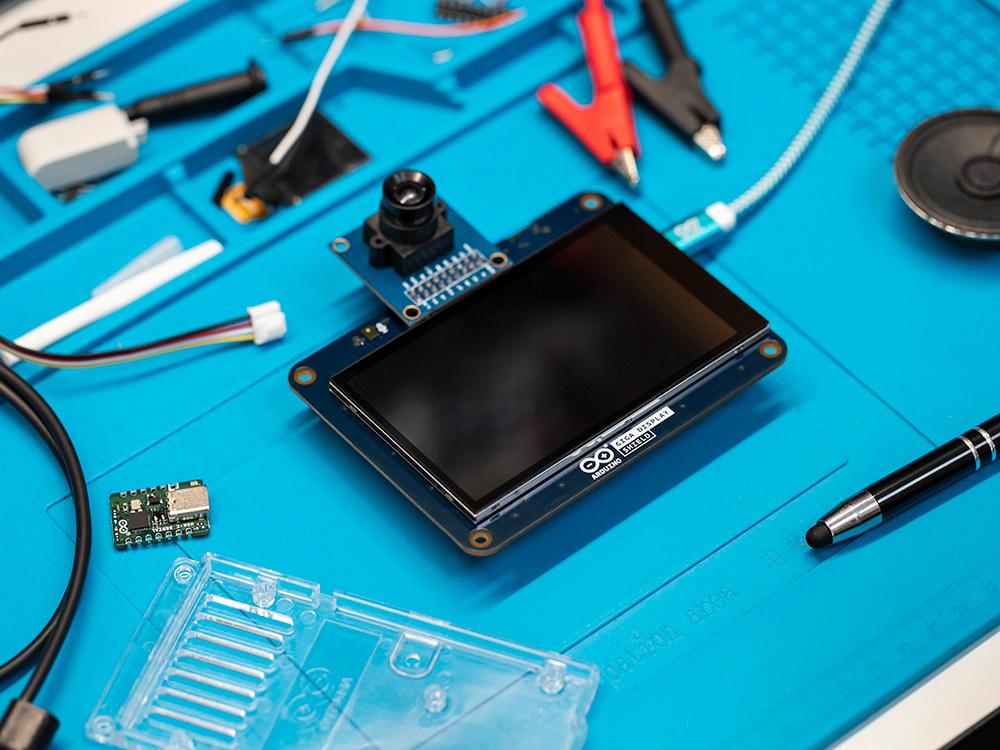
Overview
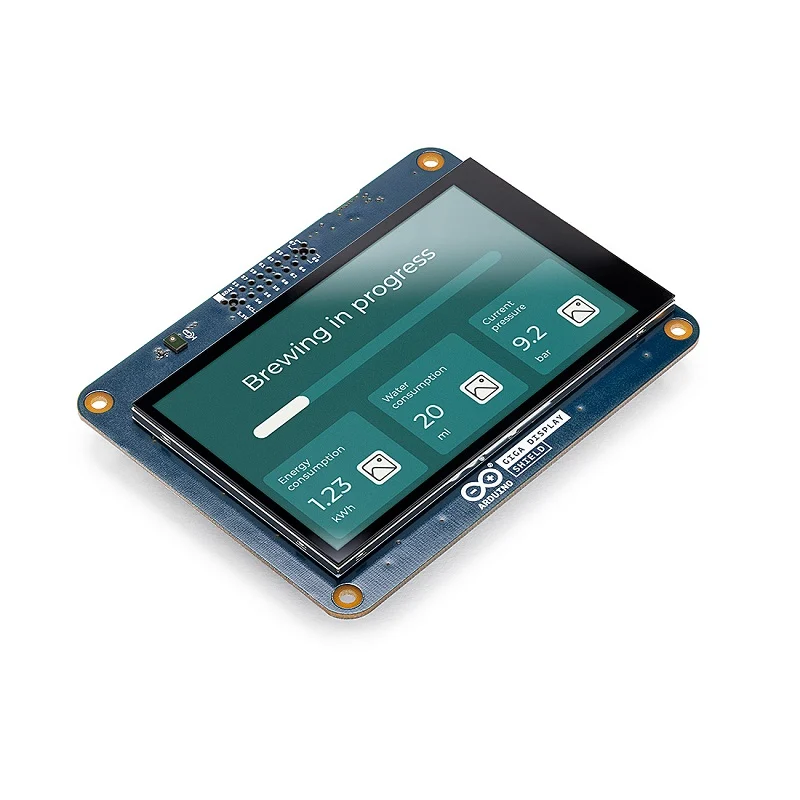
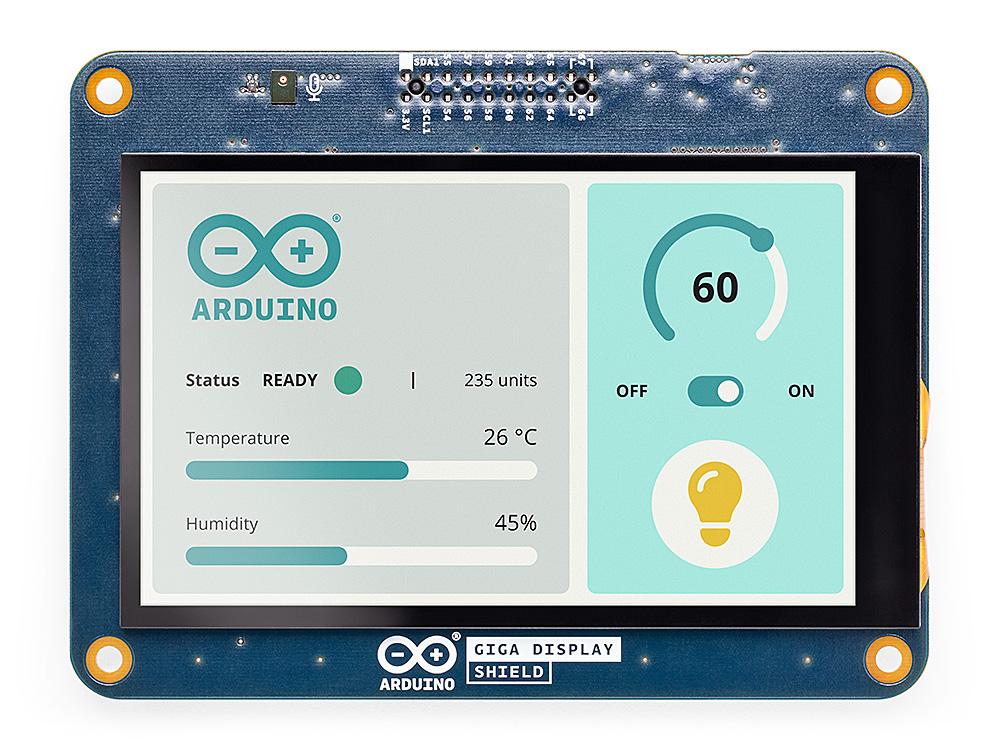
Experience the convenience of building intuitive interfaces with ease, thanks to the GIGA Display Shield's user-friendly design and comprehensive features. Elevate your project's functionality and user experience with this cutting-edge solution.
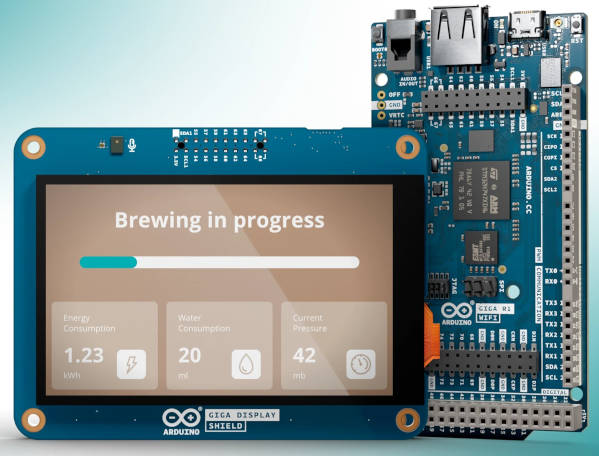
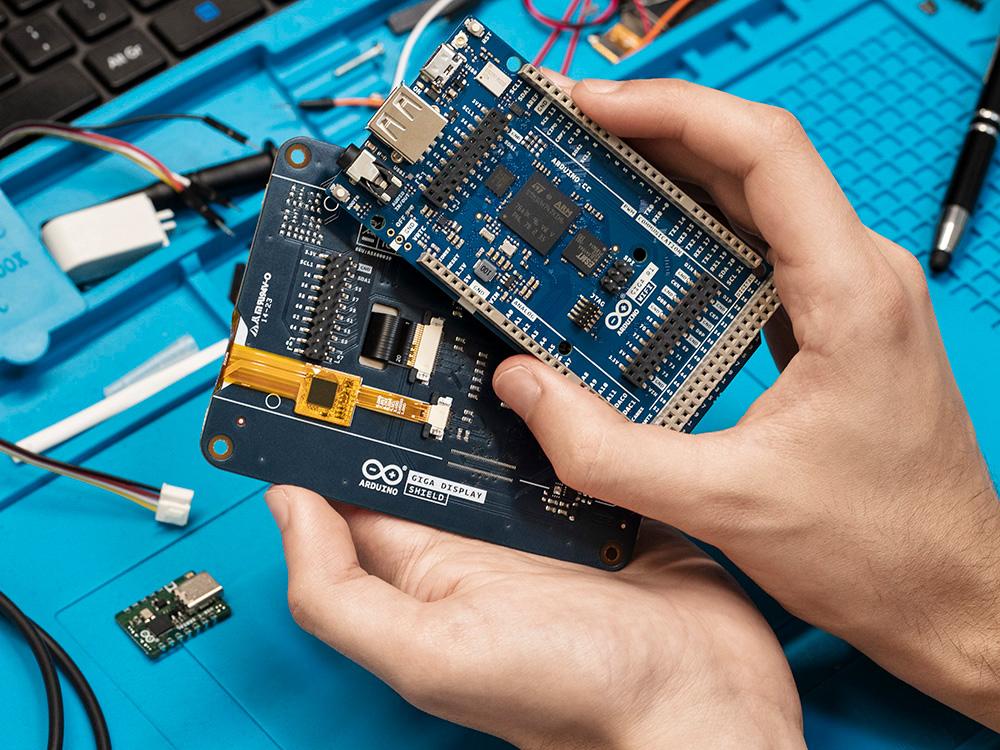
How to connect the GIGA Display Shield to the GIGA R1 WiFi?
The GIGA Display Shield connects via the middle headers (J5 and J6) on the GIGA R1 WiFi. Attach the shield from the bottom, leaving the top side of the GIGA R1 WiFi available for additional shields.
ดูคลิปสอนการใช้งาน GIGA Display Shield (หากยังไม่เคยใช้บอร์ด Arduino GIGA แนะนำให้ดูคลิปถัดไปด้านล่างก่อน)
ดูคลิปเริ่มต้นใช้งานบอร์ด GIGA (ดาวโหลดโค๊ดที่ใช้ในคลิปได้ที่ Click)
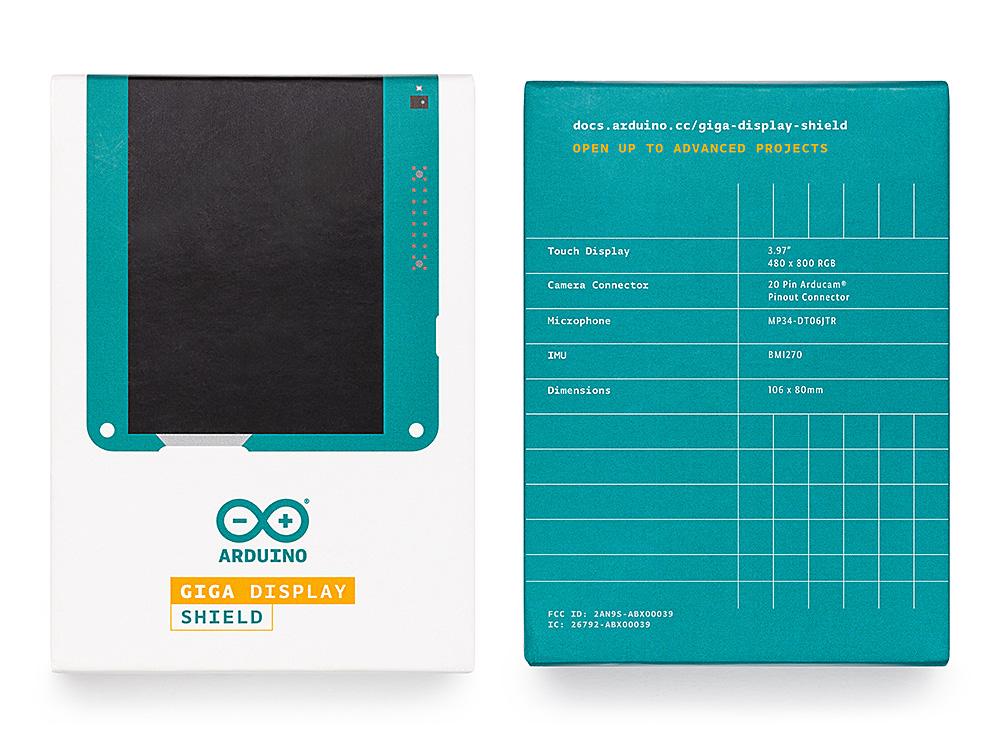
| Board | Name | Arduino® GIGA Display Shield |
| SKU | CC10036 | |
| Connectors | Camera | SOCKET 2ROW 20POS VERTICAL PASS THROUGH (Arducam compatible) |
| Display Video | F32Q-1A7H1-11020 | |
| Display Touch | F32Q-1A7H1-11008 | |
| Display | KD040WVFID026-01-C025A | |
| Size | 3.97” | |
| Resolution | 480x800 RGB | |
| Color | 16.7M | |
| Touch Mode | Five points and Gestures | |
| Interface | I2C | |
| Sensors | IMU | BMI270 |
| Microphone | MP34DT06JTR | |
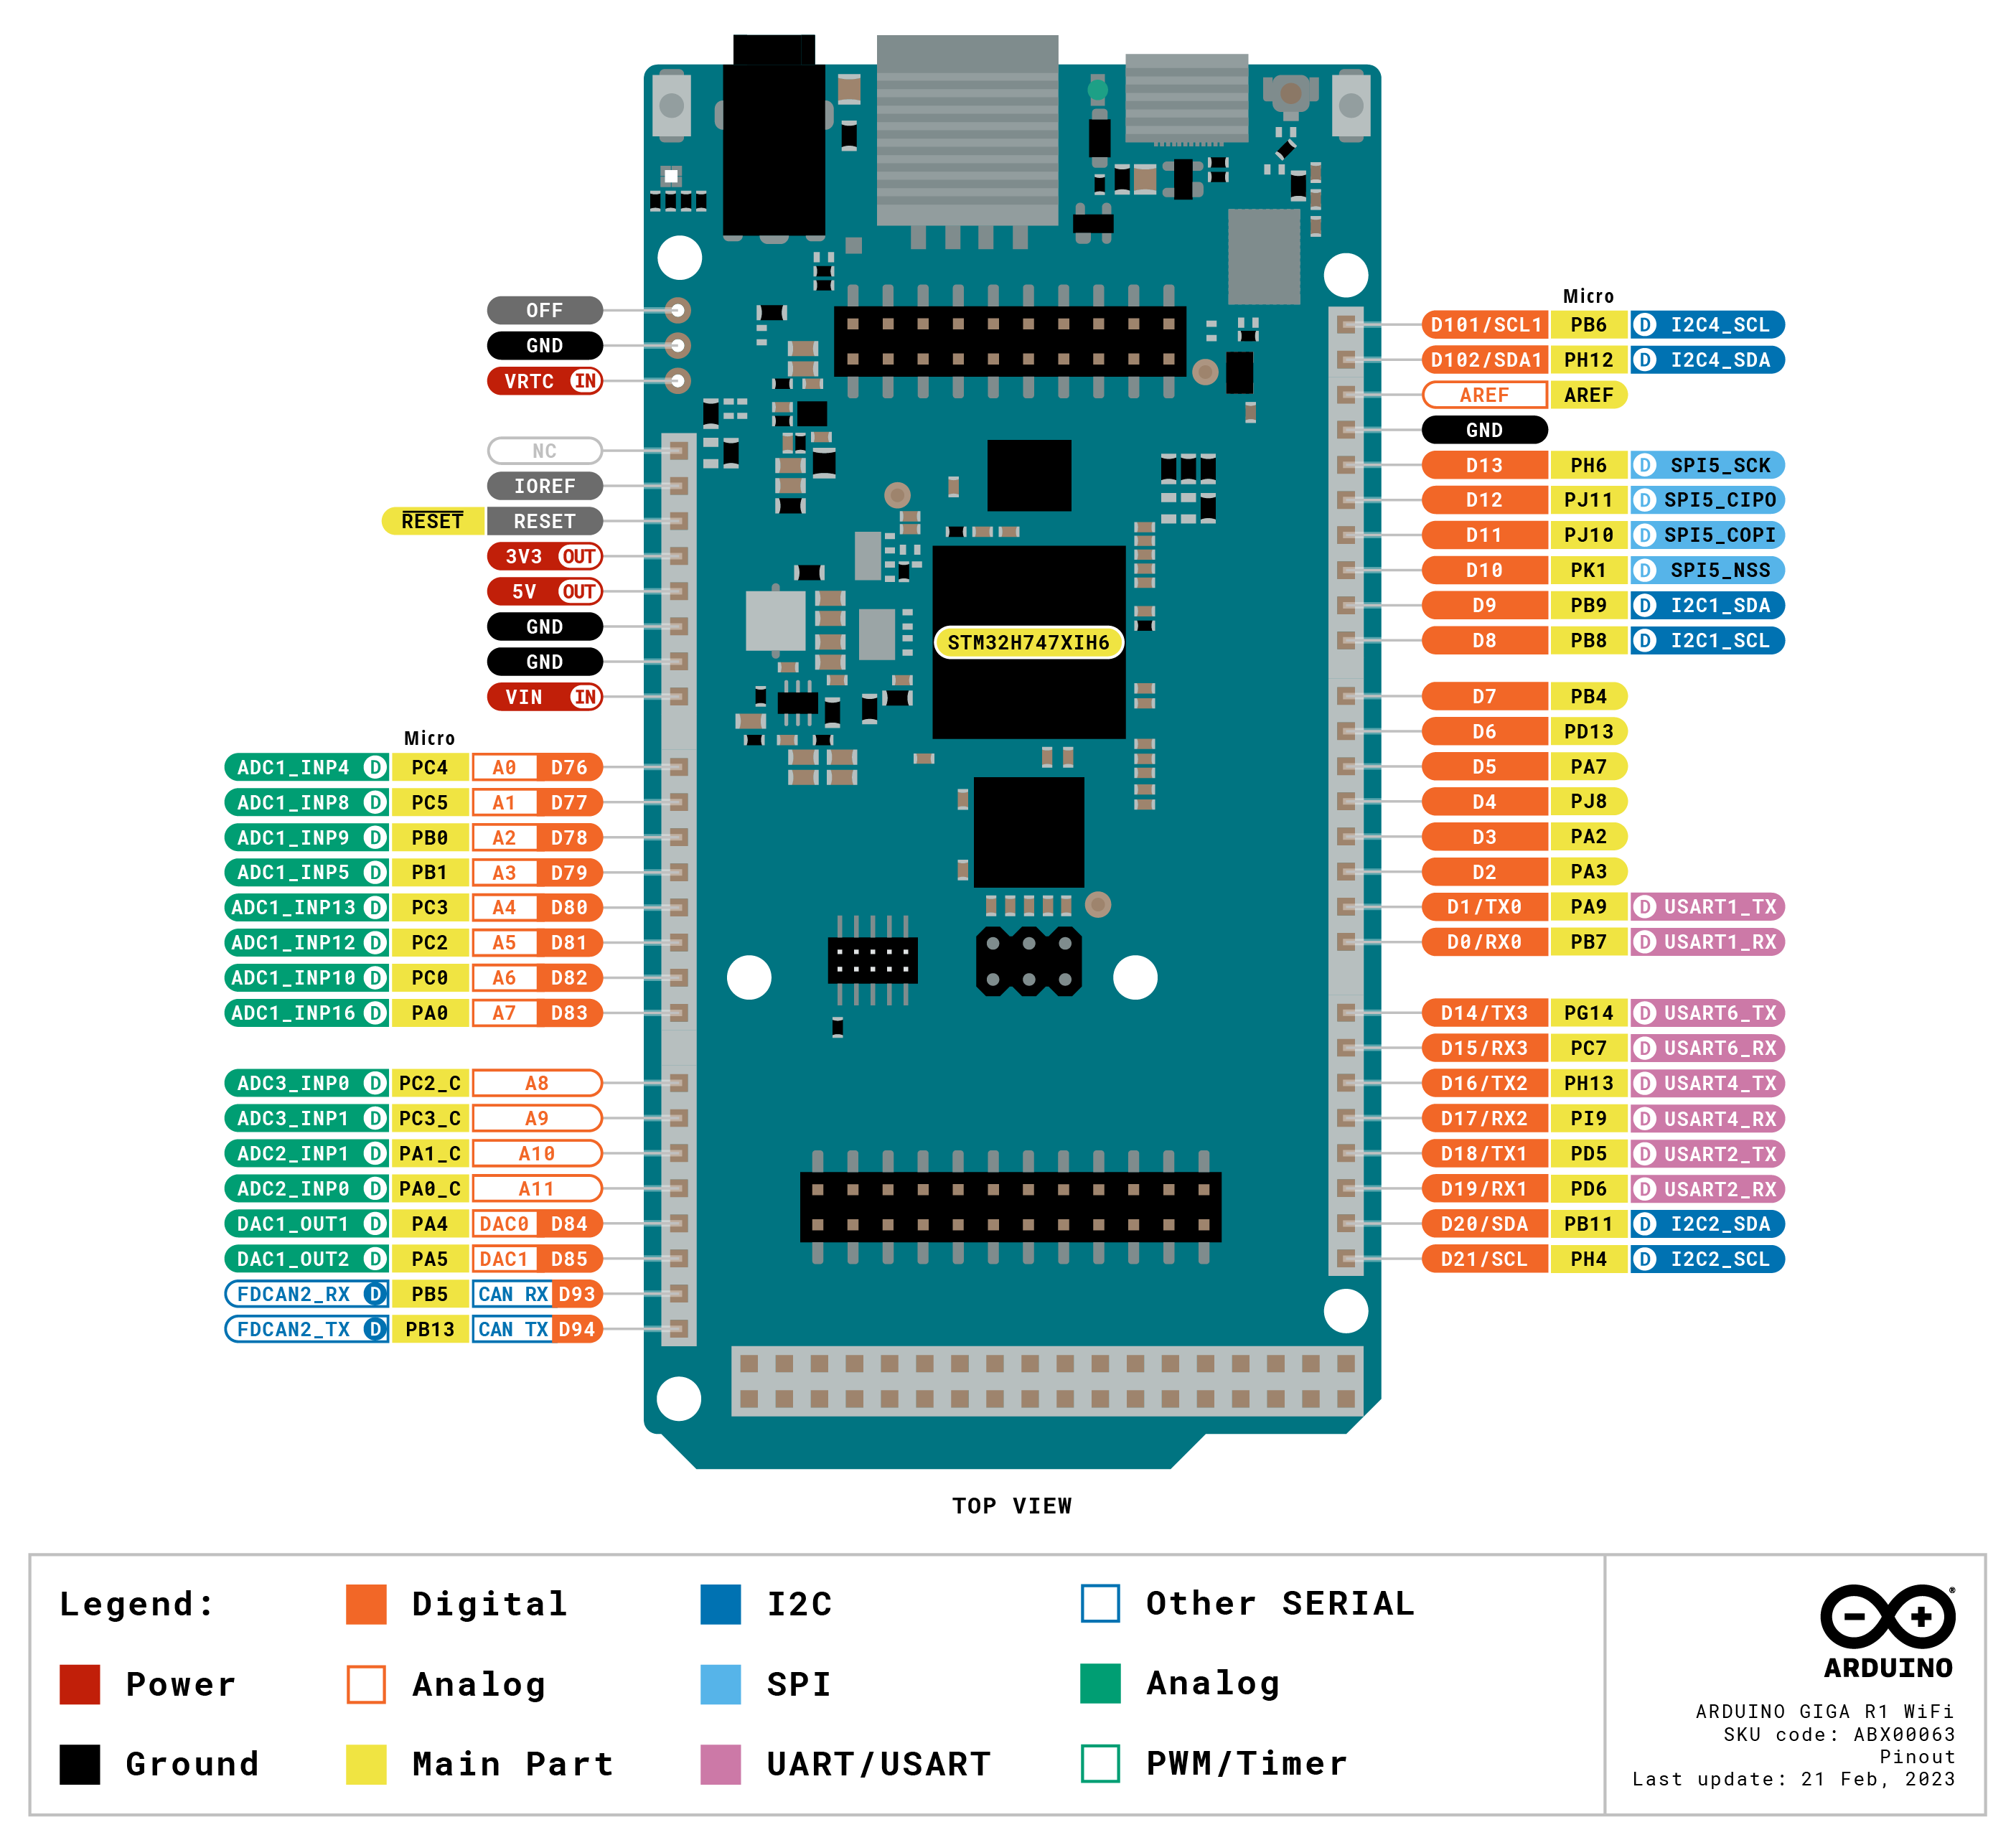
Arduino GIGA Board
ตัวอย่างการใช้งาน Wifi
ตัวอย่างการใช้งาน GIGA กับ Linux
- USB-A connector suitable for hosting USB sticks, other mass storage devices and HID devices such as keyboard or mouse.
- 3.5mm input-output jack connected to DAC0, DAC1 and A7.
- USB-C® to power and program the board, as well as simulate an HID device such as mouse or keyboard.
- Jtag connector, 2x5 1.27mm.
- 20 pin Arducam camera connector.
Technical Specifications
|
Board |
Name |
Arduino® GIGA R1 WiFi |
|
Microcontroller |
STM32H747XI dual Cortex®-M7+M4 32bit low power Arm® MCU (datasheet) |
|
|
Radio Module |
Murata 1DX dual WiFi 802.11b/g/n 65 Mbps and Bluetooth® (datasheet) |
|
|
Secure Element |
ATECC608A-MAHDA-T (datasheet) |
|
|
USB |
USB-C® |
Programming Port / HID |
|
USB-A |
Host (enable with PA_15) |
|
|
Pins |
Digital I/O Pins |
76 |
|
Analog input pins |
12 |
|
|
DAC |
2 (DAC0/DAC1) |
|
|
PWM pins |
12 |
|
|
Misc |
VRT & OFF pin |
|
|
Communication |
UART |
Yes, 4x |
|
I2C |
Yes, 3x |
|
|
SPI |
Yes, 2x |
|
|
CAN |
Yes (Requires an external transceiver) |
|
|
Connectors |
Camera |
I2C + D54-D67 |
|
Display |
D1N, D0N, D1P, D0P, CKN, CKP + D68-D75 |
|
|
Audio Jack |
DAC0, DAC1, A7 |
|
|
Power |
Circuit operating voltage |
3.3V |
|
Input voltage (VIN) |
6-24V |
|
|
DC Current per I/O Pin |
8 mA |
|
|
Clock Speed |
Cortex® M7 |
480 MHz |
|
Cortex® M4 |
240 MHz |
|
|
Memory |
STM32H747XI |
2MB Flash, 1MB RAM |
|
Dimensions |
Width |
53 mm |
|
Length |
101 mm |
|
Documentation
FAQ
DO I NEED AN EXTERNAL ANTENNA? IS IT INCLUDED WITH THE PRODUCT?
Yes and yes, this board has no on board antenna however a u.FL antenna is provided in the box.
WHICH ARDUCAM MODELS ARE COMPATIBLE WITH THE ON BOARD CAMERA CONNECTOR?
The camera adapter (J6 header) is a 20 pin adapter for Arducam cameras such as OV7675 and OV7670. For more information on how to use the camera visit the GIGA R1 WiFi Camera guide.
WHAT IS THE DIFFERENCE BETWEEN THE PORTENTA H7 AND THE GIGA R1 WIFI?
The difference between these two products are:
- The GIGA R1 WiFi uses the USB-C® to power and program the board, as well as simulate an HID device such as mouse or keyboard. In the case of the Portenta H7, the USB-C® can also be used as DisplayPort out, USB Hub or to deliver power to OTG connected devices.
- The GIGA R1 WiFi exposes all the possibilities of the STM32H7 in a more accessible way using 2.54 mm pin headers making it a more suitable option for prototyping whereas the Portenta H7 is suitable for mass production since it uses high-density connectors to save space.
- Given its form factor the GIGA R1 WiFi has the space to provide additional services such as a USB-A connector, 3.5mm input-output jack and JTAG connector on board.
CAN I USE MY PREVIOUS ARDUINO UNO, ARDUINO MEGA OR ARDUINO DUE SHIELDS WITH THE GIGA R1 WIFI?
Yes, mechanically the shields are compatible however take into account that the GIGA R1 WiFi operates at 3.3V, so we recommend double checking the tech specs of the shield to make sure it works at this voltage.
WHAT IS THE DIFFERENCE BETWEEN THE TWO USB CONNECTORS?
The GIGA R1 WiFi has two USB connectors. The USB-C® connector (USB0), next to the reset button and the u.FL antenna connector, is used for programming, serial communication and 5V power. The USB-A connector (USB1), next to the 3.5mm jack connector, is used as a USB host (not a programming port).
วิธีการชำระเงิน
ชำระเงินค่าสินค้าโดยการโอนเงินเข้าบัญชีธนาคาร KBANK, SCB, BBL,TMB
กรุณาเก็บหลักฐานการโอนเงินของท่านไว้เพื่อแจ้งการชำระเงินด้วยค่ะ
ท่านสามารถแจ้งการชำระเงินผ่านระบบอัตโนมัติได้โดย Click Link ข้างล่างค่ะ
https://www.arduitronics.com/informpayment
ชำระเงินผ่านธนาคาร


@rfm0967y
ติดต่อสอบถาม
Join เป็นสมาชิกร้านค้า
MEMBER
