
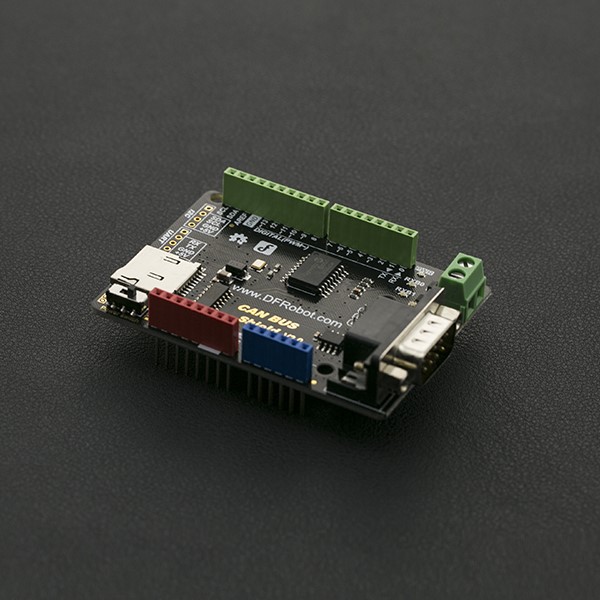
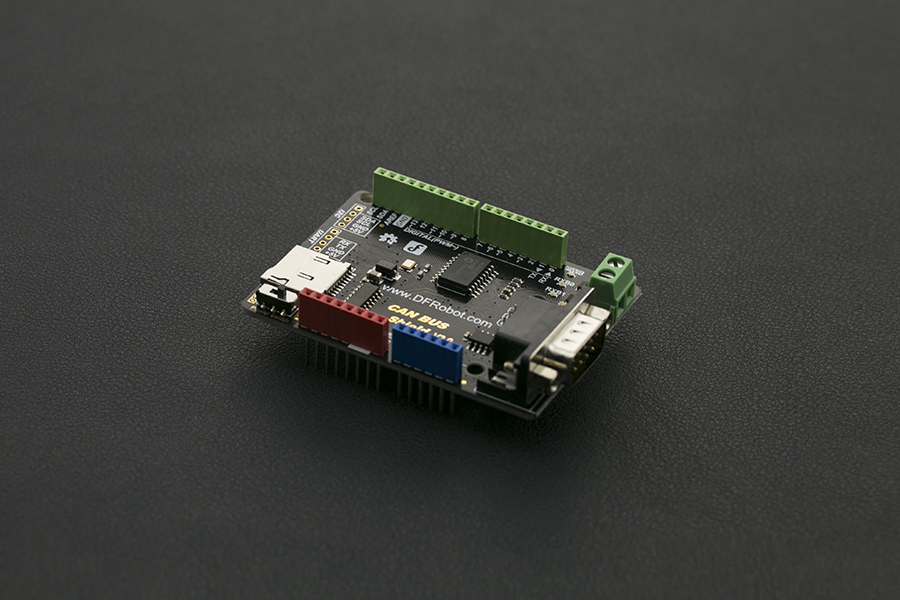
CAN BUS Shield for Arduino (แท้จาก DFRobot)


รายละเอียดสินค้า
This is an Arduino CAN Bus shield. It is compatible with the Arduino standard interface and can be stacked on an Arduino UNO, Leonardo or MEGA board.
FEATURES
- Supports standard frame, extended frame transmitting and receiving
- Supports two reception methods: Rotational and interrupt detection
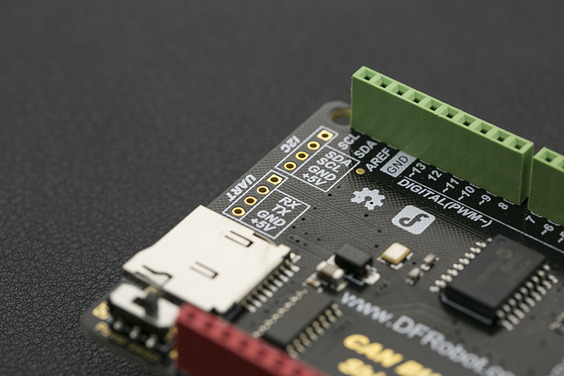
- Supports UART, i2C and DB9 terminal interfaces
- Supports SD card data storage
- Supports Arduino mainboard power supply or DB9 power supply (Switch)
SPECIFICATION
- Chip: MCP2515
- Power supply: 3.3 ~ 5V Arduino board power supply or DB9 interface power supply
- Dimension: 76x54x19 (mm)/ 2.99x2.12x0.75 inches
- Weight: 40g
DOCUMENTS
SHIPPING LIST
- CAN-BUS Shield V2.0 x1
- 8-Pin header x1
Tutorial
Requirements
- Hardware
- Arduino UNO x3
- CAN-BUS Shield V2 x3
- Dupont Cable x4
- Software
Basic CAN BUS Receiving and sending function (receiving: polling mode)
In this section we will demonstrate basic CAN BUS receiving and sending functions. Receiving uses polling mode. You can accept any ID standard data frame or extended frame. The transmitting node sends a standard data frame which ID is 0x06 per 100ms.
Connection Diagram

Sample Code
Receiver Code
Sender code
Result
Receiver: output in the serial port

Basic CAN BUS Receiving and sending function(receive:interrupt mode)
In this section we will test basic CAN BUS receiving and sending functions in this experiment, but will only receive data by interrupt mode.
Connection Diagram
Sample Code
Receiver Code
Sender code
Result
Receiver: output in the serial port
Accecpted to specify the data frame of the ID(receive:interrupt mode)
This test is to specify the data frame of the ID when the CAN module is initialized. Data is received using interrupt mode.
Connection Diagram
 ]
]
Sample Code
Receiver Code
Sender code
Result

The received data frame has no data from ID 0x06,0x00,0x01 or 0x02 which not matched with the ID which is set by Data acceptance filter. This shows that the filter can be a single job, or a few filters working at the same time, or all of the filters working at the same time. When all filters are not in use then can receive any data.

Sample Code
Node 1 Code
Node 2 code
Node 3 code
Result
Output in the each serial port  COM10 is running Node 3 code, which only receives the ID 0x08 data frame. COM12 is running Node 2 code, which only receives the ID 0x09 data frame. COM21 is running Node 1 code, which receives the ID 0x09 and 0x08 data frame.
SD CARD Read and Write
The purpose of this experimental is receiving node receives the ten data from the sending node.And then put it into the SD card.Finally read it from SD card out and print it out through the serial port.
Connection Diagram
Sample Code
Receiver Code
Sender Code
Result
Receiver: output in the serial port Experimental phenomenon analysis: the receiving node receives the data frame from ID 0x60, and deposits it in a file named Node0x60.text file. Then it closes the file. Finally, it opens the file, and reads the data and prints it through the serial port.
Protocol/Library Explanation
วิธีการชำระเงิน
ชำระเงินค่าสินค้าโดยการโอนเงินเข้าบัญชีธนาคาร KBANK, SCB, BBL,TMB
กรุณาเก็บหลักฐานการโอนเงินของท่านไว้เพื่อแจ้งการชำระเงินด้วยค่ะ
ท่านสามารถแจ้งการชำระเงินผ่านระบบอัตโนมัติได้โดย Click Link ข้างล่างค่ะ
https://www.arduitronics.com/informpayment
ชำระเงินผ่านธนาคาร


@rfm0967y
ติดต่อสอบถาม
Join เป็นสมาชิกร้านค้า
MEMBER
