
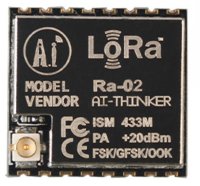
LoRa SX1278 LoRa wireless module 433MHz Ra-01 SPI Interface โมดูล LoRa SX1278 รุ่น Ra-01 433Mhz with antenna soldered


| รหัสสินค้า | AS10252 |
| หมวดหมู่ | LoRa / LoRa+WiFi |
| ราคา | 195.00 บาท |
| สถานะสินค้า | พร้อมส่ง |
| จำนวน | ชิ้น |

รายละเอียดสินค้า
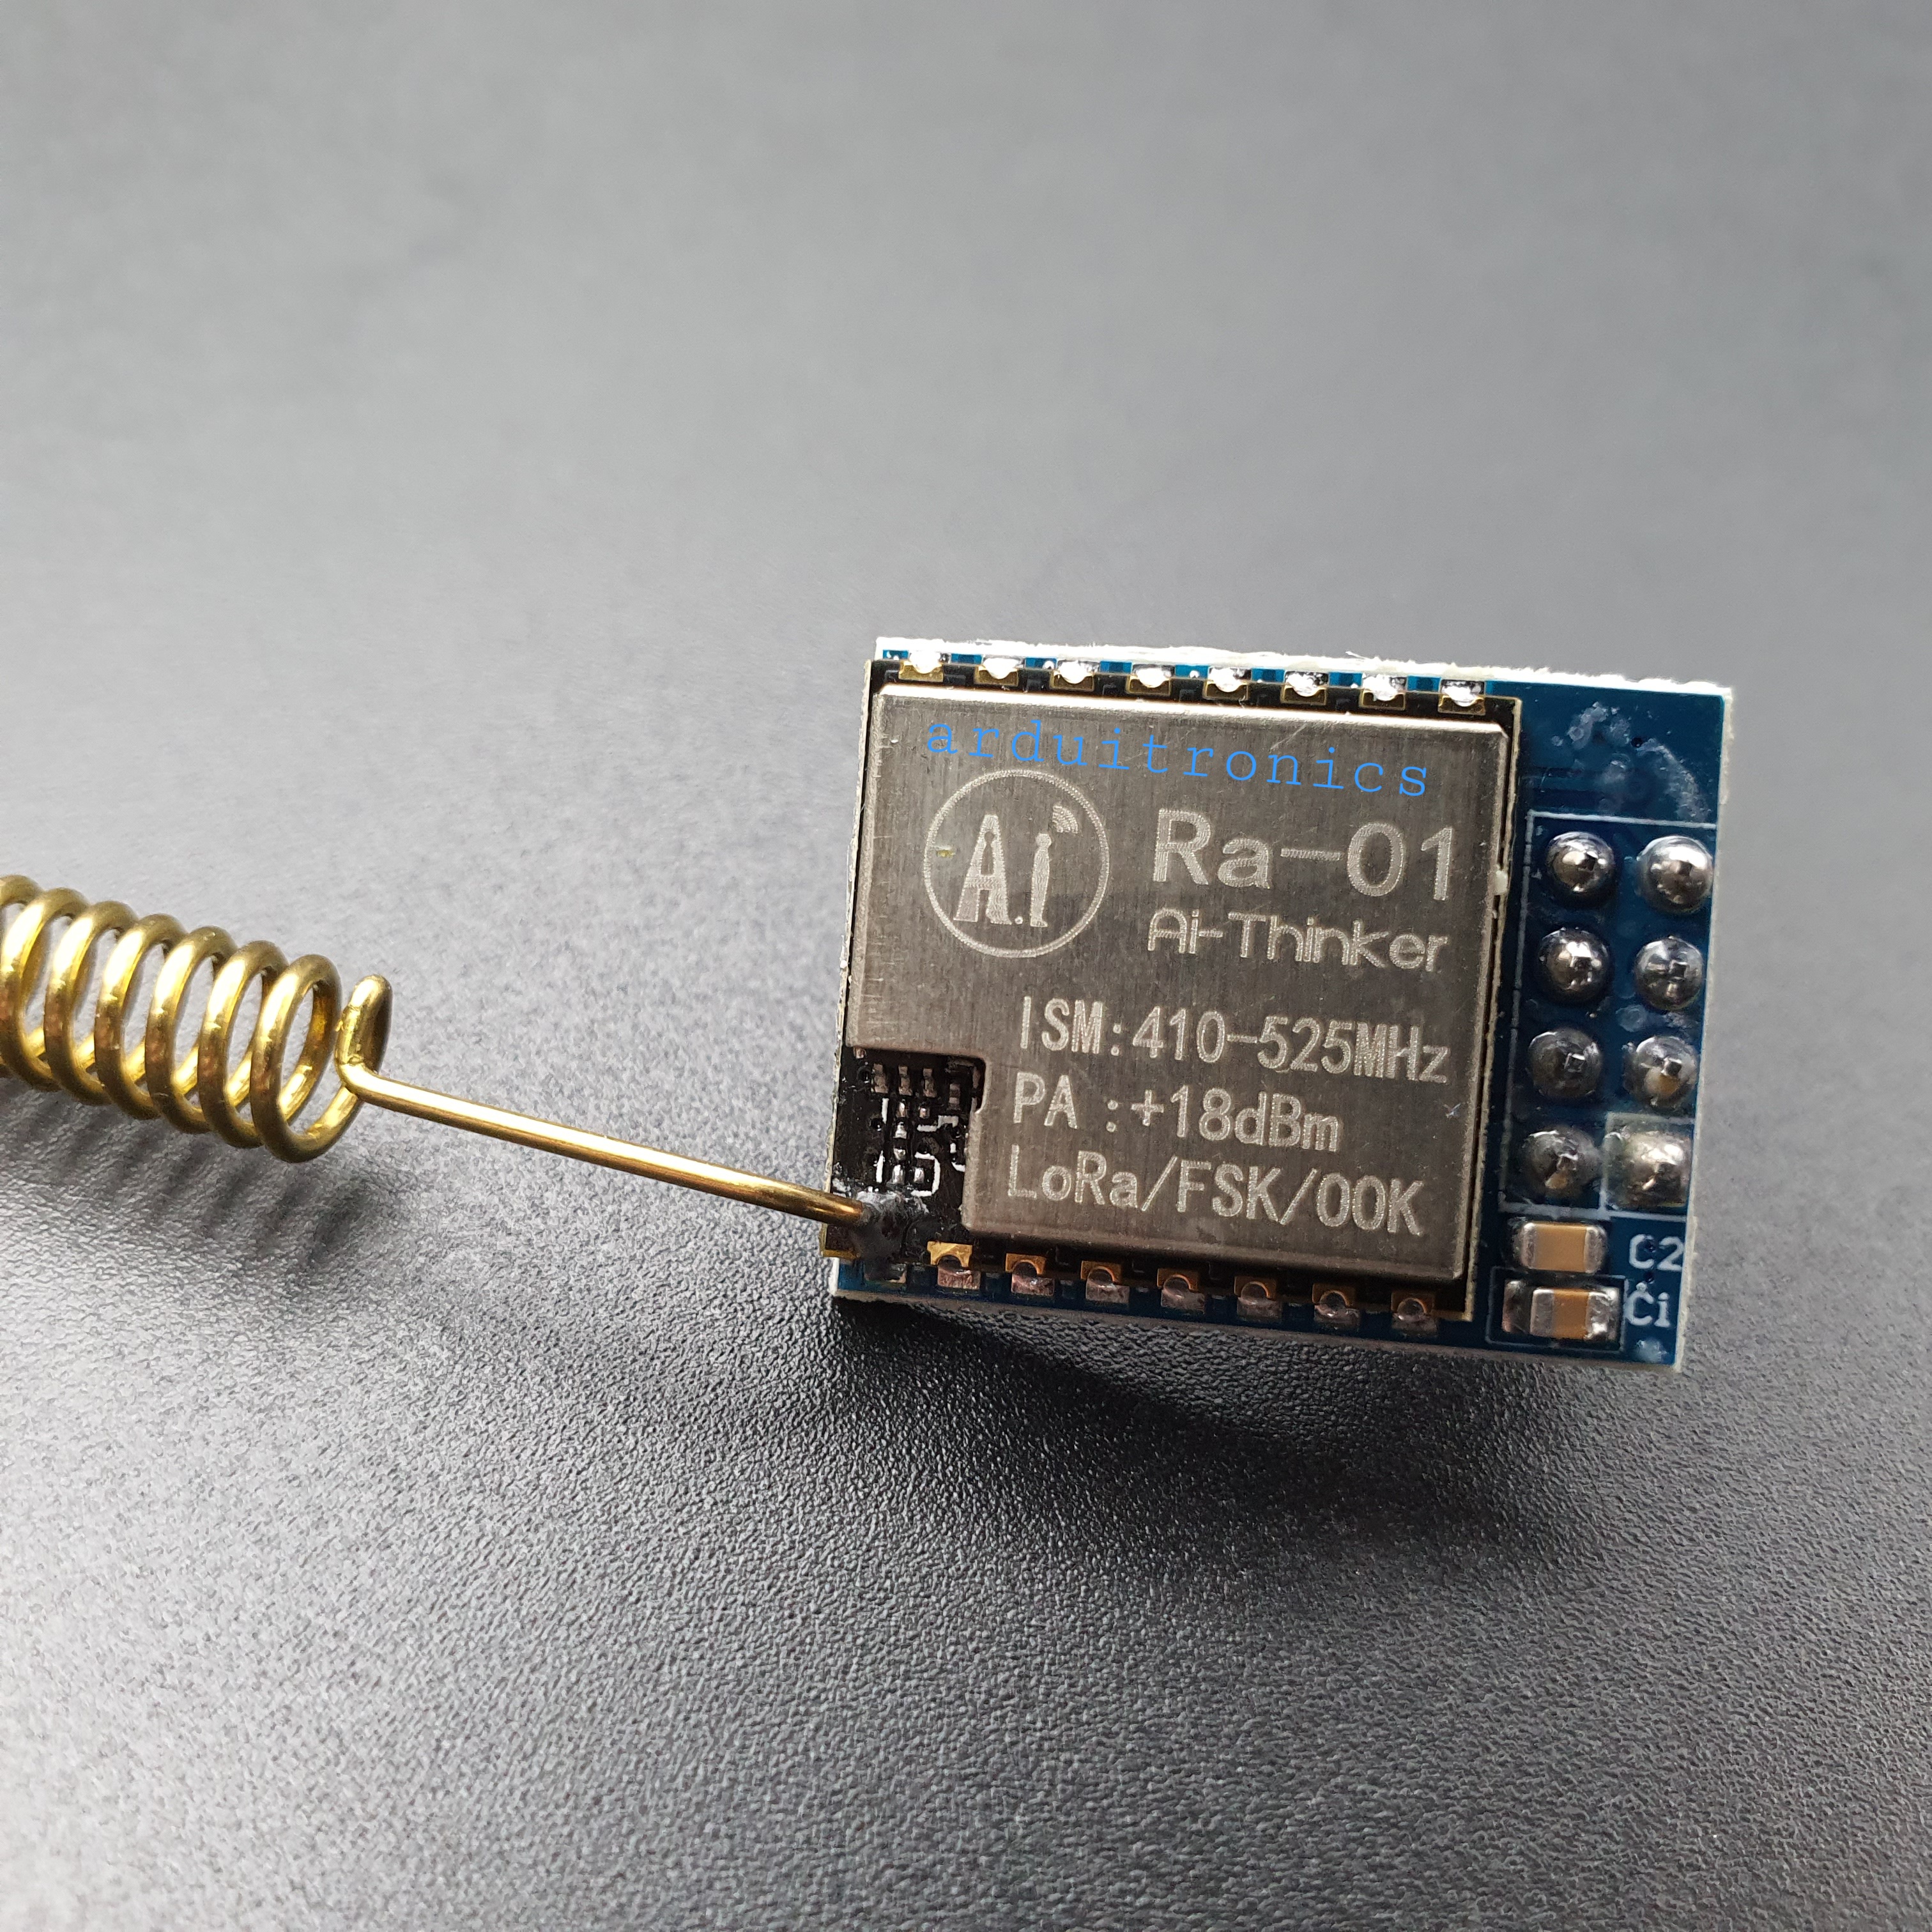
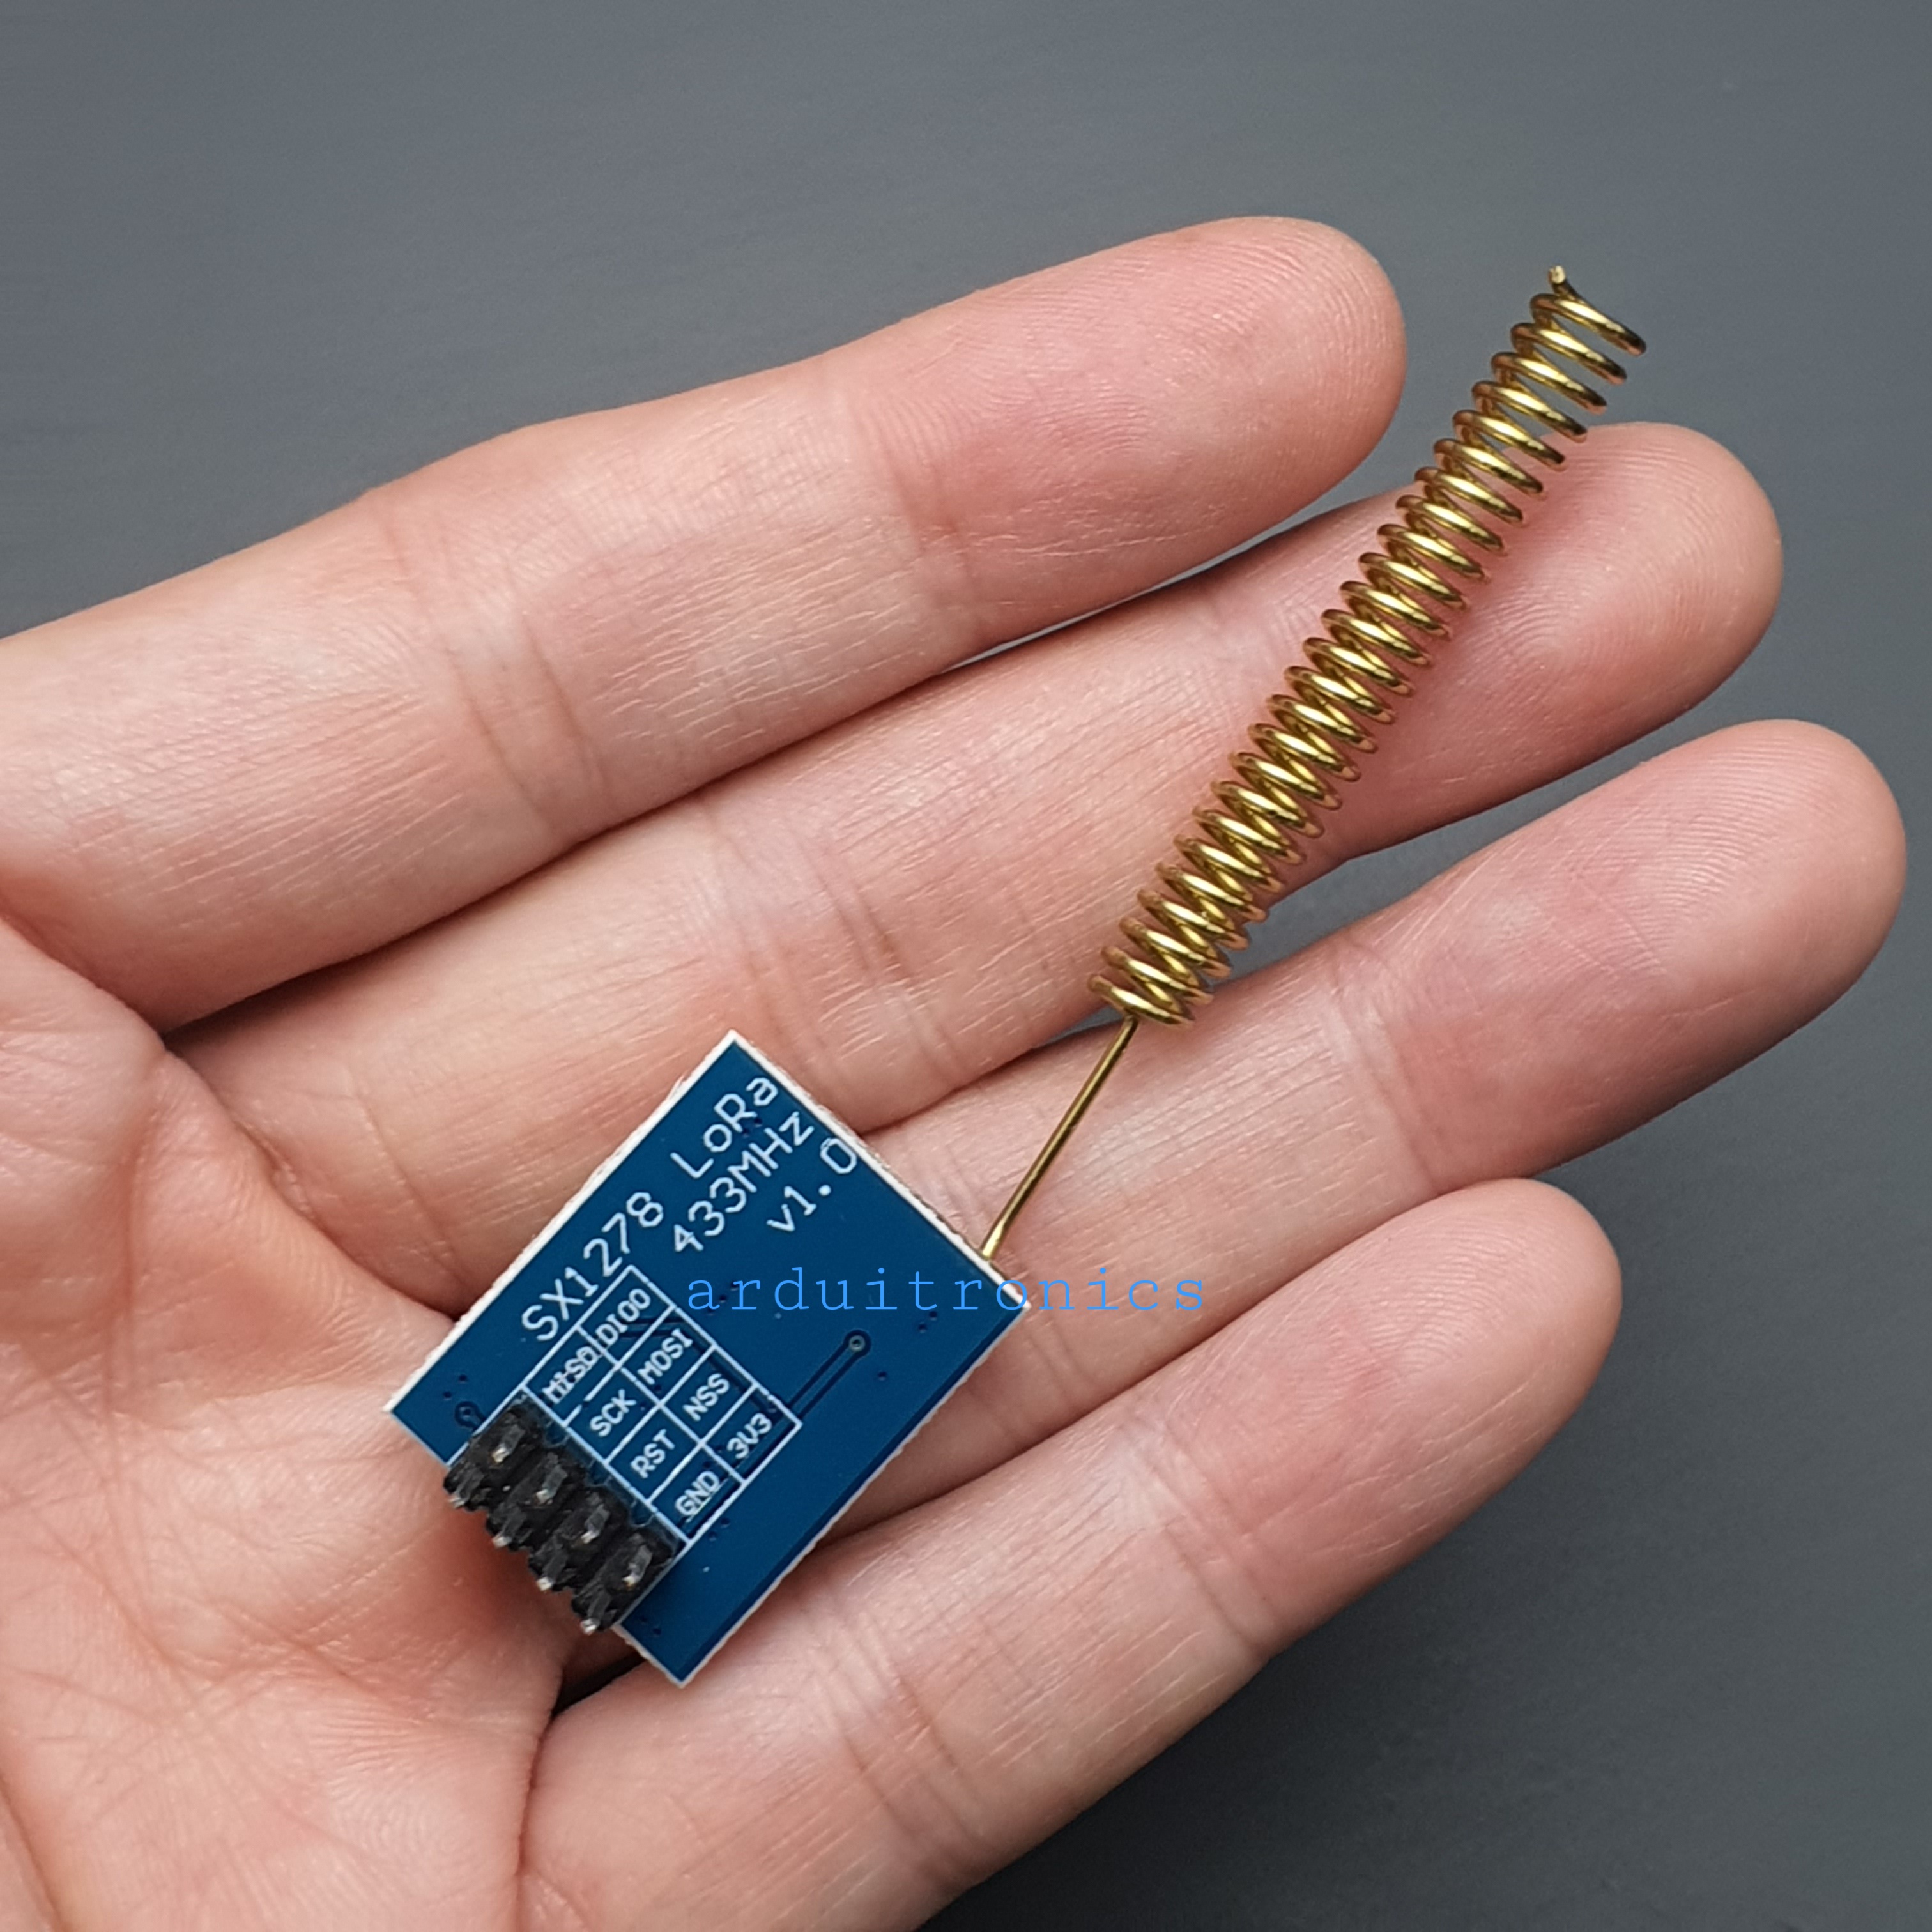
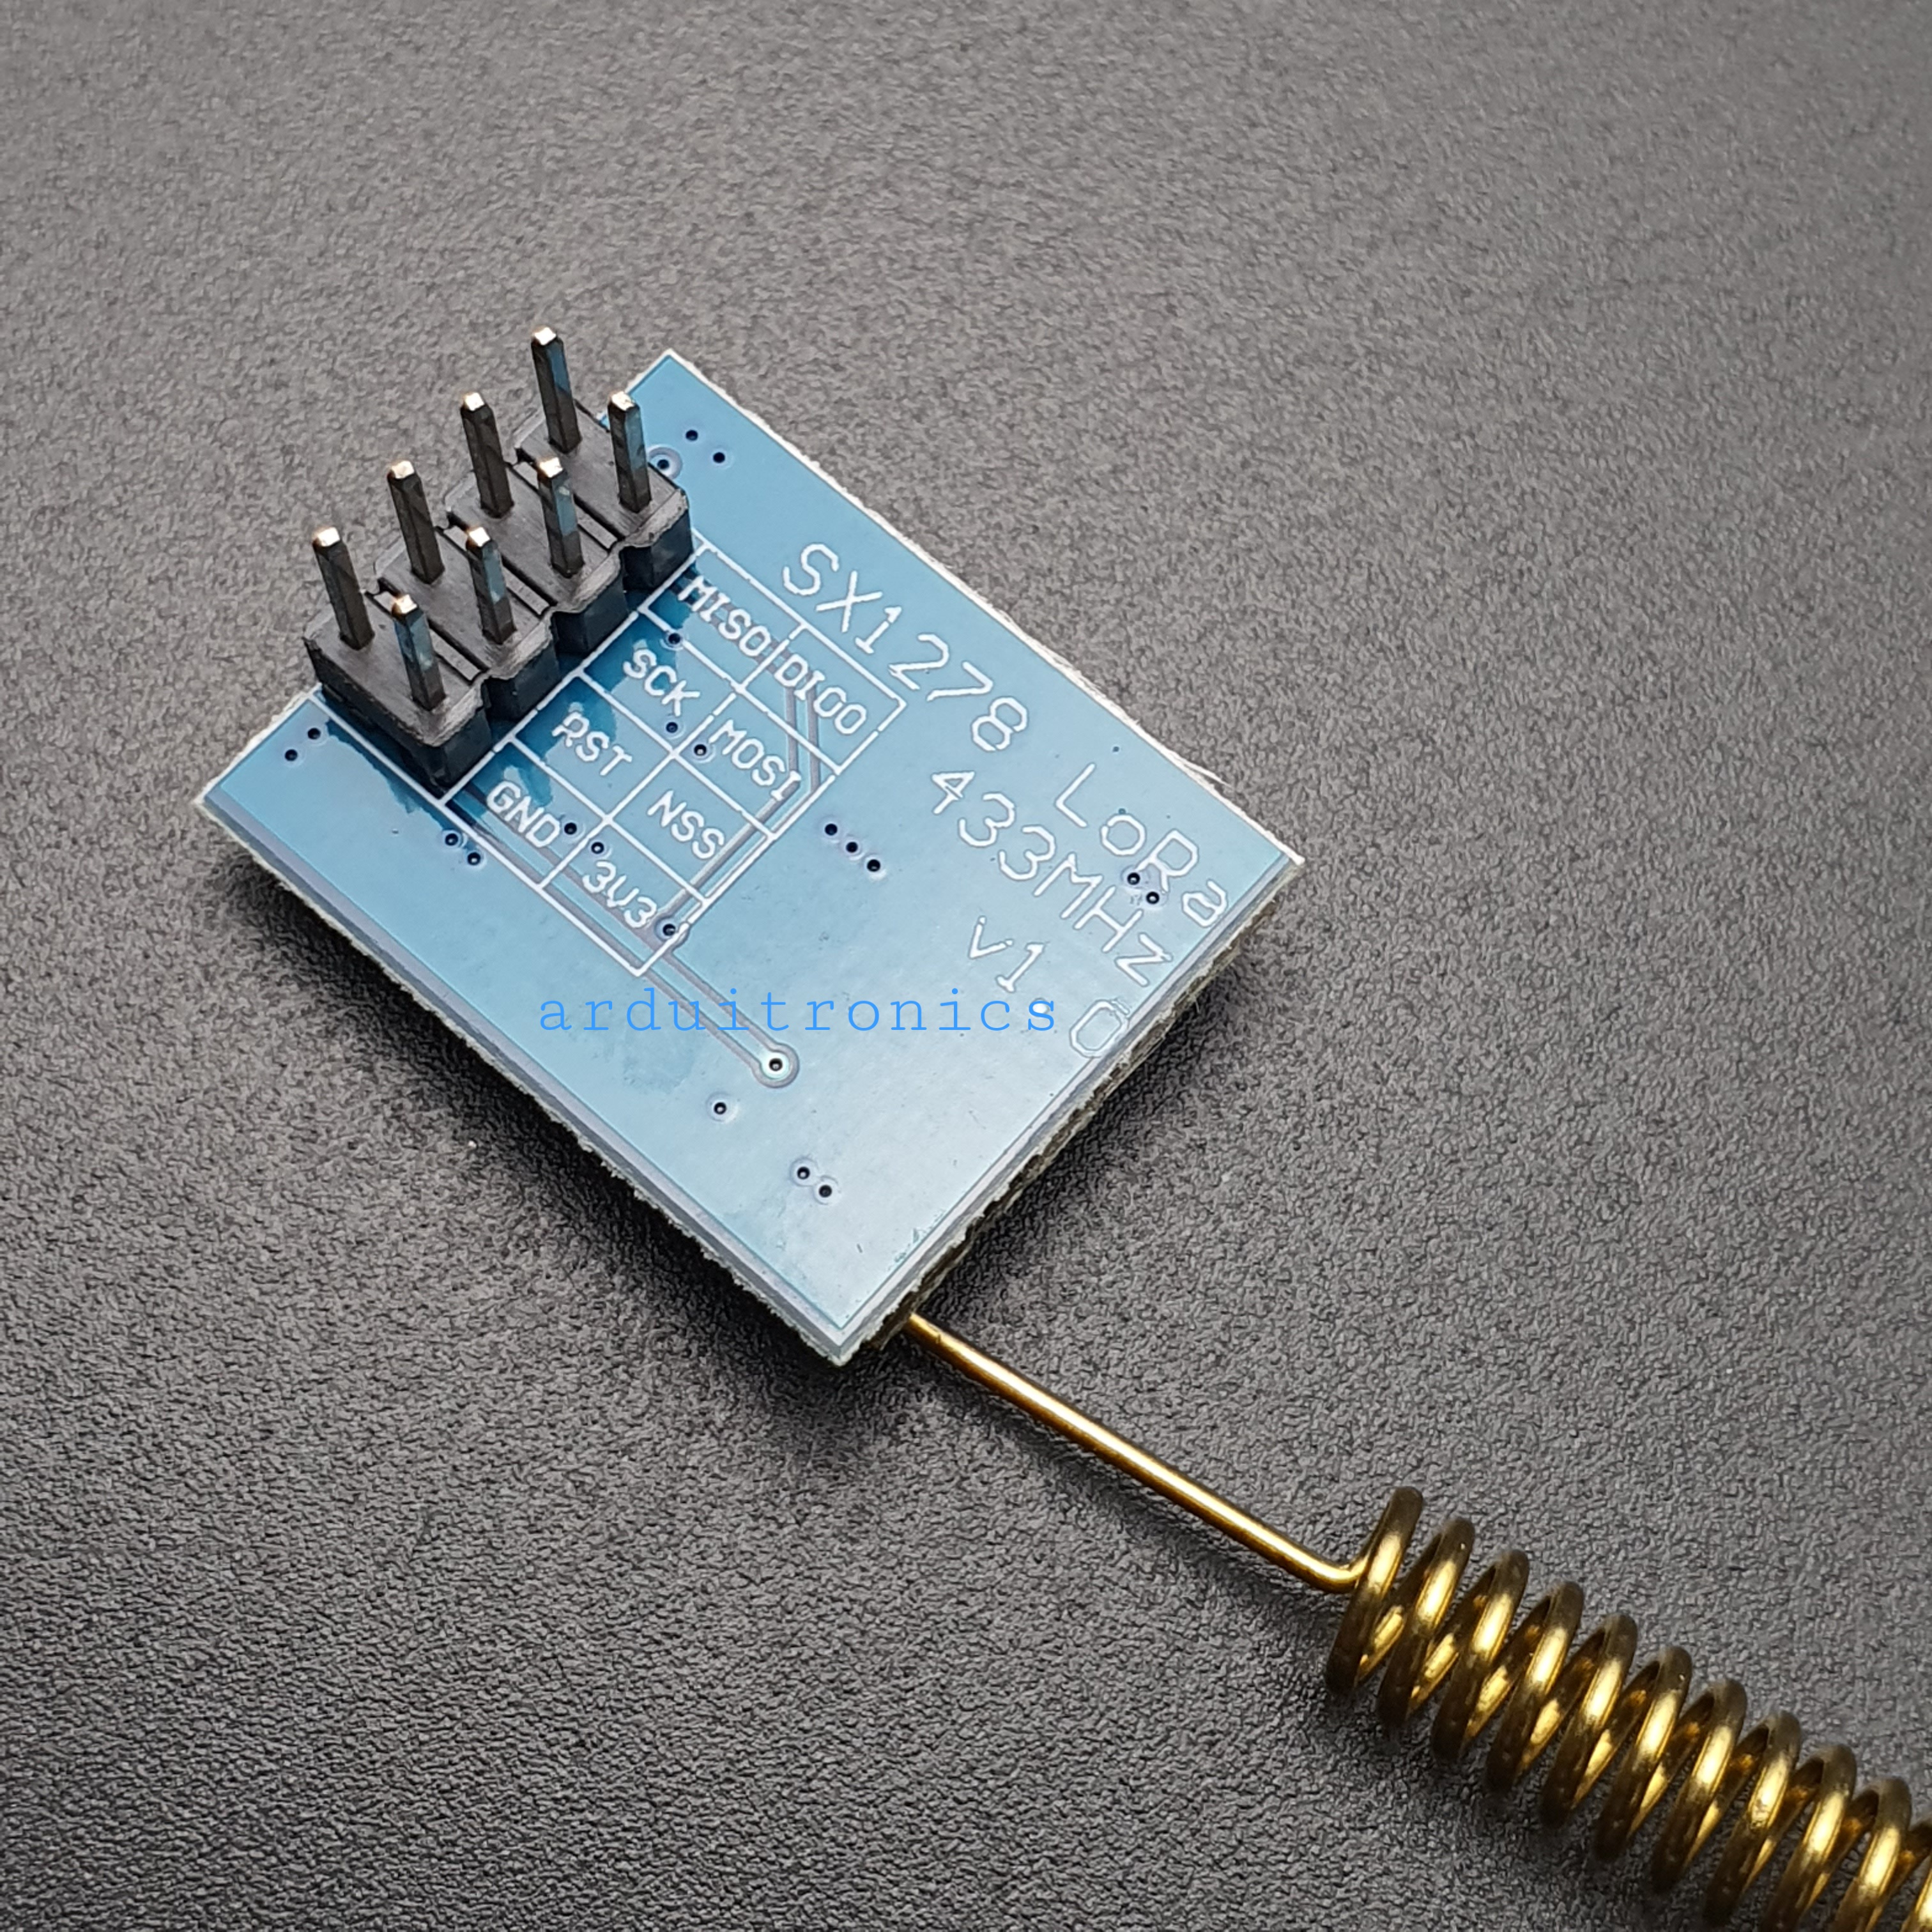
LoRa SX1278 LoRa wireless module 433MHz Ra-01 SPI Interface โมดูล LoRa SX1278 รุ่น Ra-01 433Mhz with antenna soldered
LoRa SX1270 รุ่น Ra-01 ผลิตโดย AI Thinker เจ้าของเดียวกับผู้ผลิต โมดูล ESP8266 ที่โด่งดังและใช้งานกันทั่วโลก จึ่งมั่นใจในประสิทธิภาพของโมดูล LoRa Ra-01
ตัวอย่างโคด Arduino SX1278
https://github.com/jgromes/LoRaLib
** แนะนำให้ซื้อคู่กับแผ่น PCB ขยายขา AG00110 แต่ต้องบัคกรีเอาตัวต้านทาง 2 ตัวดังภาพต้านล่างออกก่อน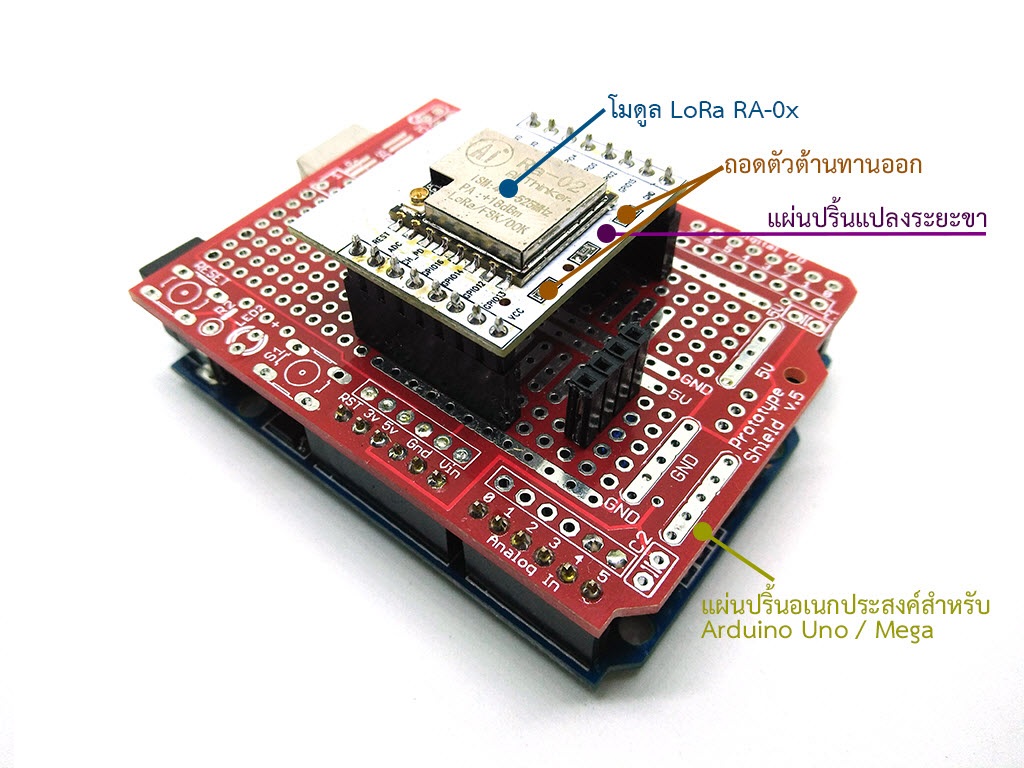

ขั้นตอนการ setup การส่งข้อมูลผ่าน RA-01 สามารถดูได้จาก Click Here
A set up guide for sending LoRa data using the Arduino UNO with the RA-01 module by Ai-Thinker
I’ve seen a few people asking how to set this up in various places. It’s pretty easy once you know how to plug it together and which library to use. I’m using this library https://github.com/sandeepmistry/arduino-LoRa which is available in the Arduino IDE via Sketch > Include Library > Manage Libraries. Search for and then install LoRa by Sandeep Mistry as below.

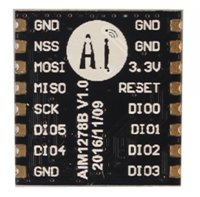
If you have the same basic RA-02 Module that I bought, it’s going to be pretty tricky to solder connections. The module is 15mm wide so the pads on the back are tiny.
I couldn’t find a breakout board for this so I used one made for an ESP12. The spacing is the same and the pins I needed are all available.
The video below is a bit long-winded but explains perfectly how to solder this type of module to a breakout board.
My effort isn’t as clean as the video above!
The wiring is pretty simple. For background you can read this page about SPI on the Arduino – https://www.arduino.cc/en/Reference/SPI and this page for the wiring the SX1278 https://github.com/sandeepmistry/arduino-LoRa#semtech-sx1276777879-wiring but it’s probably easier to just follow the diagram below.

The pins on the RA-02 look like this with the board face up and the aerial socket top left.

IMPORTANT ! Before connecting the module to power, install the aerial – push it firmly into place. The chip can be damaged if you try transmitting without the aerial.
 Use the diagram above. |
 The wiring on the UNO |
When it’s all connected you can try some of the examples (File > Examples > LoRa) to see if things are generally working.
I have a Heltec 32 LoRa Kit set up to receive packets (tutorial coming soon for this board). When I upload the example Sketch ‘LoRaSender’ to the Arduino UNO I see this on the serial output of the Heltec Board.

Which shows that the loop in the Arduino code below is sending data via the SX1278 chip correctly.
void loop() {
 Serial.print("Sending packet: ");
 Serial.println(counter);

 // send packet
 LoRa.beginPacket();
 LoRa.print("hello ");
 LoRa.print(counter);
 LoRa.endPacket();

 counter++;

 delay(5000);
วิธีการชำระเงิน
ชำระเงินค่าสินค้าโดยการโอนเงินเข้าบัญชีธนาคาร KBANK, SCB, BBL,TMB
กรุณาเก็บหลักฐานการโอนเงินของท่านไว้เพื่อแจ้งการชำระเงินด้วยค่ะ
ท่านสามารถแจ้งการชำระเงินผ่านระบบอัตโนมัติได้โดย Click Link ข้างล่างค่ะ
https://www.arduitronics.com/informpayment
ชำระเงินผ่านธนาคาร


@rfm0967y
ติดต่อสอบถาม
Join เป็นสมาชิกร้านค้า
MEMBER
