
SparkFun GPS Logger Shield (แท้จาก Sparkfun, USA)
| รหัสสินค้า | AS20040 |
| หมวดหมู่ | Receiver/RTK/Timing |
| ราคา | 2,080.00 บาท |
| สถานะสินค้า | พร้อมส่ง |
| จำนวน | ชิ้น |
หยิบลงตะกร้า

Tags : GPS, GPS shield
รายละเอียดสินค้า
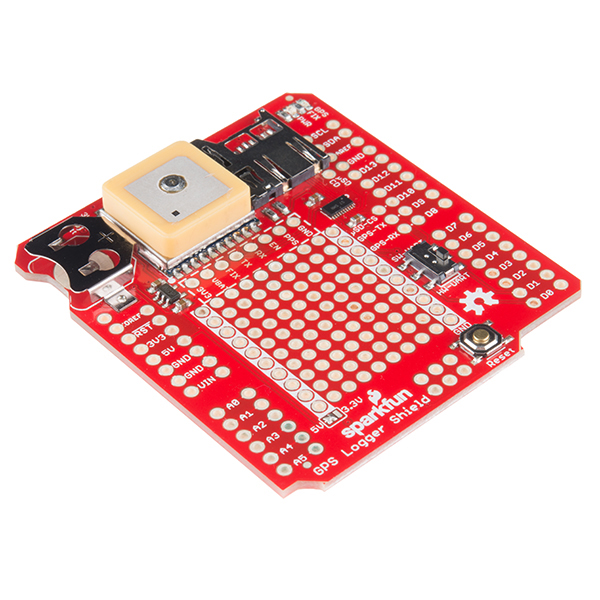
The SparkFun GPS Logger Shield equips your Arduino with access to a GPS module, µSD memory card socket, and all of the other peripherals you’ll need to turn your Arduino into a position-tracking, speed-monitoring, altitude-observing wonder logger. The shield is based around a GP3906-TLP GPS Module – a 66-channel GPS receiver featuring a MediaTek MT3339 architecture and up to a 10Hz update rate. The GPS module will stream constant position updates over a simple TTL-level serial port, which you can then log to a µSD card and/or use for other purposes.
Everything on the shield is highly configurable: A switch allows you to select the GPS module’s UART interface between either hardware or software ports, the µSD card operates over a hardware SPI port, which should be compatible with most Arduino layouts, and extra prototyping space should allow you to add those last, few components you need to complete your project. The GPS Logger Shield’s main voltage supply is taken from the Arduino 5V header pin. This voltage is regulated down to 3.3V, which is supplied to both the GPS module and the µSD card. These two components should consume, about 30mA on average, but they may very occasionally spike to around 100mA. We also highly recommend a 12mm Coin Cell Battery, which fits into the GPS Shield’s battery holder.
Note: The shield does not come with headers installed
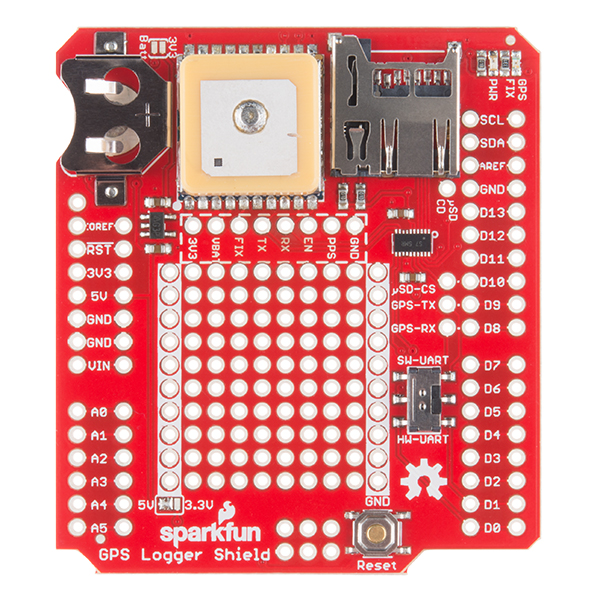
- On-Board GP3906-TLP GPS Module
- 12mm Coin cell battery socket
- µSD memory card socket
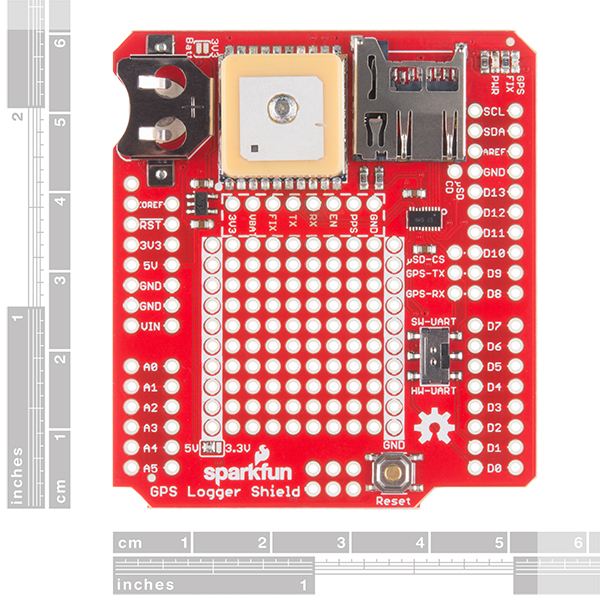
- Standard Arduino sized shield
- Prototyping area
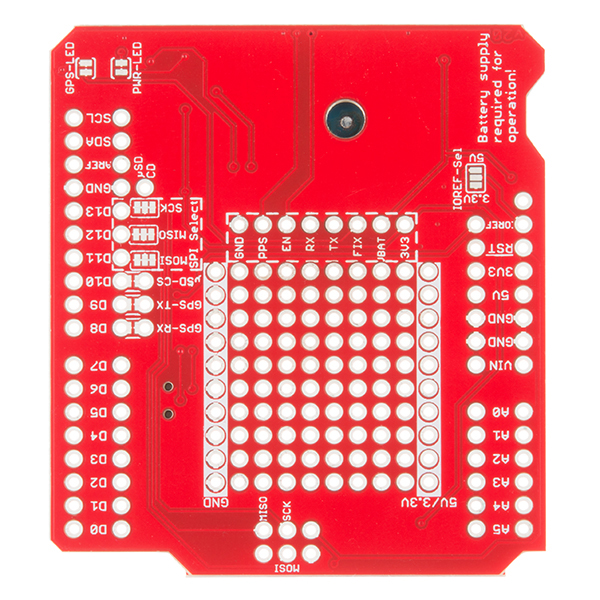
- GPS Module Pins Broken Out
- Arduino reset button
- UART switch controls serial communications
- Schematic
- Eagle Files
- Hookup Guide
- Datasheet (GP3906)
- GitHub
/******************************************************************************
TinyGPSPlus_GPS_Shield.ino
TinyGPS++ Library Example for the SparkFun GPS Logger Shield
By Jim Lindblom @ SparkFun Electronics
February 9, 2016
https://github.com/sparkfun/GPS_Shield

This example uses SoftwareSerial to communicate with the GPS module on
pins 8 and 9. It uses the TinyGPS++ library to parse the NMEA strings sent
by the GPS module, and prints interesting GPS information to the serial
monitor.

After uploading the code, open your serial monitor, set it to 9600 baud, and
watch for latitude, longitude, altitude, course, speed, date, time, and the
number of visible satellites.

Resources:
TinyGPS++ Library - https://github.com/mikalhart/TinyGPSPlus/releases
SoftwareSerial Library

Development/hardware environment specifics:
Arduino IDE 1.6.7
GPS Logger Shield v2.0 - Make sure the UART switch is set to SW-UART
Arduino Uno, RedBoard, Pro, Mega, etc.
******************************************************************************/

#include <TinyGPS++.h> // Include the TinyGPS++ library
TinyGPSPlus tinyGPS; // Create a TinyGPSPlus object

#define GPS_BAUD 9600 // GPS module baud rate. GP3906 defaults to 9600.

// If you're using an Arduino Uno, Mega, RedBoard, or any board that uses the
// 0/1 UART for programming/Serial monitor-ing, use SoftwareSerial:
#include <SoftwareSerial.h>
#define ARDUINO_GPS_RX 9 // GPS TX, Arduino RX pin
#define ARDUINO_GPS_TX 8 // GPS RX, Arduino TX pin
SoftwareSerial ssGPS(ARDUINO_GPS_TX, ARDUINO_GPS_RX); // Create a SoftwareSerial

// Set gpsPort to either ssGPS if using SoftwareSerial or Serial1 if using an
// Arduino with a dedicated hardware serial port
#define gpsPort ssGPS // Alternatively, use Serial1 on the Leonardo

// Define the serial monitor port. On the Uno, Mega, and Leonardo this is 'Serial'
// on other boards this may be 'SerialUSB'
#define SerialMonitor Serial

void setup()
{
SerialMonitor.begin(9600);
gpsPort.begin(GPS_BAUD);
}

void loop()
{
// print position, altitude, speed, time/date, and satellites:
printGPSInfo();

// "Smart delay" looks for GPS data while the Arduino's not doing anything else
smartDelay(1000);
}

void printGPSInfo()
{
// Print latitude, longitude, altitude in feet, course, speed, date, time,
// and the number of visible satellites.
SerialMonitor.print("Lat: "); SerialMonitor.println(tinyGPS.location.lat(), 6);
SerialMonitor.print("Long: "); SerialMonitor.println(tinyGPS.location.lng(), 6);
SerialMonitor.print("Alt: "); SerialMonitor.println(tinyGPS.altitude.feet());
SerialMonitor.print("Course: "); SerialMonitor.println(tinyGPS.course.deg());
SerialMonitor.print("Speed: "); SerialMonitor.println(tinyGPS.speed.mph());
SerialMonitor.print("Date: "); printDate();
SerialMonitor.print("Time: "); printTime();
SerialMonitor.print("Sats: "); SerialMonitor.println(tinyGPS.satellites.value());
SerialMonitor.println();
}

// This custom version of delay() ensures that the tinyGPS object
// is being "fed". From the TinyGPS++ examples.
static void smartDelay(unsigned long ms)
{
unsigned long start = millis();
do
{
// If data has come in from the GPS module
while (gpsPort.available())
tinyGPS.encode(gpsPort.read()); // Send it to the encode function
// tinyGPS.encode(char) continues to "load" the tinGPS object with new
// data coming in from the GPS module. As full NMEA strings begin to come in
// the tinyGPS library will be able to start parsing them for pertinent info
} while (millis() - start < ms);
}

// printDate() formats the date into dd/mm/yy.
void printDate()
{
SerialMonitor.print(tinyGPS.date.day());
SerialMonitor.print("/");
SerialMonitor.print(tinyGPS.date.month());
SerialMonitor.print("/");
SerialMonitor.println(tinyGPS.date.year());
}

// printTime() formats the time into "hh:mm:ss", and prints leading 0's
// where they're called for.
void printTime()
{
SerialMonitor.print(tinyGPS.time.hour());
SerialMonitor.print(":");
if (tinyGPS.time.minute() < 10) SerialMonitor.print('0');
SerialMonitor.print(tinyGPS.time.minute());
SerialMonitor.print(":");
if (tinyGPS.time.second() < 10) SerialMonitor.print('0');
SerialMonitor.println(tinyGPS.time.second());
}
วิธีการชำระเงิน
ชำระเงินค่าสินค้าโดยการโอนเงินเข้าบัญชีธนาคาร KBANK, SCB, BBL,TMB
กรุณาเก็บหลักฐานการโอนเงินของท่านไว้เพื่อแจ้งการชำระเงินด้วยค่ะ
ท่านสามารถแจ้งการชำระเงินผ่านระบบอัตโนมัติได้โดย Click Link ข้างล่างค่ะ
https://www.arduitronics.com/informpayment
ชำระเงินผ่านธนาคาร


@rfm0967y
ติดต่อสอบถาม
Join เป็นสมาชิกร้านค้า
ร้านArduitronics
/www.arduitronics.com/
สมัครสมาชิกร้านนี้ เพื่อรับสิทธิพิเศษ
MEMBER
สินค้าในตะกร้า ({{total_num}} รายการ)

ขออภัย ขณะนี้ยังไม่มีสินค้าในตะกร้า
ราคาสินค้าทั้งหมด
฿ {{price_format(total_price)}}
- ฿ {{price_format(discount.price)}}
ราคาสินค้าทั้งหมด
{{total_quantity}} ชิ้น
฿ {{price_format(after_product_price)}}
ราคาไม่รวมค่าจัดส่ง
➜ เลือกซื้อสินค้าเพิ่ม