
Weather Station Kit with Anemometer/Wind Vane/Rain Bucket (ของแท้จาก DFRobot)

| รหัสสินค้า | AS50228 |
| หมวดหมู่ | วัดสภาพแวดล้อมและแก๊ส Environmental / Gas |
| ราคา | 7,785.00 บาท |

รายละเอียดสินค้า
ดูวิธีประกอบได้จาก คลิปด้านล่าง
ตัวอย่างโปรเจคน่าสนใจ Click
Description:
Together with other components, this IoT weather station kit can be widely used in measuring wind/rain in engineering, railways, docks, power plants, meteorological, cableway, environment study, agriculture, energy monitoring, health study with corresponding signal output.
Also, it is compatible with Arduino devices.

Version Update (2016/3/28): Upgrade the Temperature and Humidity sensor, the range and accuracy will be improved.
Project 1: Make Your Own Arduino Weather Station
This durable Arduino weather station kit includes an anemometer, wind vane, rain bucket and DH11 temperature and humidity sensor. It can transmit data via serial or RF interfaces.
Hardware List:
LCD12864 Shield for Arduino
Weather Station Kit with Solar Panel
Weather Station Kit with Anemometer/Wind Vane/Rain Bucket
Bluno M3 - A STM32 ARM with Bluetooth 4.0 (Arduino Compatible)
APPLICATIONS
- Weather Station
- Weather Monitoring
SPECIFICATION
- Operating voltage: 5V
- Temperature range: -40~80℃
- Humidity range: 0~99%
- Package Dimension: 20*18*30 CM (7.87*7.09*11.81")
- Weight: 4480g
DOCUMENTS
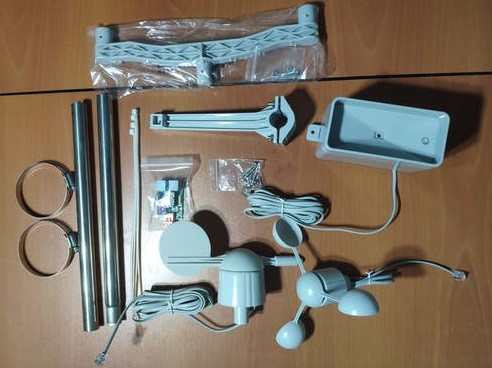
SHIPPING LIST
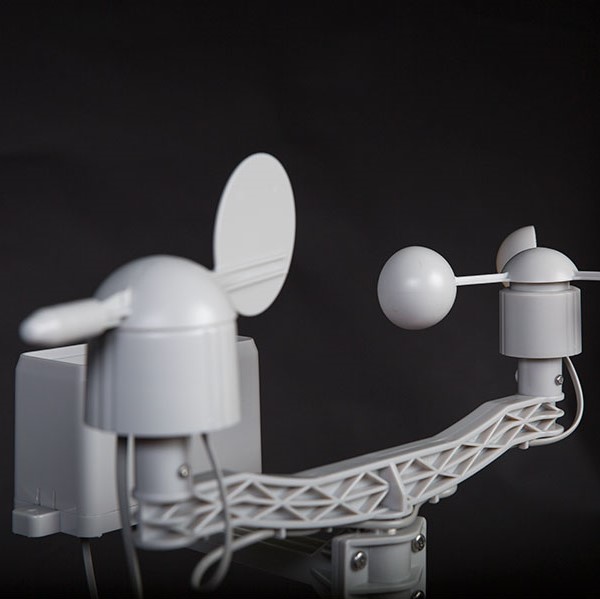
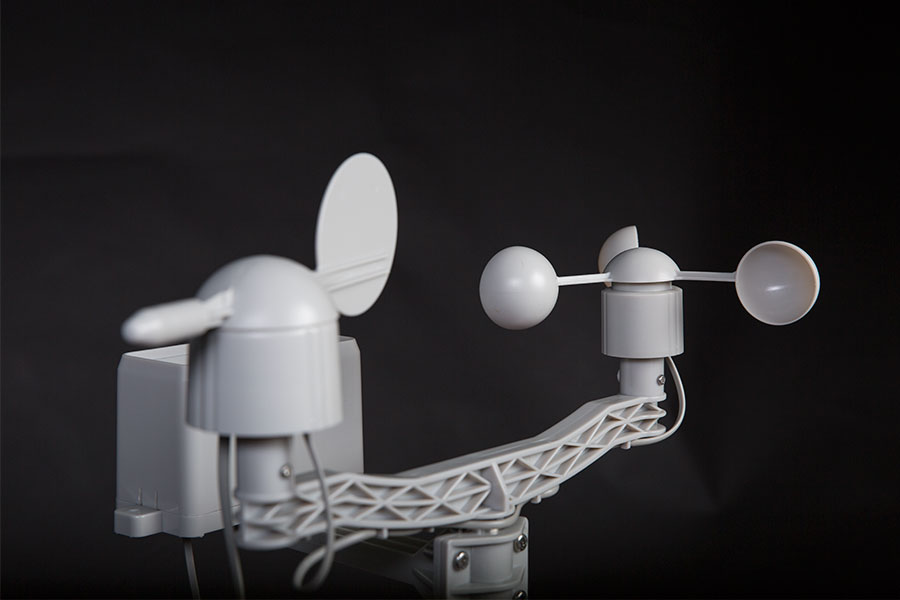
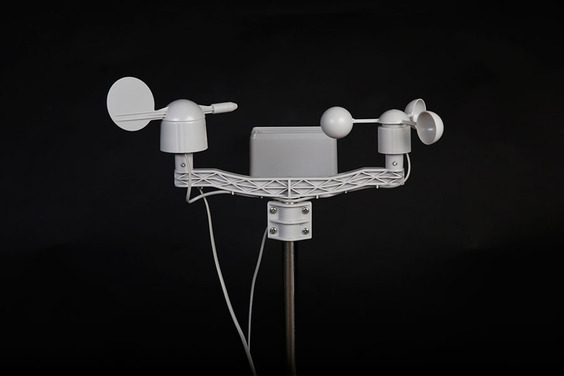
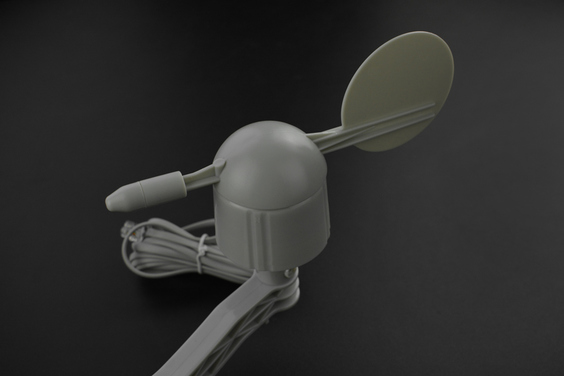
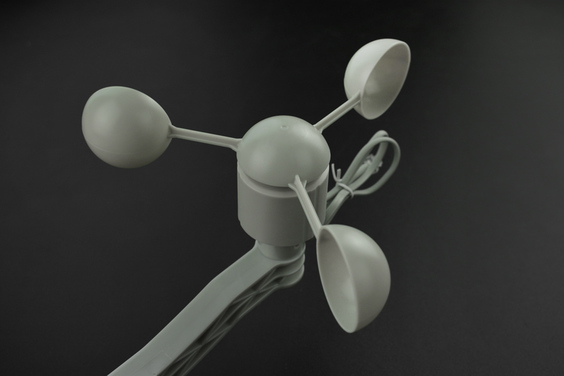
- Anemometer x1
- Wind vane x1
- Rain bucket x1
- Sensor Board x1
- Stainless steel studdle (30cm) (11.81") x1
- component package x1
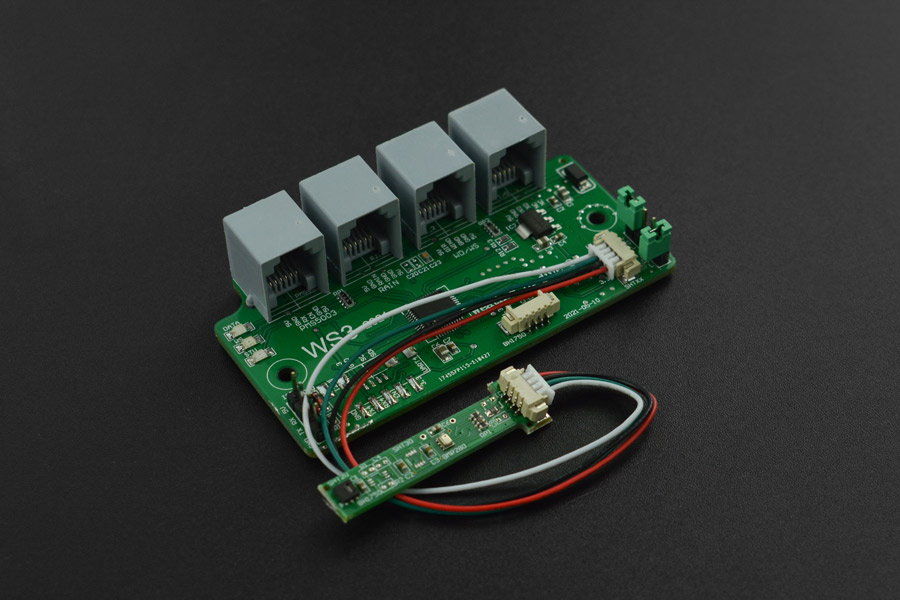
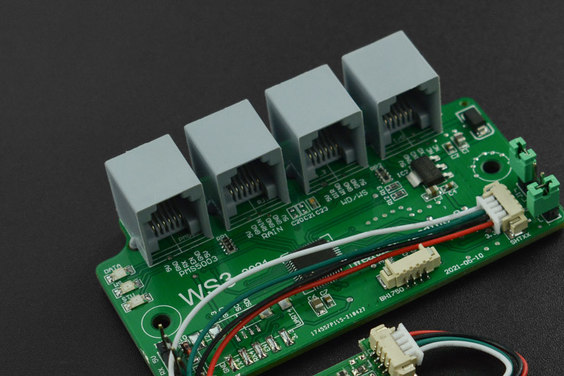
Board Overview

| No. | Description |
|---|---|
| B | Rainfall |
| C | Wind speed and direction |
| D | Data output |
| E | Indicator light |
| I | I2C temperature, humidity and air pressure port |
| J1 | Metric & Imperialb Jumpers |
| J2 | Data interface 2400/9600 baud rate Jumpers |
Data Output Format
c000s000g000t082r000p000h48b10022*3COutput 37 bytes per second, including CR/LF at the end of the data.
Data Analysis:
- c000: Wind direction angle, unit: degree.
- s000: wind speed in 1 minute, unit: miles per hour
- g000: the highest wind speed in 5 minutes, unit: miles per hour
- t086: Temperature (Fahrenheit)
- r000: Rainfall in 1 hour (0.01 inches)
- p000: Rainfall in 24 hours (0.01 inches)
- h53: Humidity (00% = 99%)
- b10020: Air pressure (0.1 hpa)
Note: The board will make a hardware self-check before it works, it will output “...” when it doesn’t detect the related devices. For example, If the temperature & humidity sensor and barometer are not installed or broken, it will output: '''c000s000g000t...r000p000h..b..... '''
Indicator Light
- DAT flashes synchronously when sending data
- TX flashes synchronously when sampling wind speed
- RX flashes synchronously when rain sensor is working
Tutorial
Requirements
-
Hardware
- DFRduino UNO R3 (or similar) x 1
- APRS Weather Station Kit x 1
- M-M/F-M/F-F Jumper wires
-
Software
Connection Diagram

Please unplug the cable on the TX&RX interface, or it will interfere with the sketch uploading.
Sample Code
Expected Results
Note: Due to the fact that there is no wind in the test environment, all parameters related to wind speed and wind direction are 0.

FAQ
Q1. About the module assembly: I only found there are only two installation blocks for the different modules on the Converter Board, but there are three modules: Anemometer, Wind vane and Rain bucket to be installed on the Converter Board. How come?
A: There are two ports under the anemometer, you need to connect the anemometer to the wind direction and then connect to the adapter board, as shown in the figure:

วิธีการชำระเงิน
ชำระเงินค่าสินค้าโดยการโอนเงินเข้าบัญชีธนาคาร KBANK, SCB, BBL,TMB
กรุณาเก็บหลักฐานการโอนเงินของท่านไว้เพื่อแจ้งการชำระเงินด้วยค่ะ
ท่านสามารถแจ้งการชำระเงินผ่านระบบอัตโนมัติได้โดย Click Link ข้างล่างค่ะ
https://www.arduitronics.com/informpayment
ชำระเงินผ่านธนาคาร


@rfm0967y
ติดต่อสอบถาม
Join เป็นสมาชิกร้านค้า
MEMBER
