
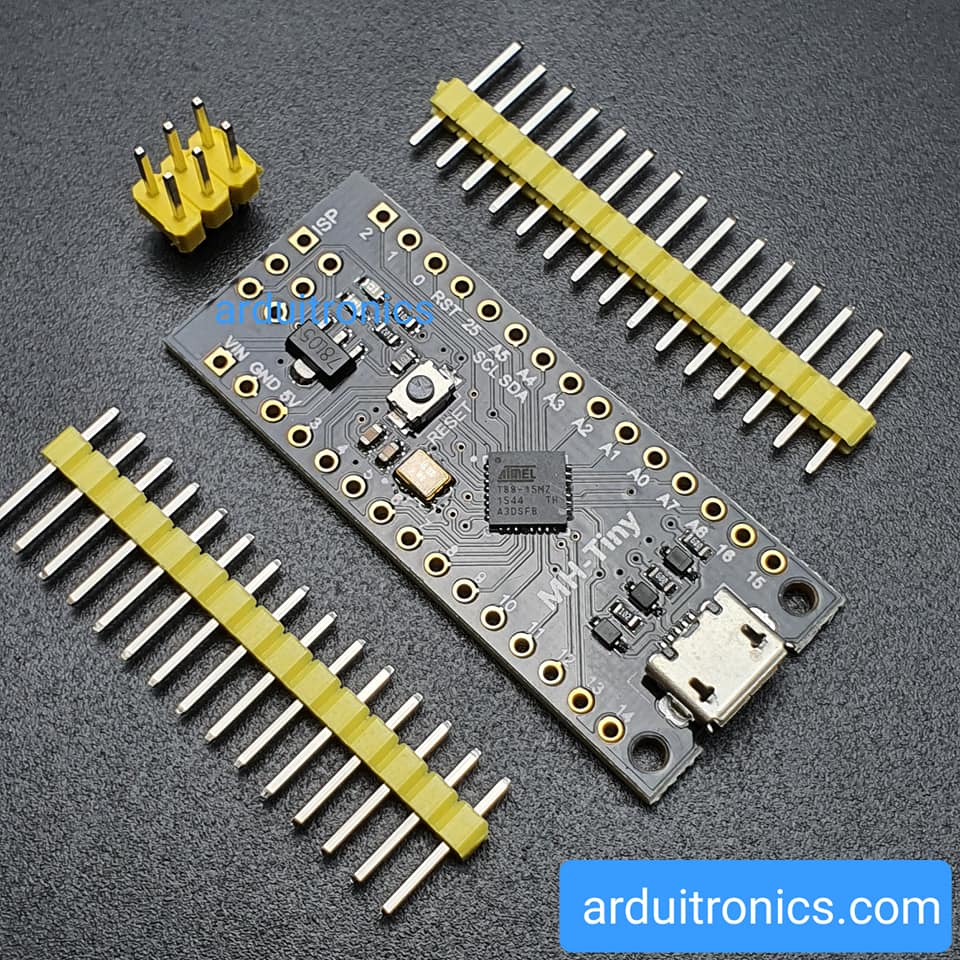
Arduino บอร์ด Arduino ATTINY88 (HM-Tiny) Development Board Compatible with NANO V3.0 Improvement Board

| รหัสสินค้า | BA60030 |
| หมวดหมู่ | Arduino Compatible Board |
| ราคา | 120.00 บาท |
| สถานะสินค้า | พร้อมส่ง |
| จำนวน | 1 |
หยิบลงตะกร้า

รายละเอียดสินค้า
การเพิ่มบอร์ด Arduino ลงใน Arduino IDE และอัพโหลดโคด Arduino
1. เพิ่มลิงค์บอร์ดใน Preferences :
https://raw.githubusercontent.com/MHEtLive/arduino-boards-index/master/package_mhetlive_index.json

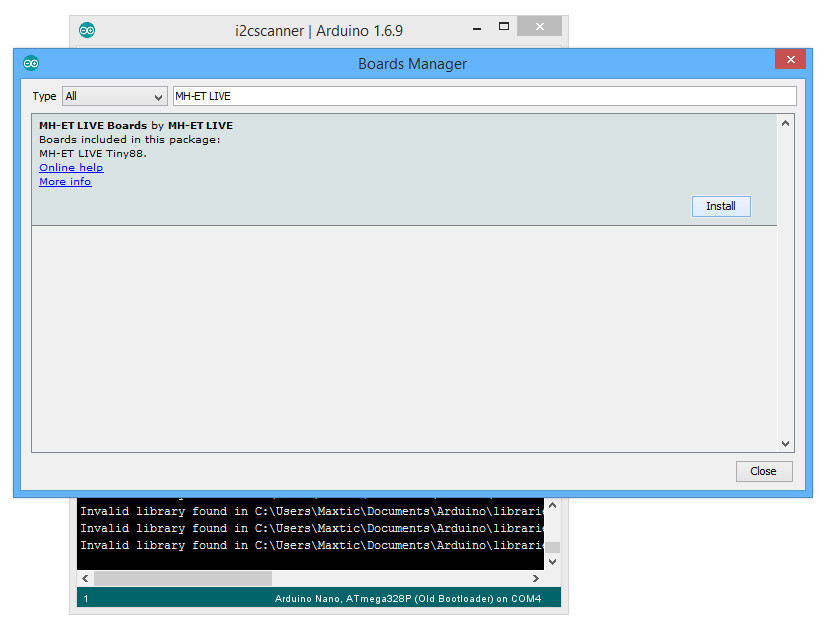
2. เพิ่มบอร์ด MH-ET LIVE Tiny88 ในเมนู board manager
3. เลือกบอร์ดเป็น ME-ET

4. การอัพโหลด ให้ถอดบอร์ดออกก่อน แล้วกดปุ่ม upload รอจนหน้าจอแจ้ง ให้เสียบบอร์ดเข้าไป ก็เรียบร้อย

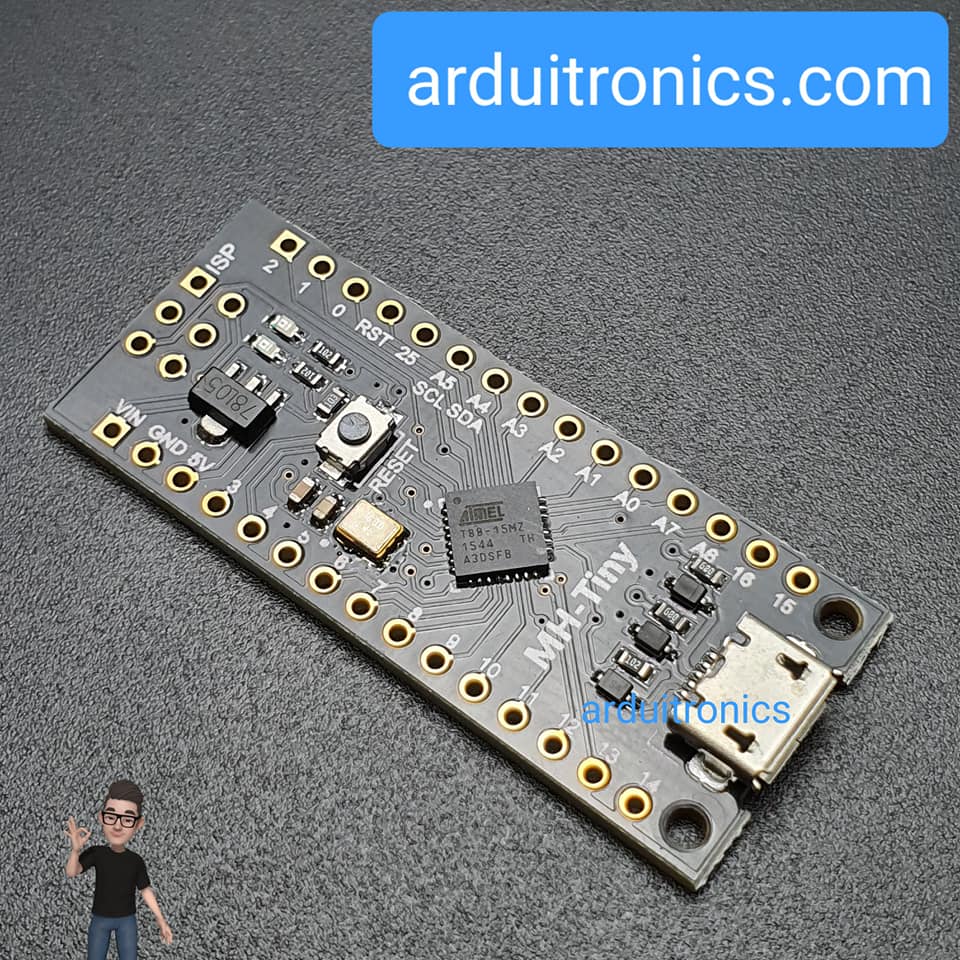
The MH-ET LIVE Tiny88 (16.0Mhz) microcontroller development board is similar to the Arduino series development board, but it is more cost-effective, smaller and more powerful. Thanks to the familiar Arduino IDE, MH-ET LIVE Tiny88 is a development board that can quickly get started with electronic DIY, which is a good alternative to other oversized and overly complex development boards.
MH-ET LIVE Tiny88 is manufactured in addition to the pin headers that need to be soldered by the user. The other components are fully assembled and the welding is convenient and simple.
Specifications
- Support for Arduino IDE 1.0+ (OSX / Win / Linux)
- 5v or 7-24v via USB or external power supply (12v or lower recommended, automatic selection)
- Onboard 500ma 5V regulator
- Built-in USB
- 26 I/O pins (only when your program communicates actively via USB, 2 for USB, otherwise
- You can also use all 26 after programming via USB)
- 8k flash (approximately 6k after bootloader)
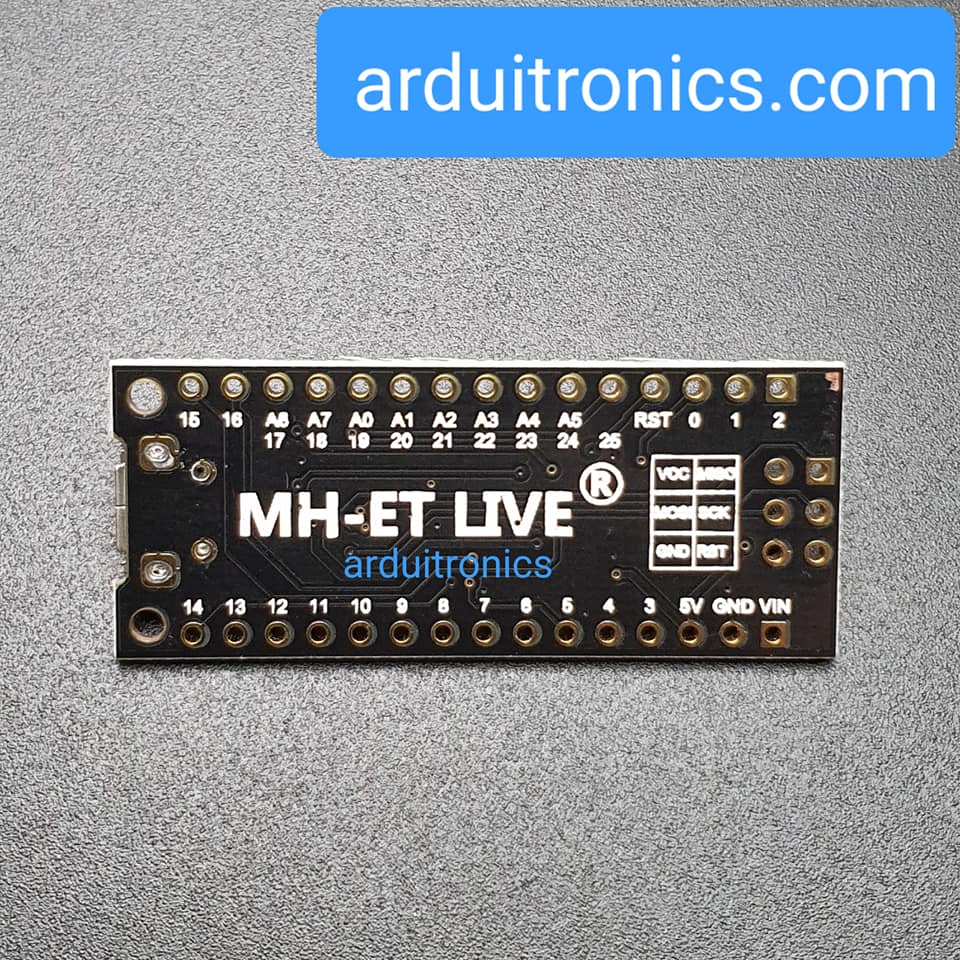
- Onboard I2C and SPI interface
- With 26 PWM pins (software PWM, hardware PWM only two (D9, D10))
- with 8 ADC pins
- Power LED and test / status LED
- size: 44.5x18.3x3mm
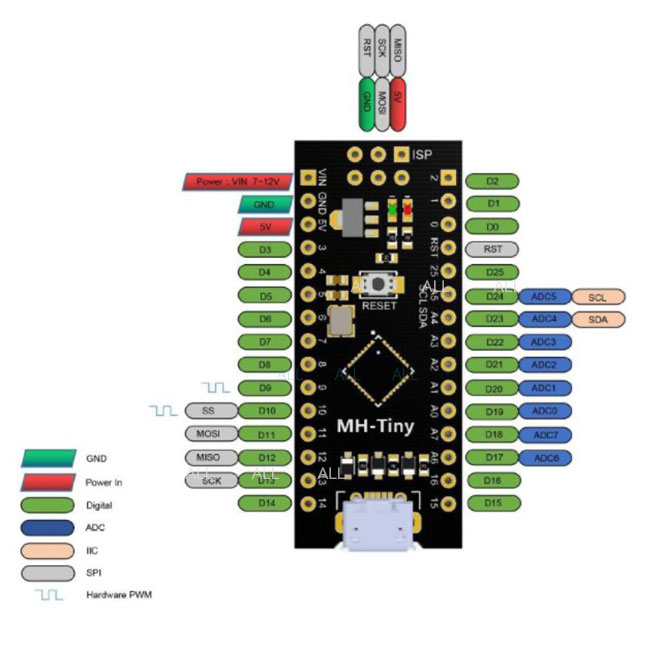
Pin diagram
ARD-based development board installation test steps
1. Download the installation package: "Addition Board Manager URL" in "File", "Preferences" in Arduino IDE
In the box, type:
https://raw.githubusercontent.com/MHEtLive/arduino-boards-index/master/package_ mhetlive_index.json
2. Go to the "Tools" menu and select "board" sub-menu - select the "management board" and then from the class select "contribution" type pull-down menu: select "MH-ET LIVE Boards board" package, and then click "install" button
3. The USB driver can also be downloaded in the supporting file. The connection is as follows:
https://github.com/MHEtLive/MHEtLiveArduino/releases/download/1.0.0/2.0a4.rar
4. When downloading the program, do not connect the module first, wait for the prompt to insert the module after compiling, then plug it in and wait for the automatic download to complete
5. You can choose the example that comes with the Arduino IDE: Select the development board as MH-ET LIVE Tiny88 in the toolbar, open the program in File >> Example >> Basic>>Blink, and change the port 13 in the program to 0. Port, compile and download into the tiny88 development board as described above, showing that the onboard LED lights flash at the frequency specified by the program .ข้อมูลเพิ่มเติม
วิธีการชำระเงิน
ชำระเงินค่าสินค้าโดยการโอนเงินเข้าบัญชีธนาคาร KBANK, SCB, BBL,TMB
กรุณาเก็บหลักฐานการโอนเงินของท่านไว้เพื่อแจ้งการชำระเงินด้วยค่ะ
ท่านสามารถแจ้งการชำระเงินผ่านระบบอัตโนมัติได้โดย Click Link ข้างล่างค่ะ
https://www.arduitronics.com/informpayment
ชำระเงินผ่านธนาคาร


@rfm0967y
ติดต่อสอบถาม
Join เป็นสมาชิกร้านค้า
ร้านArduitronics
/www.arduitronics.com/
สมัครสมาชิกร้านนี้ เพื่อรับสิทธิพิเศษ
MEMBER
สินค้าในตะกร้า ({{total_num}} รายการ)

ขออภัย ขณะนี้ยังไม่มีสินค้าในตะกร้า
ราคาสินค้าทั้งหมด
฿ {{price_format(total_price)}}
- ฿ {{price_format(discount.price)}}
ราคาสินค้าทั้งหมด
{{total_quantity}} ชิ้น
฿ {{price_format(after_product_price)}}
ราคาไม่รวมค่าจัดส่ง
➜ เลือกซื้อสินค้าเพิ่ม