
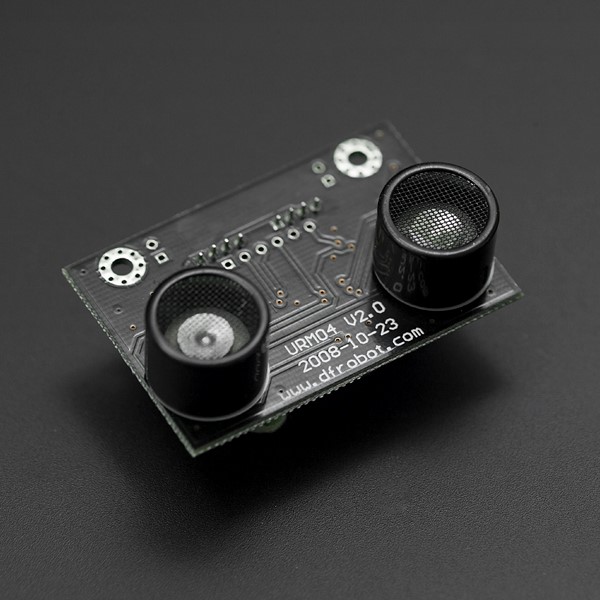
URM04 Ultrasonic Distance Sensor (4~500cm, RS485) (ของแท้จาก DFRobot)


| รหัสสินค้า | AS10369 |
| หมวดหมู่ | LIDAR / เซ็นเซอร์วัดระยะทาง / ความเร็ว Distance / Speed |
| ราคา | 1,285.00 บาท |
| สถานะสินค้า | พร้อมส่ง |
| จำนวน | ชิ้น |

รายละเอียดสินค้า
ดาวน์โหลด arduino code ได้ที่ Click
เซ็นเซอร์อัลตราโซนิก URM04 ได้รับการพัฒนาบนพื้นฐานของ URM37 โดยใน URM04 ได้ใช้อินเทอร์เฟซแบบ RS485 ซึ่งทำให้สามารถใช้เซ็นเซอร์หลายตัวพร้อมกันได้ อินเทอร์เฟซ RS485 ช่วยให้สามารถเชื่อมต่อ URM04 ได้สูงสุดถึง 32 ตัวในเครือข่ายเดียว
INTRODUCTION
SPECIFICATION
- Operating Voltage: +5V
- Current: <20mA
- Operating Temperature: -10℃~+70℃
- Detecting range: 4cm-500cm (1.6in-197in)
- Resolution: 1cm (0.4in)
- Frequency: 40KHz
- Interface: RS485
- Units: Range reported in cm
- Temperature sensor: 12 bits reading from serial port
- Default Device Address: 0x11
- Default Device baudrate: 19200
- Size: 34x51 mm (1.3x2 in)
- Weight: 30g
DOCUMENTS
- URM User manual
- WIKI (URM04 Ultrasonic Sensor (RS485))
- Test Software
- Test software source code
- Arduino Sample code
- Sample from rxcoder
SHIPPING LIST
- URM04 v2.0 Ultrasonic Sensor x 1
- Wire with 4p JST connector x 1
Sensor Connection Diagram
As the sensor uses RS485 interface which can not be connected directly to the MCU, a MAX485 chip will bridge the TTL interface to RS485, as shown in Figure 4.
For PC users, either a USB-RS485 or RS232-RS485 converter will bridge the gap. A diagram is depicted in Figure 5 and 6.


Sensor Networking
Upto 32 URM04 sensors are able to join a network. Simply serially connect the sensors uses twisted pair cables. A diagram is illustrated in Figure 7.

Arduino sketch for driving one URM04 sensor
The sketch code:
The library code: please place the library file Urm4parser.h in to the sketch folder.
วิธีการชำระเงิน
ชำระเงินค่าสินค้าโดยการโอนเงินเข้าบัญชีธนาคาร KBANK, SCB, BBL,TMB
กรุณาเก็บหลักฐานการโอนเงินของท่านไว้เพื่อแจ้งการชำระเงินด้วยค่ะ
ท่านสามารถแจ้งการชำระเงินผ่านระบบอัตโนมัติได้โดย Click Link ข้างล่างค่ะ
https://www.arduitronics.com/informpayment
ชำระเงินผ่านธนาคาร


@rfm0967y
ติดต่อสอบถาม
Join เป็นสมาชิกร้านค้า
MEMBER
